Inside ASUS X556/K556 – disassembly, internal photos and upgrade options
The ASUS X556 successor to the X555 offers mostly the same upgrade options and it’s just as easy to disassemble. However, there’s a little detail that’s important not to miss when tearing down the X556. Here’s what you should do…
You can find the notebook’s price and configurations here: http://amzn.to/2aaVXQM
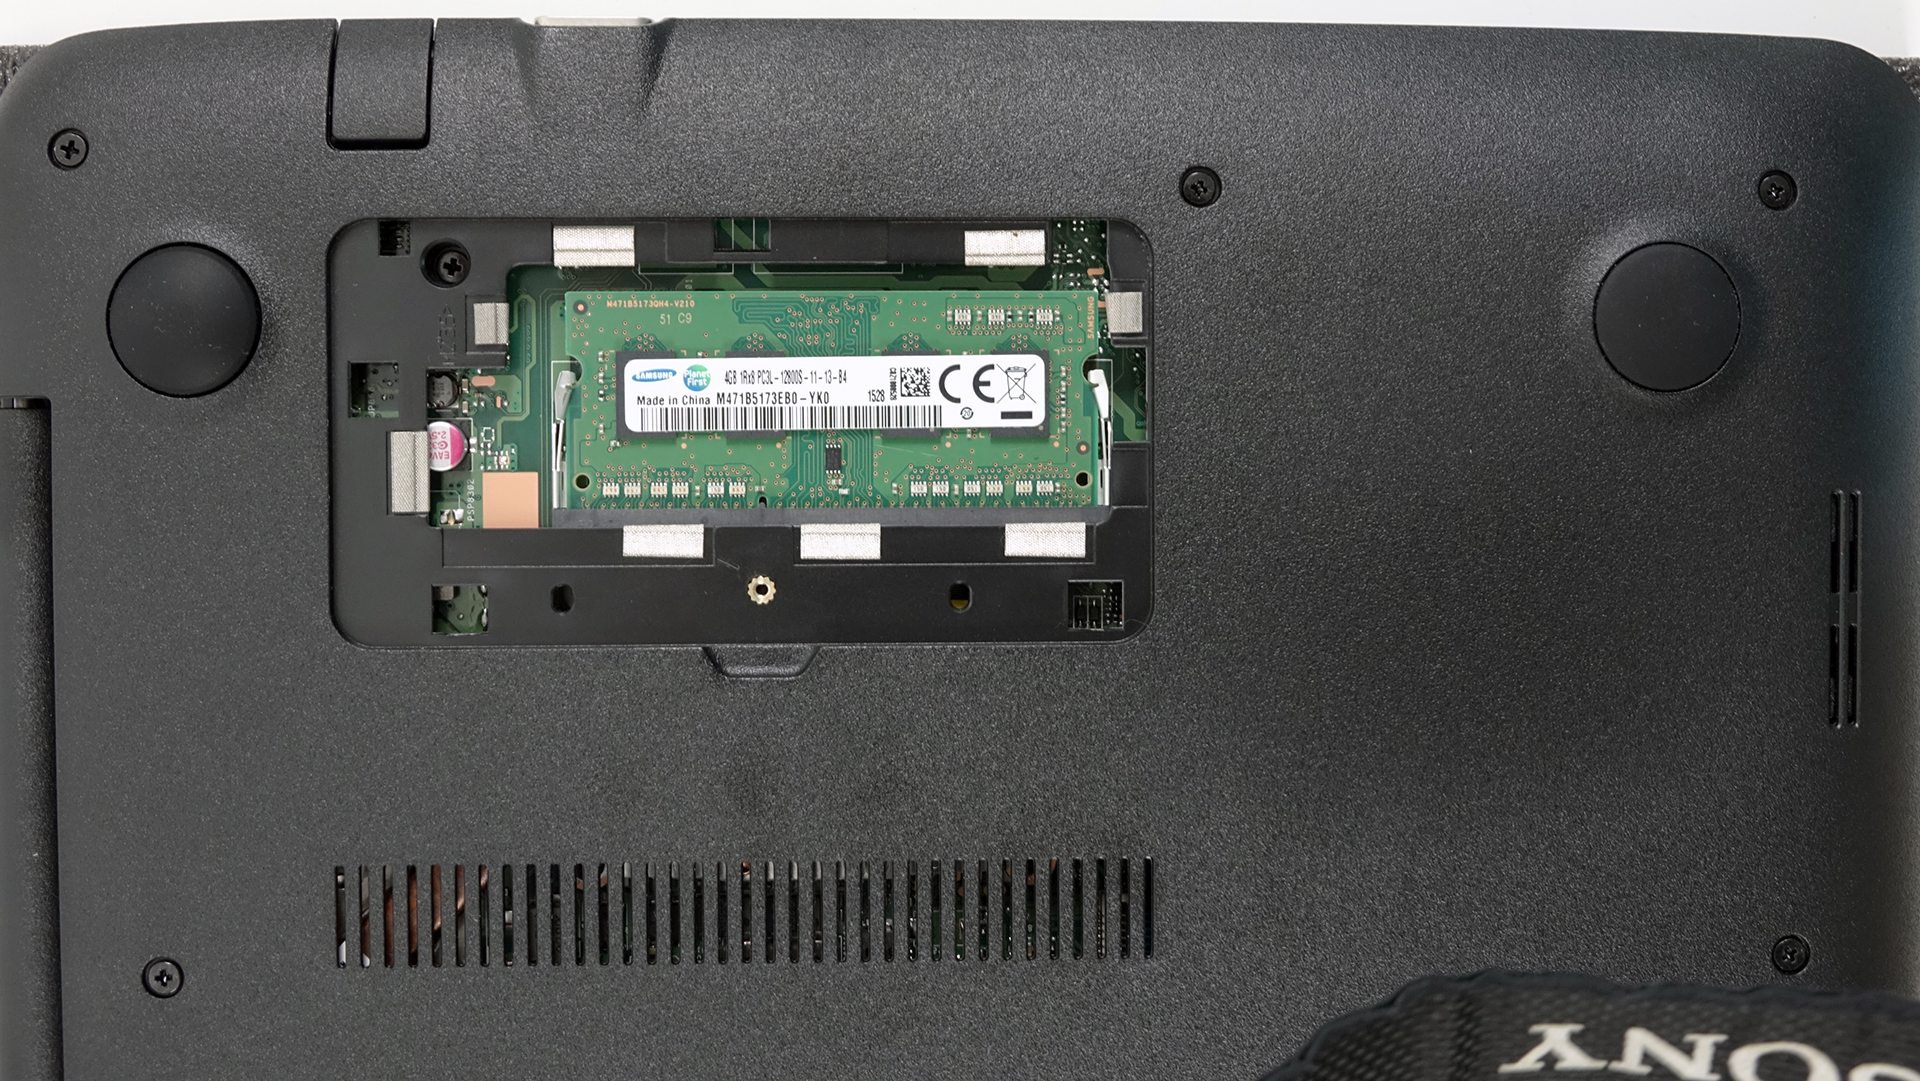
1. Removing the service lid
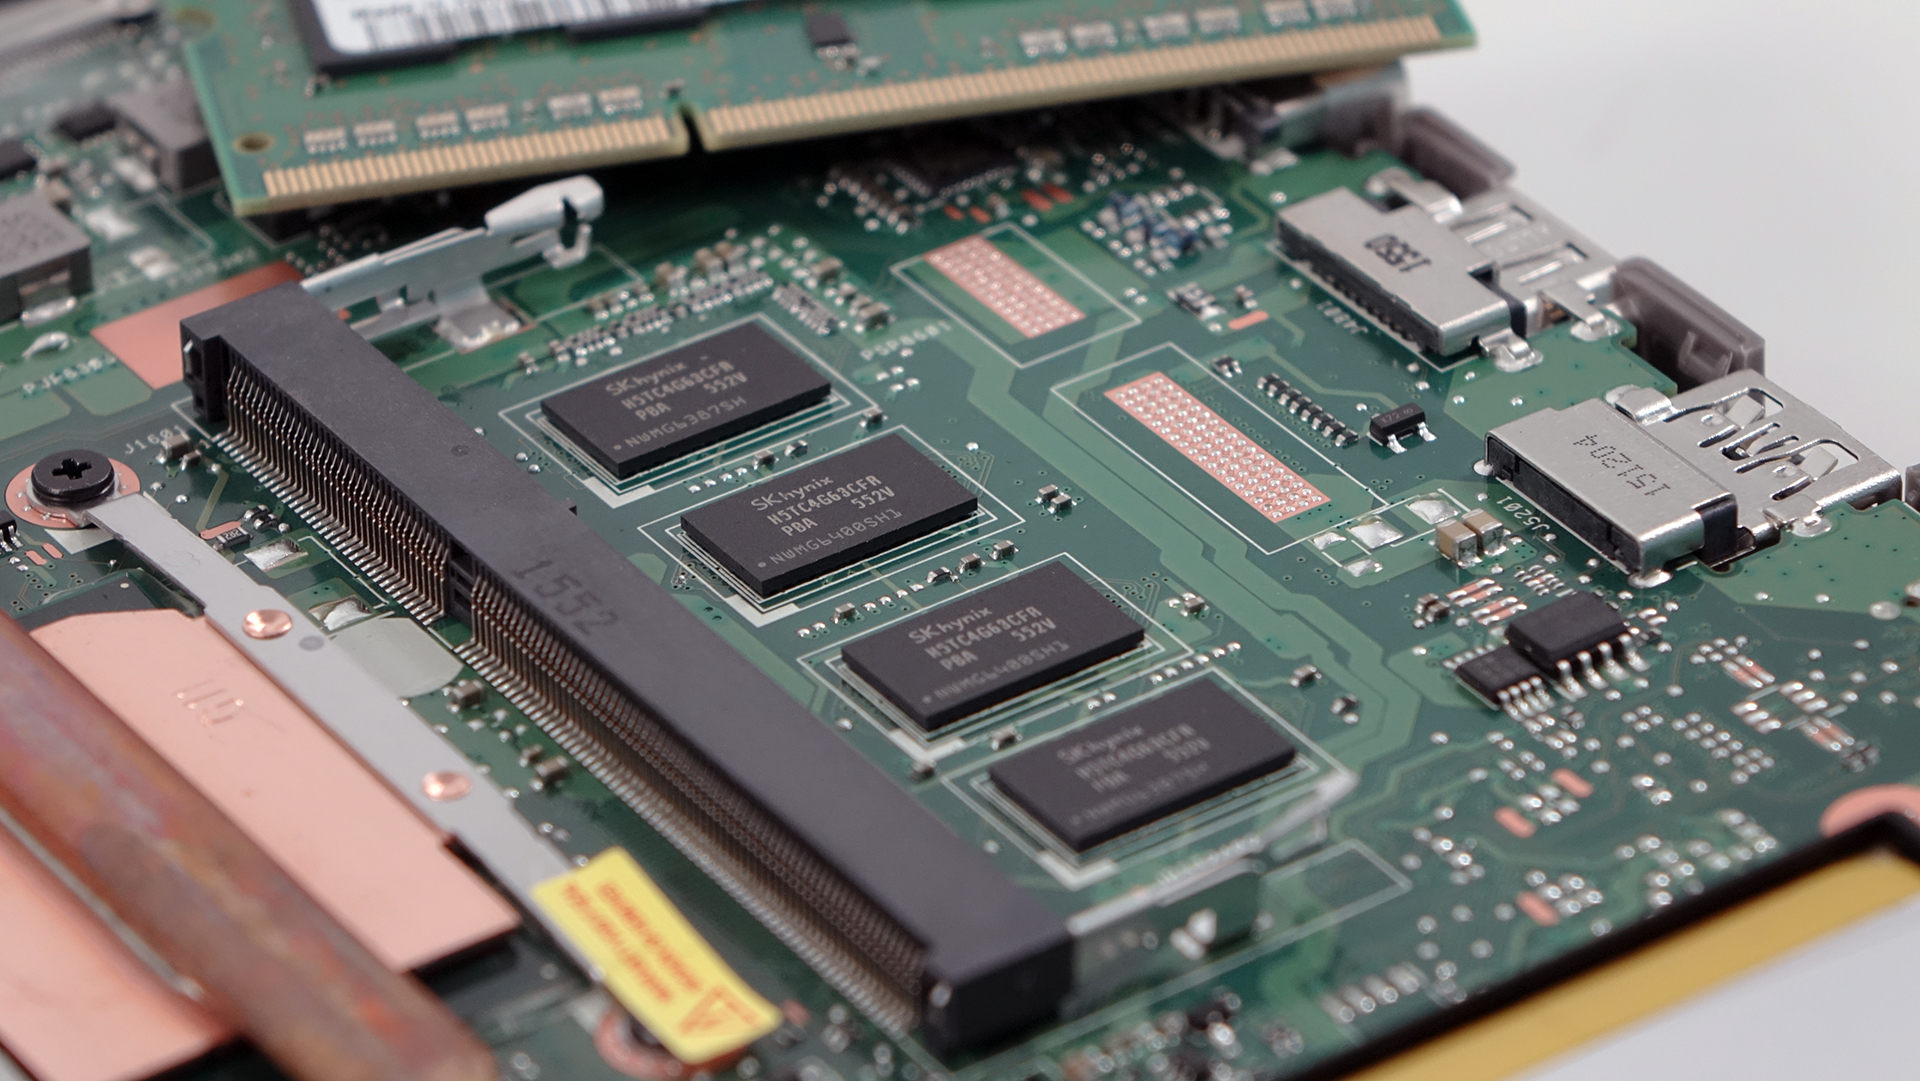
First off, you have to remove the small service lid that hides away the RAM chips or should we say the “RAM stick”. The motherboard supports only one RAM chip slot while the other 4GB of RAM are integrated into the motherboard. Once removed, make sure you’ve unscrewed the only bolt beneath the hatch.
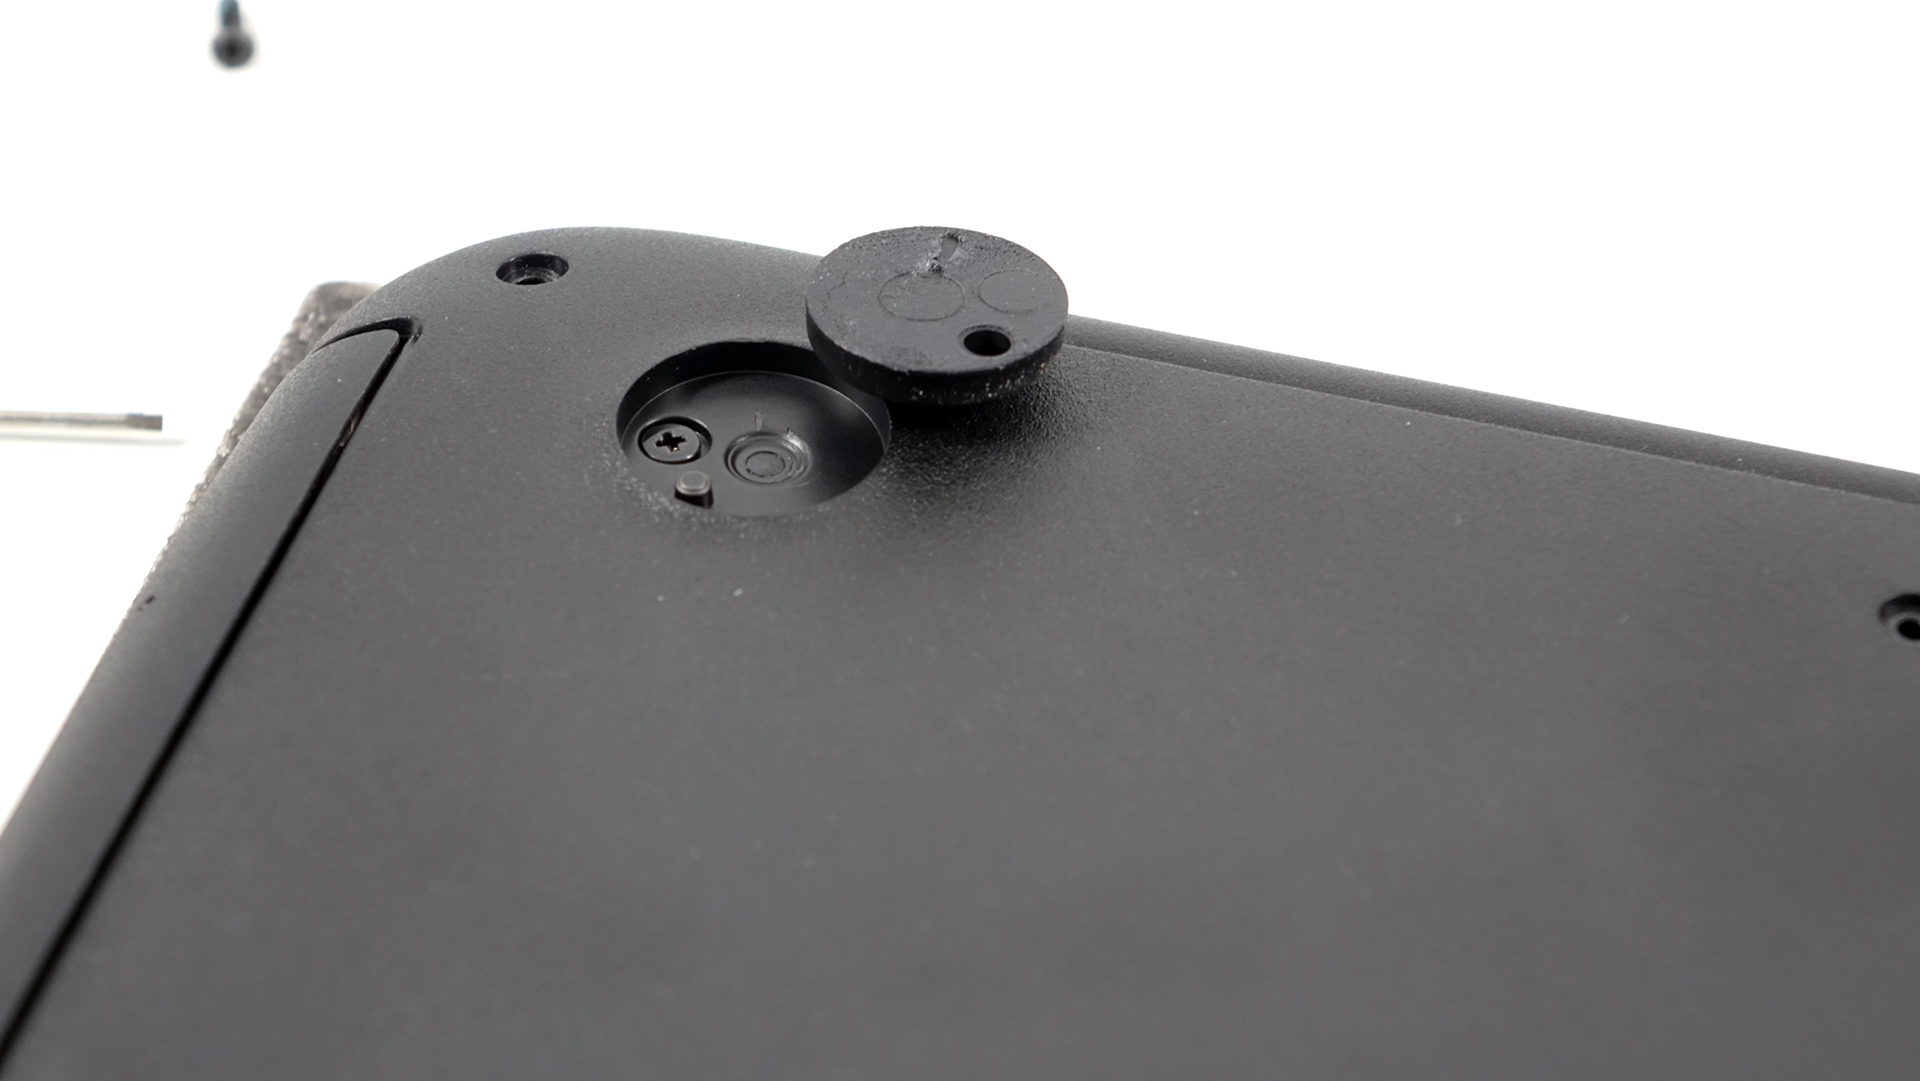
2. Removing the bottom piece
Once the service hatch is out of the way, continue unscrewing the rest of the screws around the chassis. Also, there’s one screw hiding under the upper-left silicone leg as shown in the photo below. We are quite frankly baffled why ASUS has put a screw under only one of the silicone feet. It took some time to see that.
Anyway, after you got rid of all the screws, try prying up the bottom using a thin plastic tool.
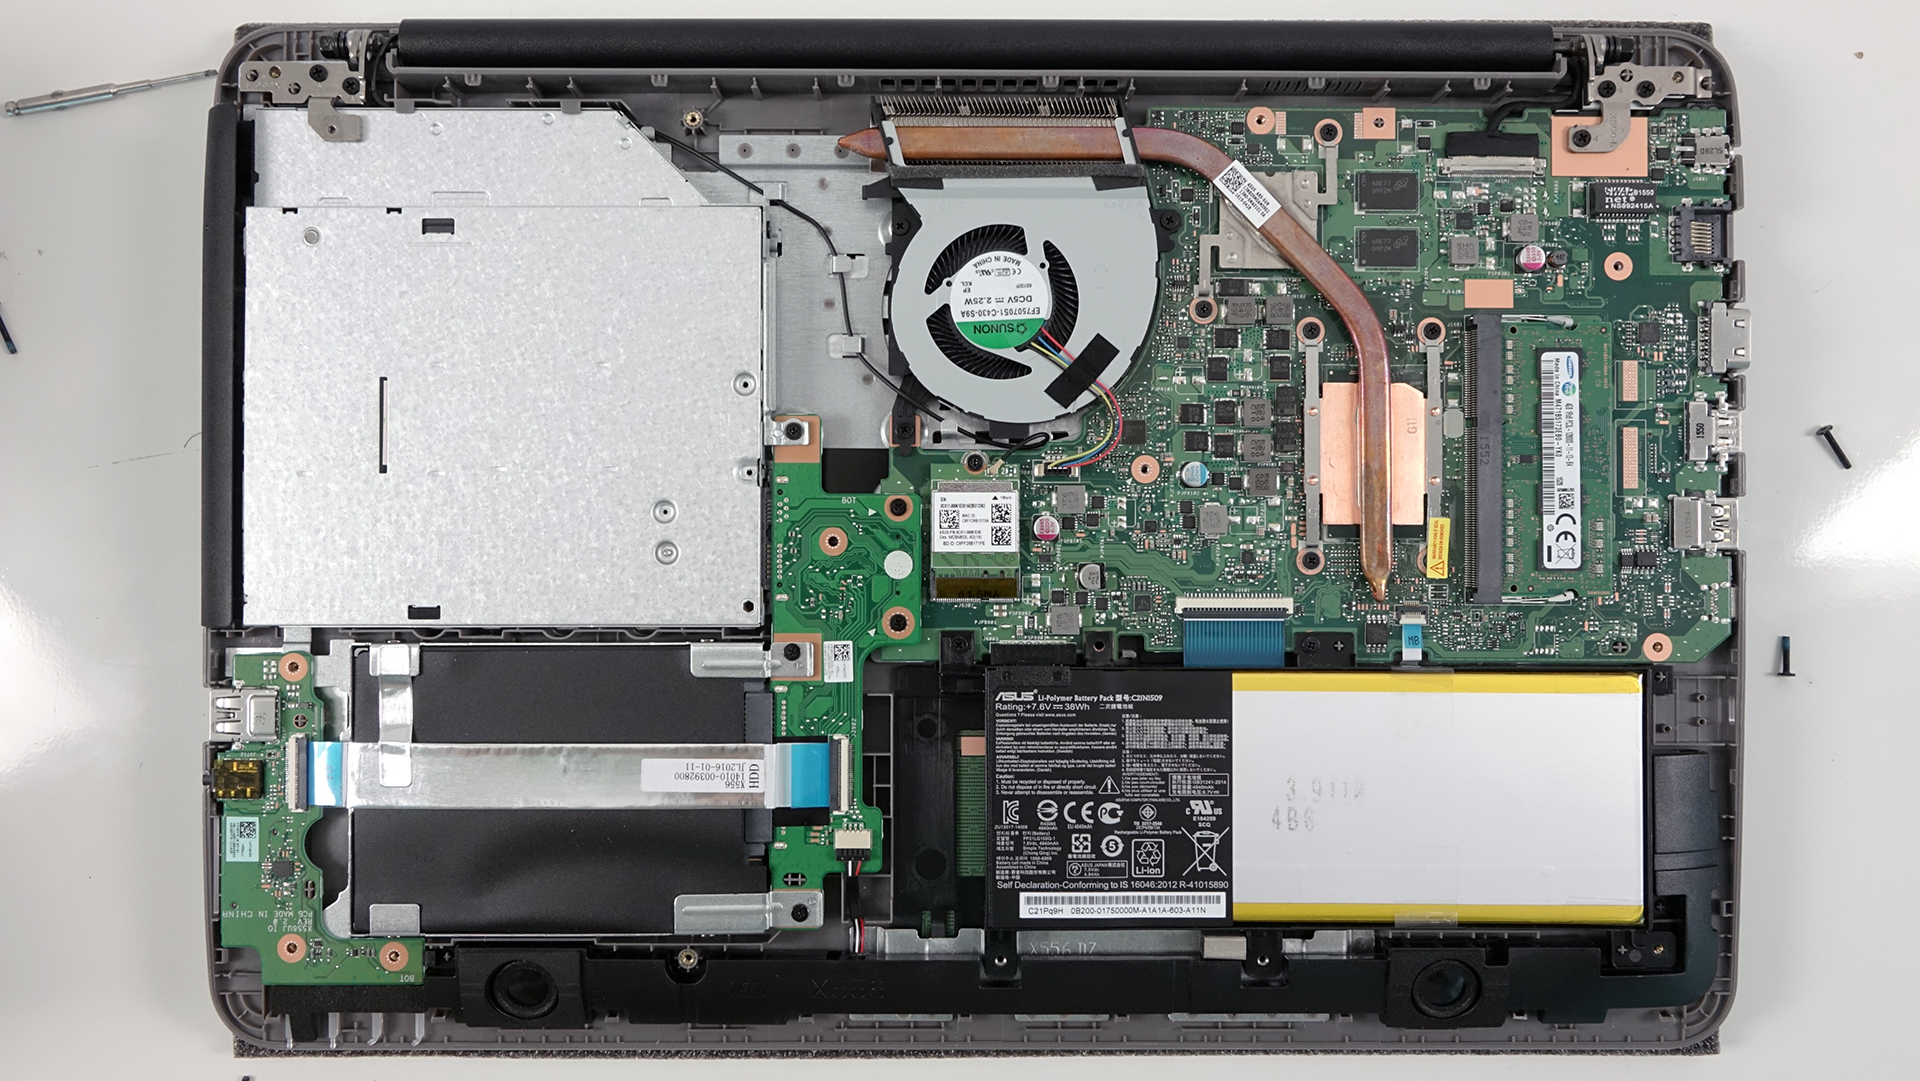

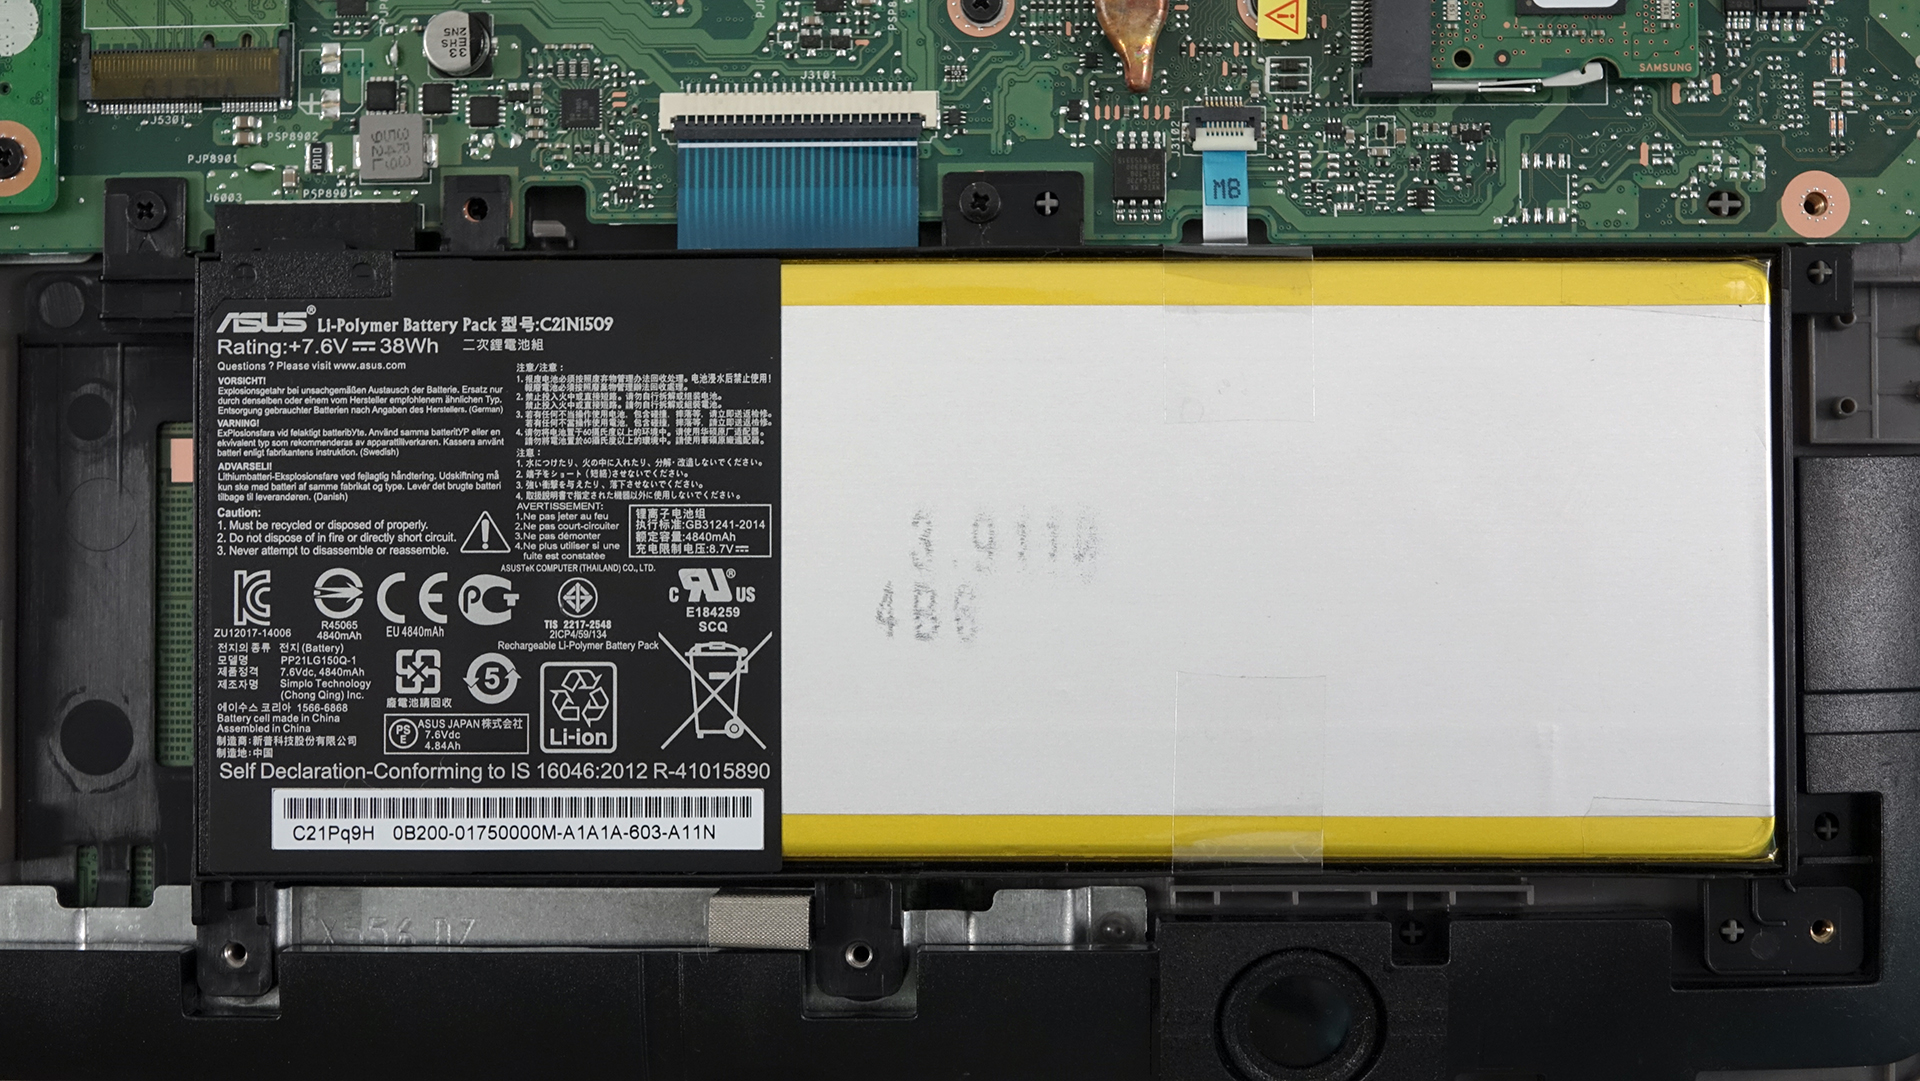
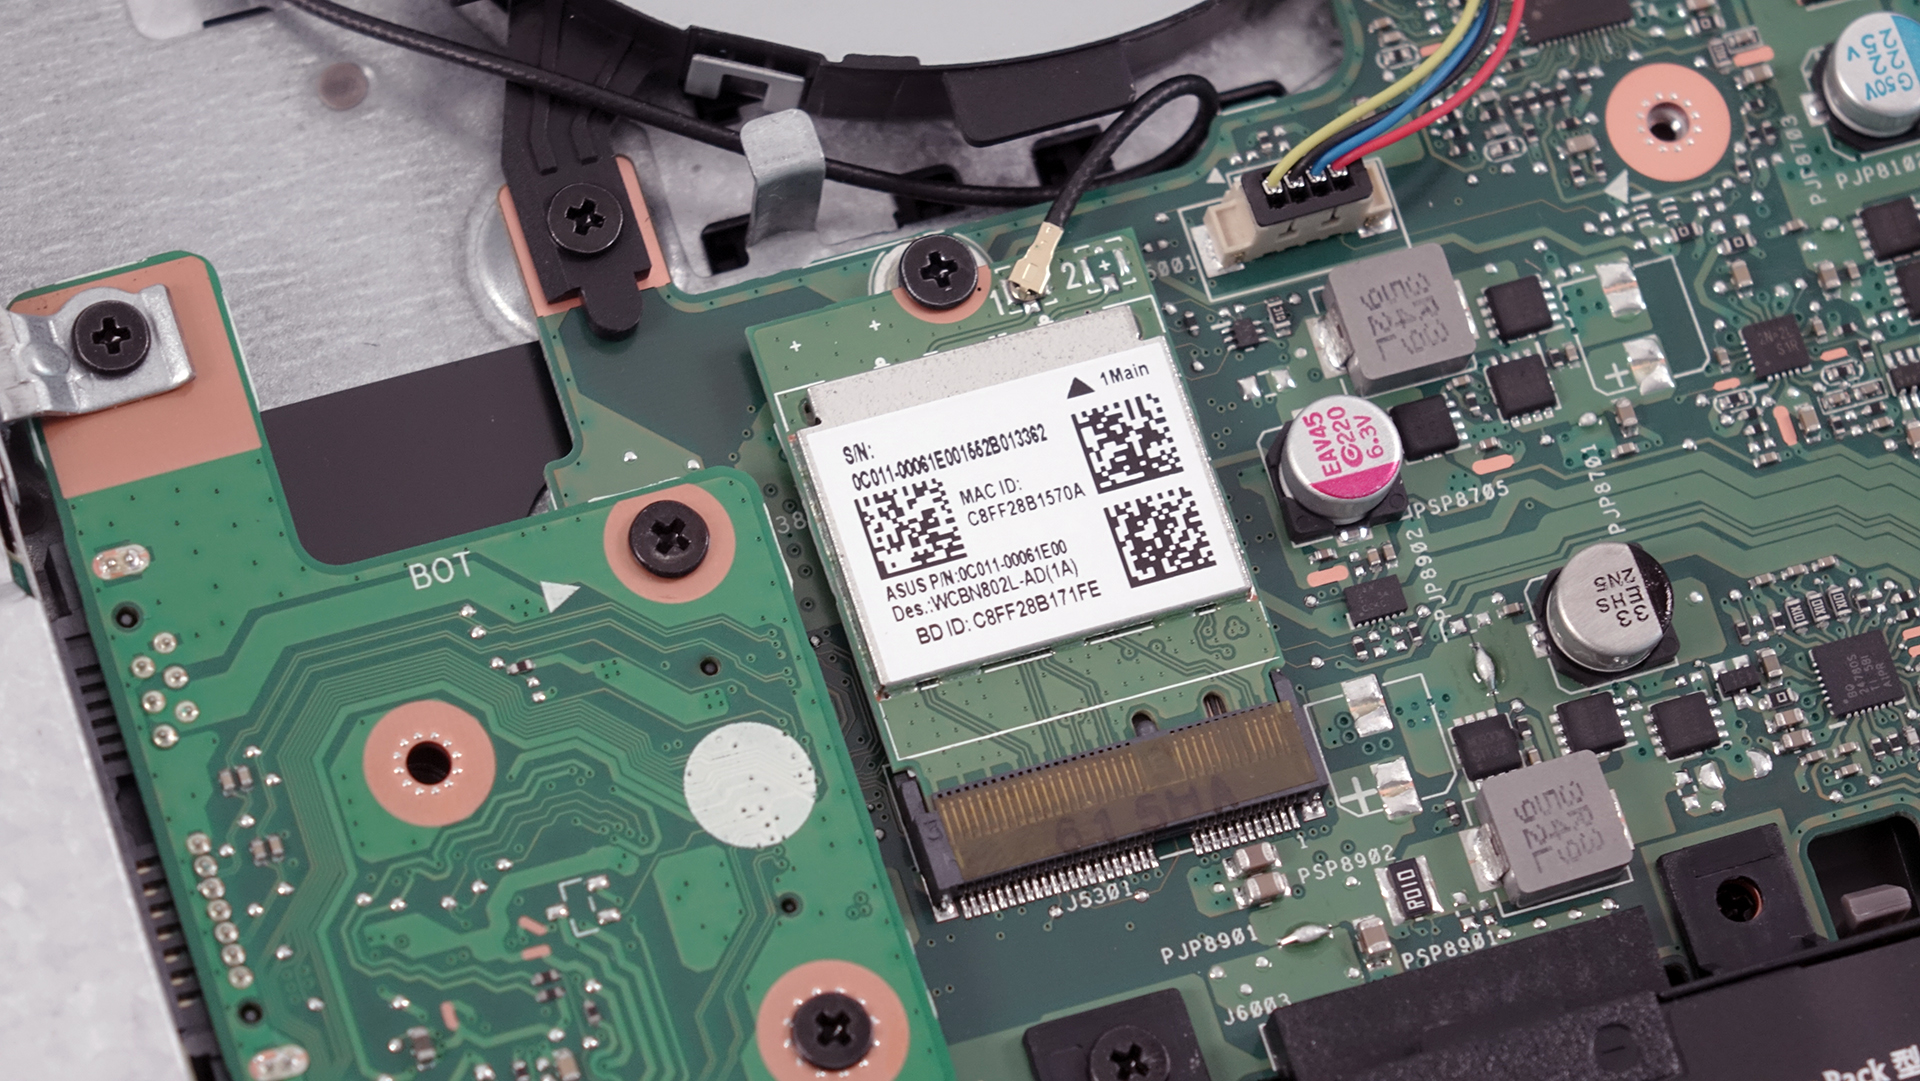
3. Storage options, battery and Wi-Fi module
The storage options are scarce as the budget variant of the notebook offers only one 2.5-inch HDD, which in our configuration is a Seagate 1TB drive spinning at 5400 rpm. Nonetheless, you can still remove the optical drive and swap it for a caddy and an additional 2.5-inch drive.

The battery hasn’t been changed as much as last year’s X555 offered a 37Wh while the new X556 is equipped with a 38Wh battery pack.
The Wi-Fi module is located right next to the fan and it’s in-house made with model number 0C011-00061E00.
4. Cooling system
The cooling consists of one fan and a radiator located at the back of the machine. The main exhaust vent is connected to a heat pipe running through the CPU and GPU equipped with separate heat sinks. We assume the presented cooling design will do well enough to support the Core i5-6200U CPU and the discrete NVIDIA GeForce 940M GPU.

You can find the notebook’s price and configurations here: http://amzn.to/2aaVXQM


sir, where is the bios battery?
No CMOS battery motherboard
How the f would i change it? says mother board has no battery anymore! 🙁
Enormously helpful. Thanks Rossen.
How can I upgrade the ram to 16 gb
Open the small portion that is under your asus k556u and then insert them.
Great job my friend. You helped me so much! TY a lot
how can i upgrade the gpu?
I also want to know if the GPU is upgradable without having to upgrade a ton of other stuff.
Hi, what it is chipset version k556u
Is there a M.2 SSD slot?
Yes, I’d like to know if is possibile insert an M.2 ssd simply or i need an adapter
k556u note book can upgrade to ssd drive?
Yes, you can, but with 2.5″ SATA SSD only since the model doesn’t have an M.2 slot for storage.
Hi, where is the cmos battery here
Can the GPU be upgraded to a 4GB? I have this model and want to upgrade the GPU.
can i upgrade ac wifi card for this motherboard?
Forgot bios password,how to reset.No CMOS battery motherboard.
Hi sir, laptop asus k556ub ssd m.2 ?Accept?
No
anyone has any idea about the CMOS Battery ? And how to restart BIOS when I can’t boot up the laptop at all ?