Inside MSI GS75 Stealth – disassembly and upgrade options
If you are familiar with the MSI GS Stealth series, you know that you are going to have a hard time when upgrading your laptop. Instead of actually placing the motherboard as it should, rather than upside-down, MSI has made removing it easier. Take a look.
Check out all MSI GS75 Stealth prices and configurations in our Specs System or read more in our In-Depth review.
1. Remove the bottom plate
Sadly, the MSI GS75 Stealth is not the easiest laptop to teardown. Similarly to its smaller brother, it requires the bottom panel to be removed, which is held in place by 15 Phillips-head screws. Then on the inside, you are going to find some stuff that can be removed immediately but essentially, you have to take remove the motherboard since it is turned upside down.

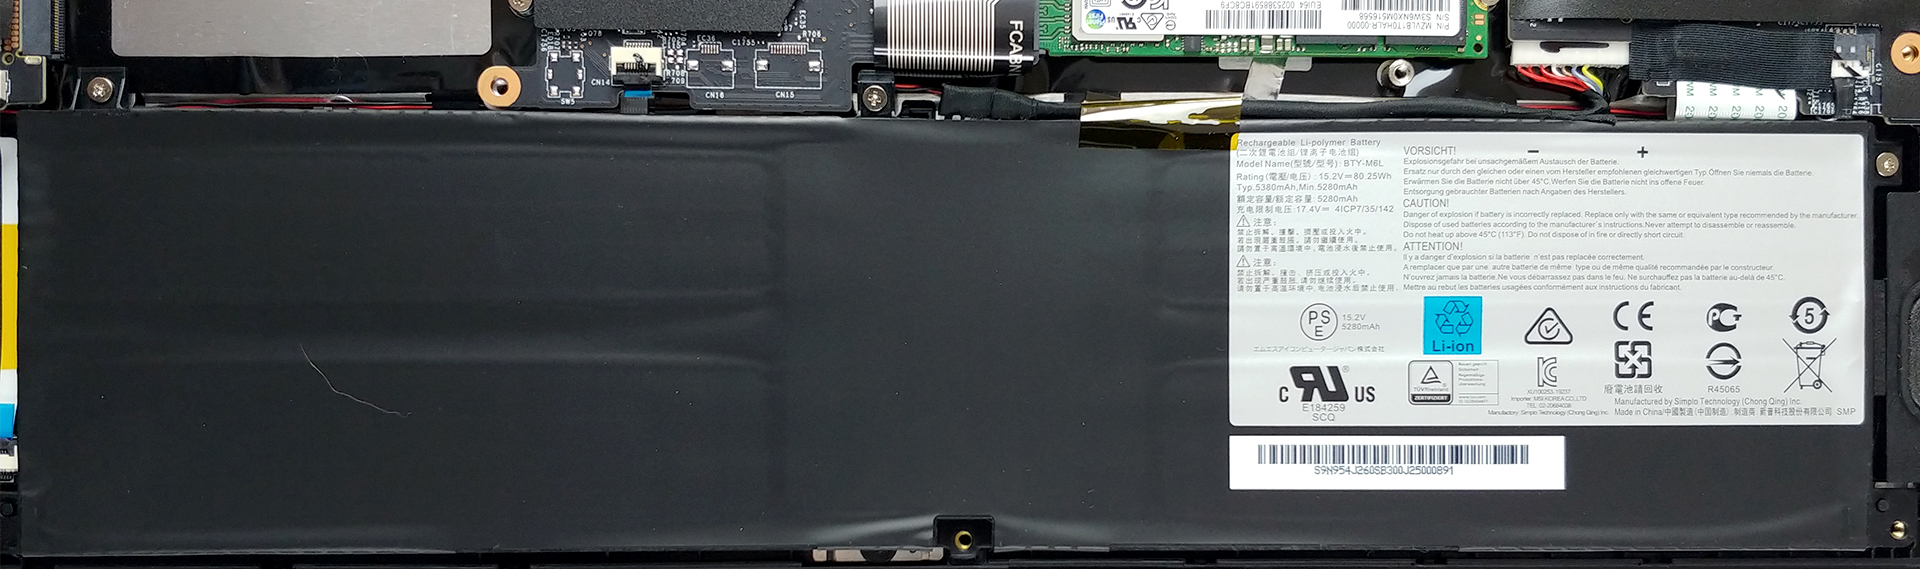
2. Battery
Battery-wise there is a beefy 80.25Wh unit inside.
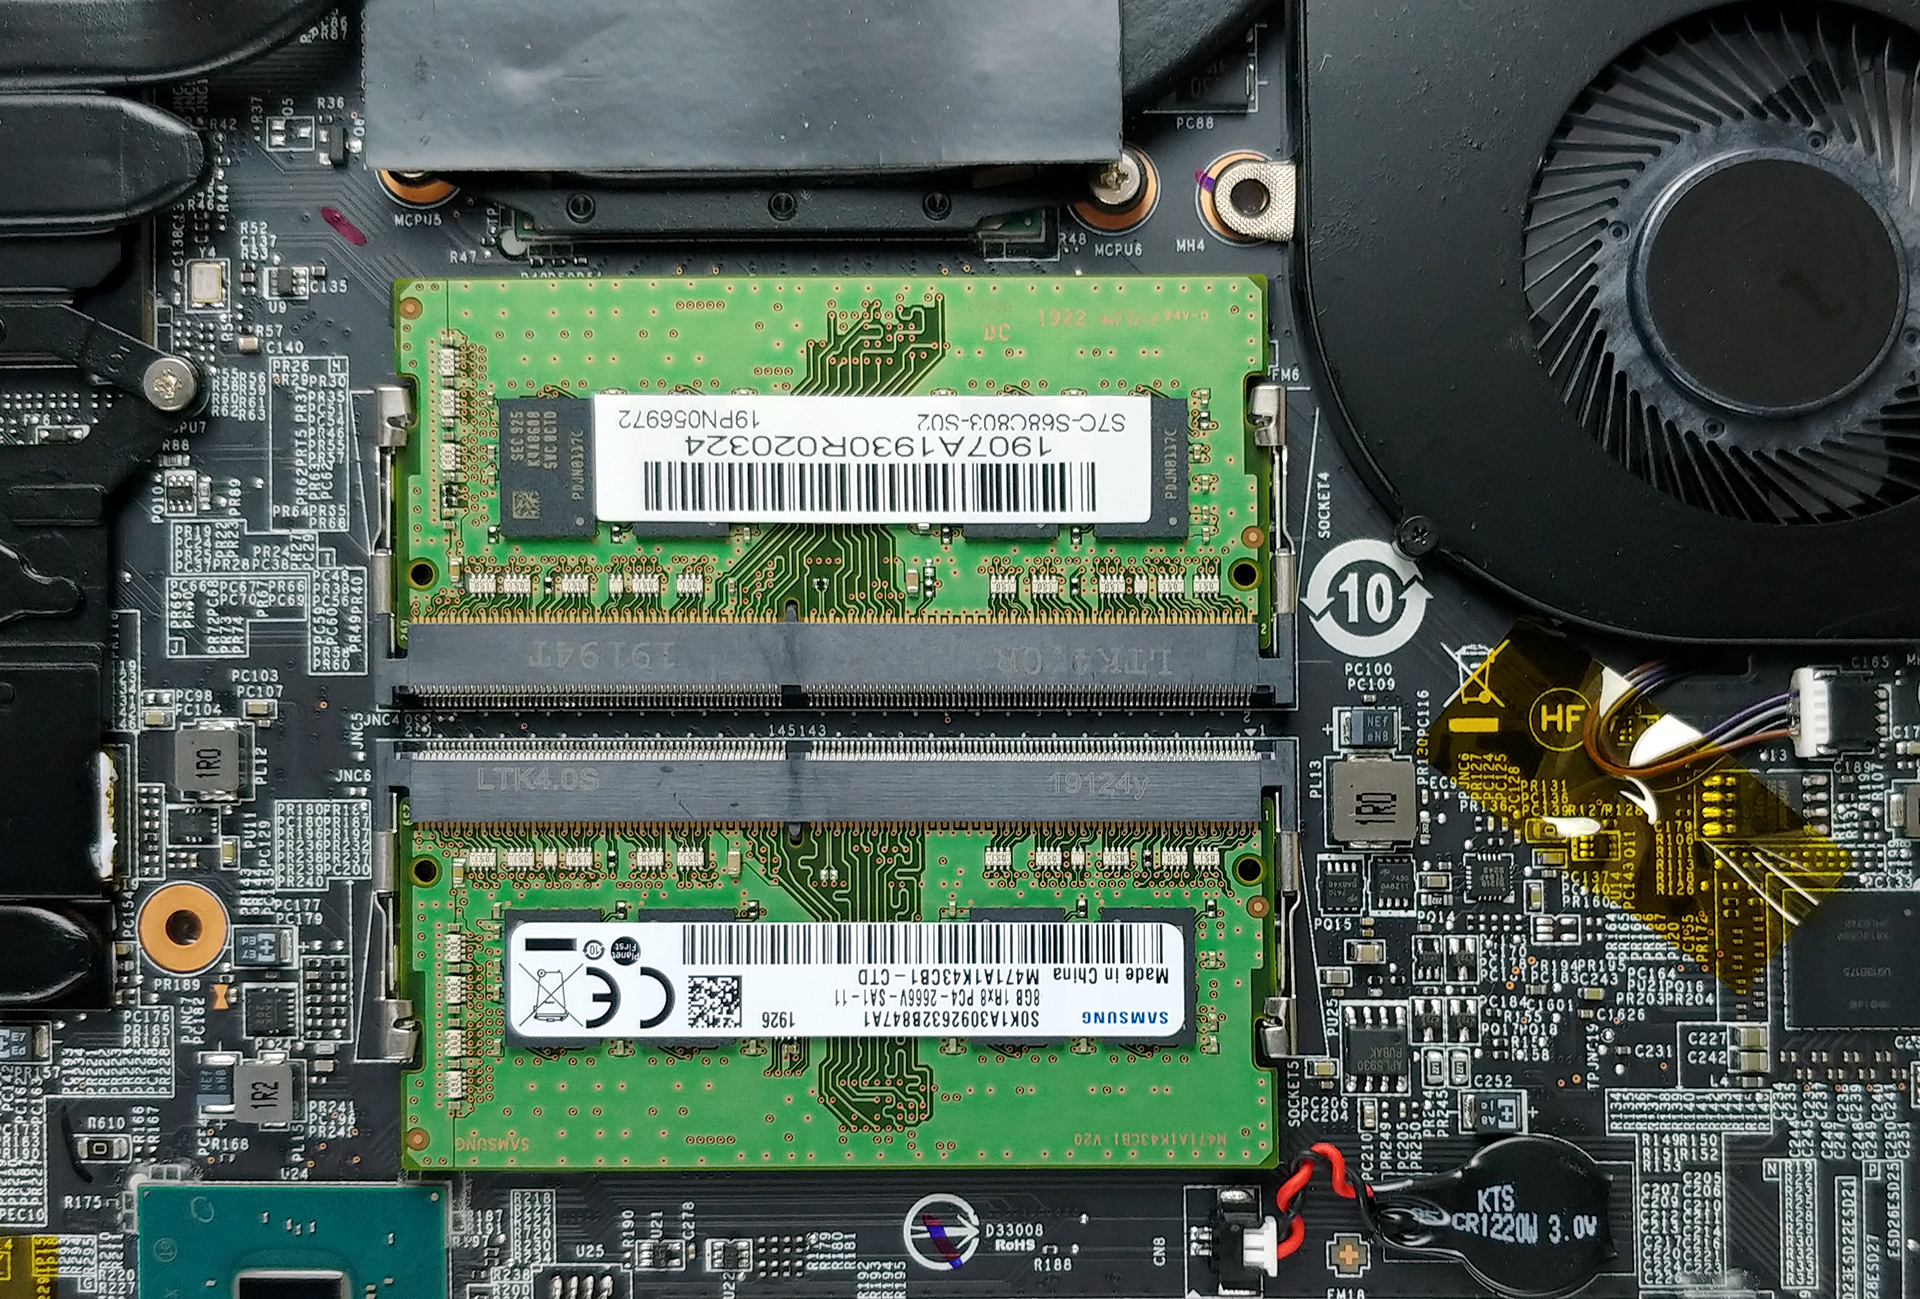
3. Memory, storage and cooling
Let’s first give kudos to MSI for including not one but THREE M.2 SSD slots, which is unprecedented in the laptop world. With the price of SSDs going down like Cristiano Ronaldo, after being touched by a gust of wind, this is the perfect setup for the laptop owners.
Now, to take the motherboard out of the chassis, you need to remove the black protective sheet and take only two Phillips-head screws out. However, after that, there are a bunch of connectors that need to be unplugged (for reference see our video guide), as well as the connected SSDs, WiFi card, and a metal cover that holds the power plug in place.
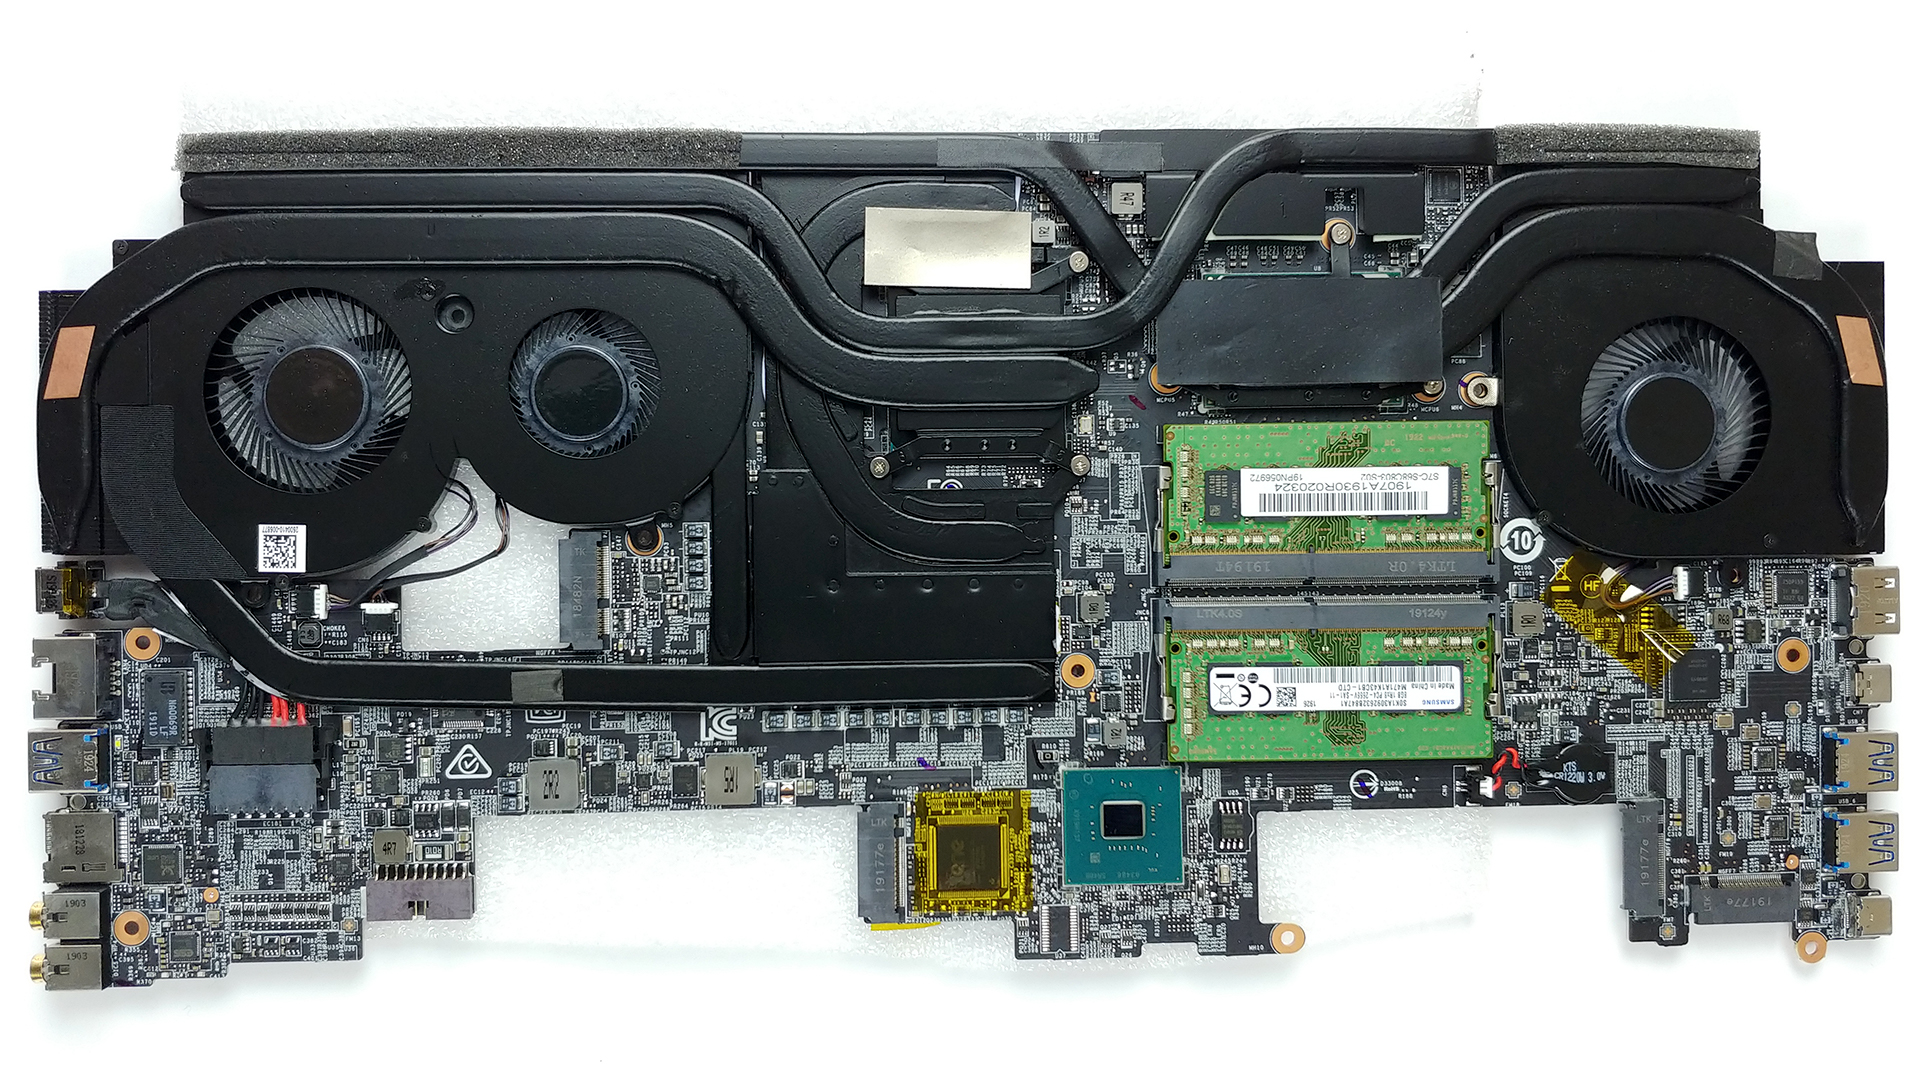
After you’ve gone through hell, and still organized your screws along the way, you will finally greet the cooling solution. MSI has made sure it throws all the copper it can inside – there are 7 heat pipes cooling the CPU, GPU, VRMs and the graphics memory.
Check out all MSI GS75 Stealth prices and configurations in our Specs System or read more in our In-Depth review.


Is the cpu or the gpu upgradable in the laptop ?
Nope
can you switch out the motherboard for another with different gpus/cpus?
What is the Max amount of RAM I can put in a GS75 Stealth 8SF? I thought it was 32GB but on Crucial’s website, they say 64GB. When I get my physical max capacity in command prompt, I only get 33554432 kilobytes.
Also where is the third M.2 Slot? I know 2 are PCIe and 1 SATA. Can I fill up all three with the same SSD? was planning to put 2 1TB Samsung 970 PRO’s in it But keep the stock 512GB mt Boot Drive.
Thanks in advance.
I just upgraded my GS75 Stealth 9SF this weekend. It doesn’t have 3 M2 slots unless they’re hiding it. That said, what I did was exactly what you said: i upgraded to 64GB of Crucial RAM, and put a second SSD in, a Crucial P1 1TB drive. It took me about an hour. Pay close attention when you do it, and be careful, and it should go fine.
So the 64GB is actually true? That is good to know.
And Laptop assembly has always scared me. I’ve built hundreds of $20,000-30,000 Workstations. But these scare me. Haha
But I found the SATA M.2 slot. If you have the bottom cover off and the battery toward you, it is on the left side closest to you. It is perpendicular to the other ones.
funny thing i purchased 2 samsung 970 NVMe 1T because i noticed that there are 2 empty slots (one in the center next to the one that came in with laptop and there is one down on left side in the corner) sadly it did not recognize the one on down left side ). and i came here to check if GS75 can get 64G of ram or not
YEPPP I just did it few weeks back… 🙂
Not sure if I can reach you through this thread.
You mentioned your upgrade to 64GB.
What exact GS75 do you have? Is an 8-series (8SE, 8SF, 8G)?
To answer the question in general.
Yes, it’s possible to upgrade the 8-series to 64GB.
I did it with in my 8SE with a Crucial 64GB kit (CT2K32G4SFD8266)
can i upgrade the wifi card to a killer 1650x, i have already upgraded my ram and memory. I have some trouble with installing the drivers as I can’t see them installed in device manager.
how did you fix those troubles?
upgraded my ram to 64gb. originally 32 and 512 storage would like to upgrade it to a lighter version more capacity in regards to parts, any suggestions? I cant seem to get away from the heat from the fans..