Inside Lenovo Yoga 500 – disassembly, internal photos and upgrade options
This flexible little companion offers neat features with a budget-friendly price tag, but somehow modest upgrade options. Maybe mainly due to some design limitations, but at least the teardown is just as modest. You will just need a screw and a small plastic tool to completely disassemble the notebook or just gain access to the most commonly upgraded hardware.
You can check the current price of the notebook here: http://amzn.to/1LPciCA
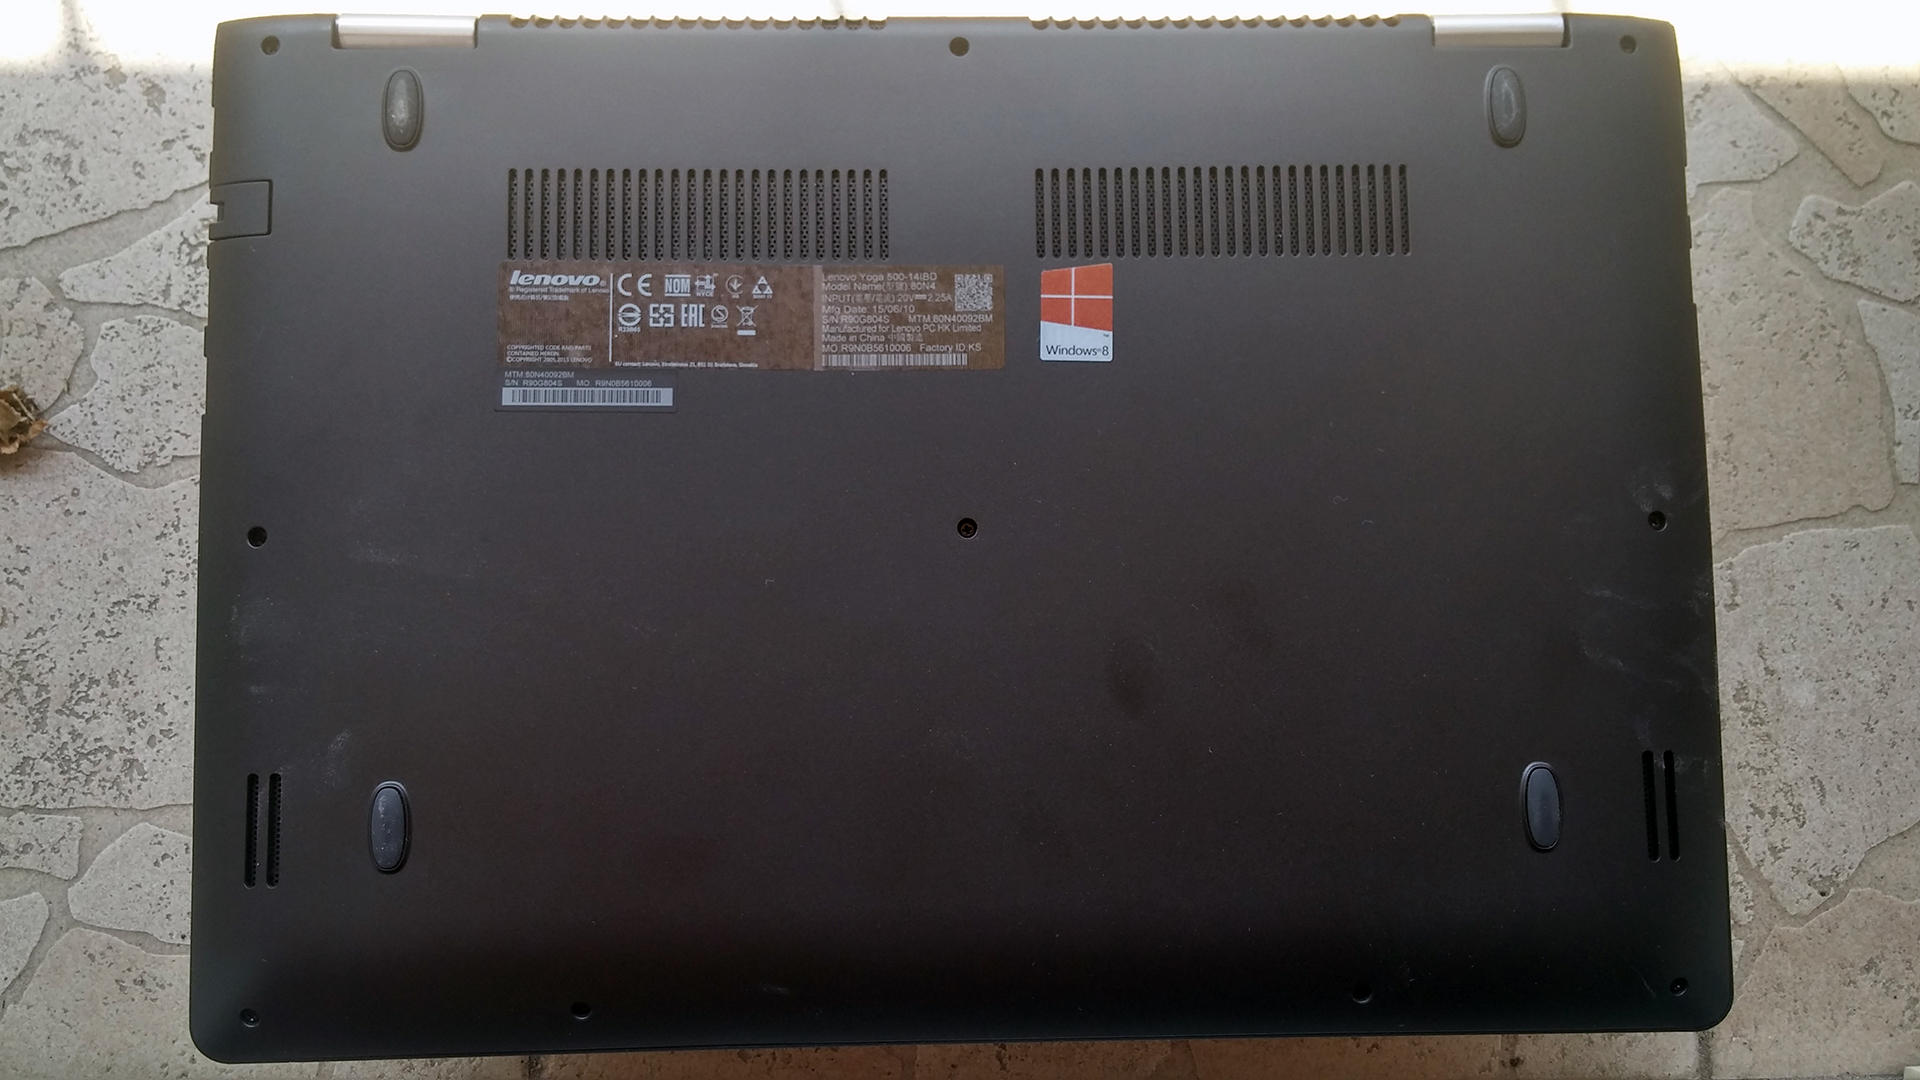
1. Opening the bottom cover
You need to do some unscrewing and after that try to pop out the bottom piece with a thin plastic tool or credit card of some sort. Luckily, there no cables that need to be removed so go ahead and detach the cover.
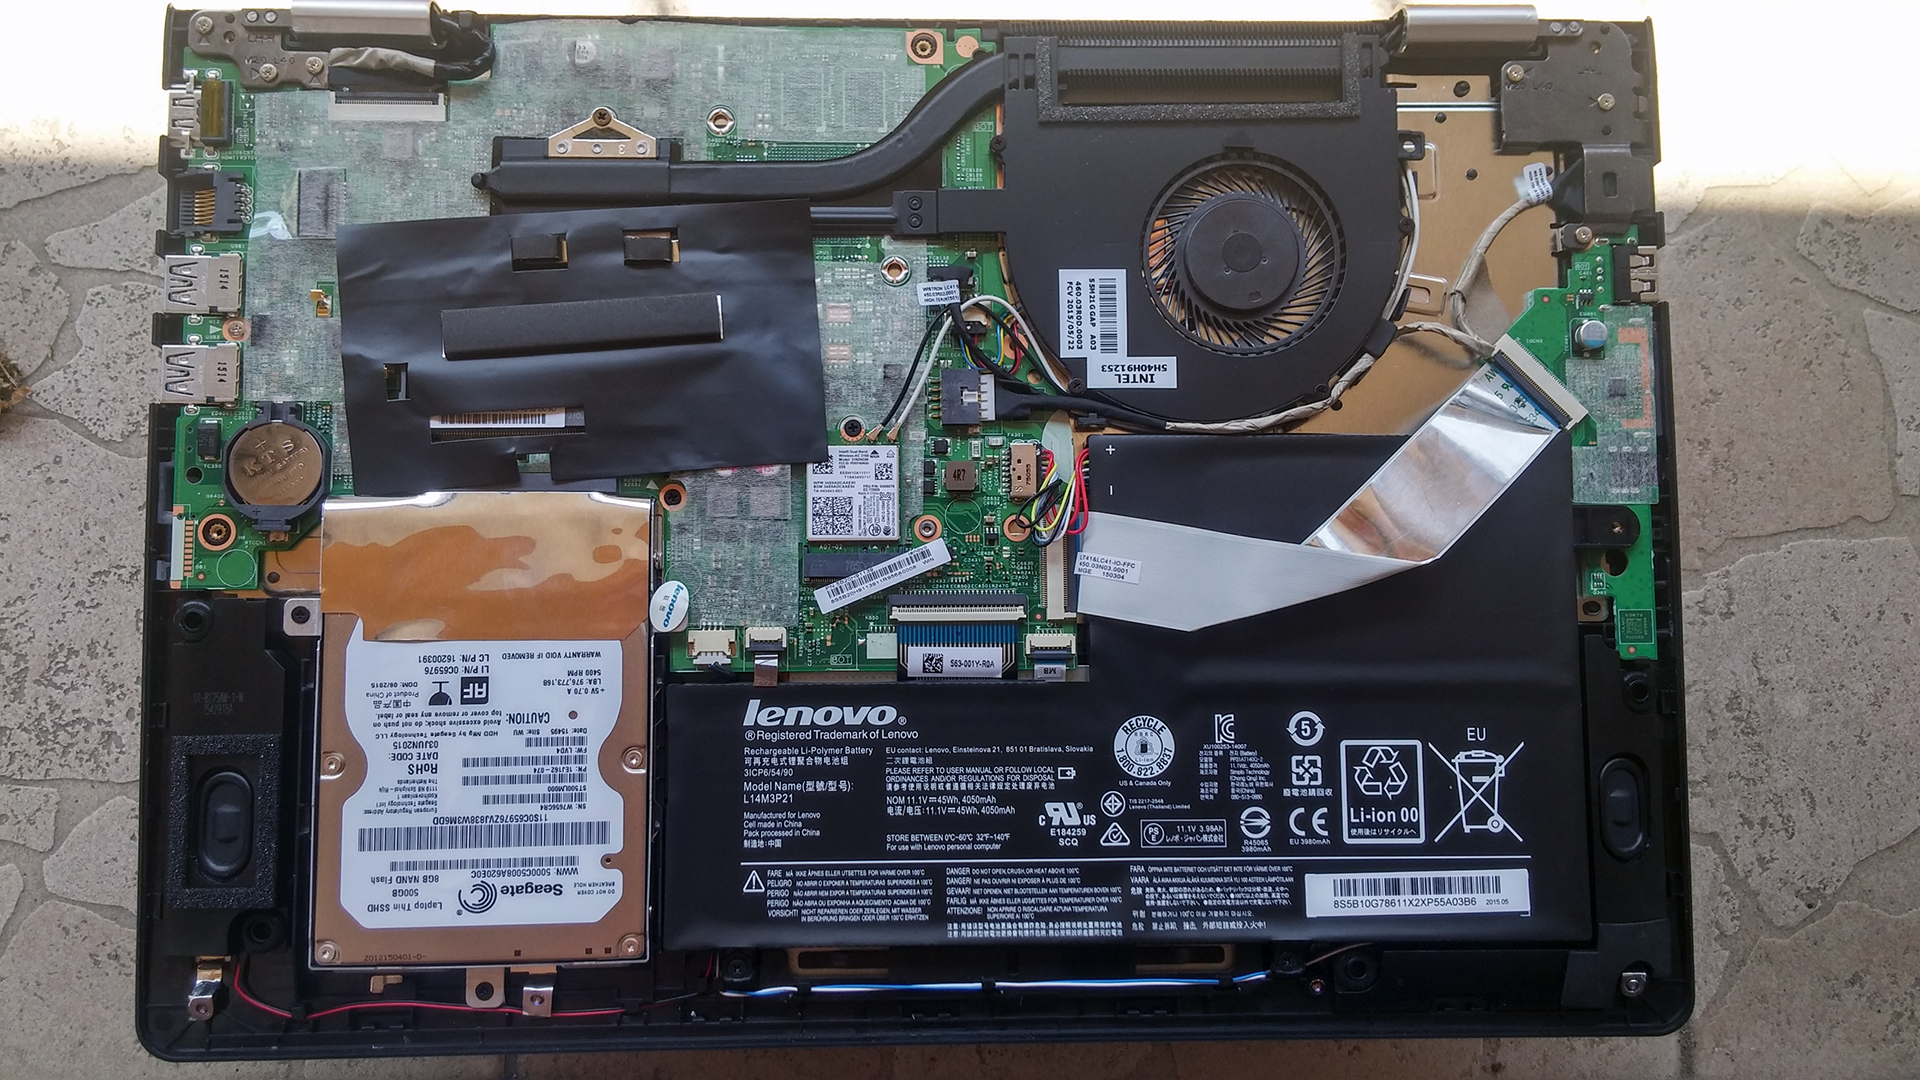
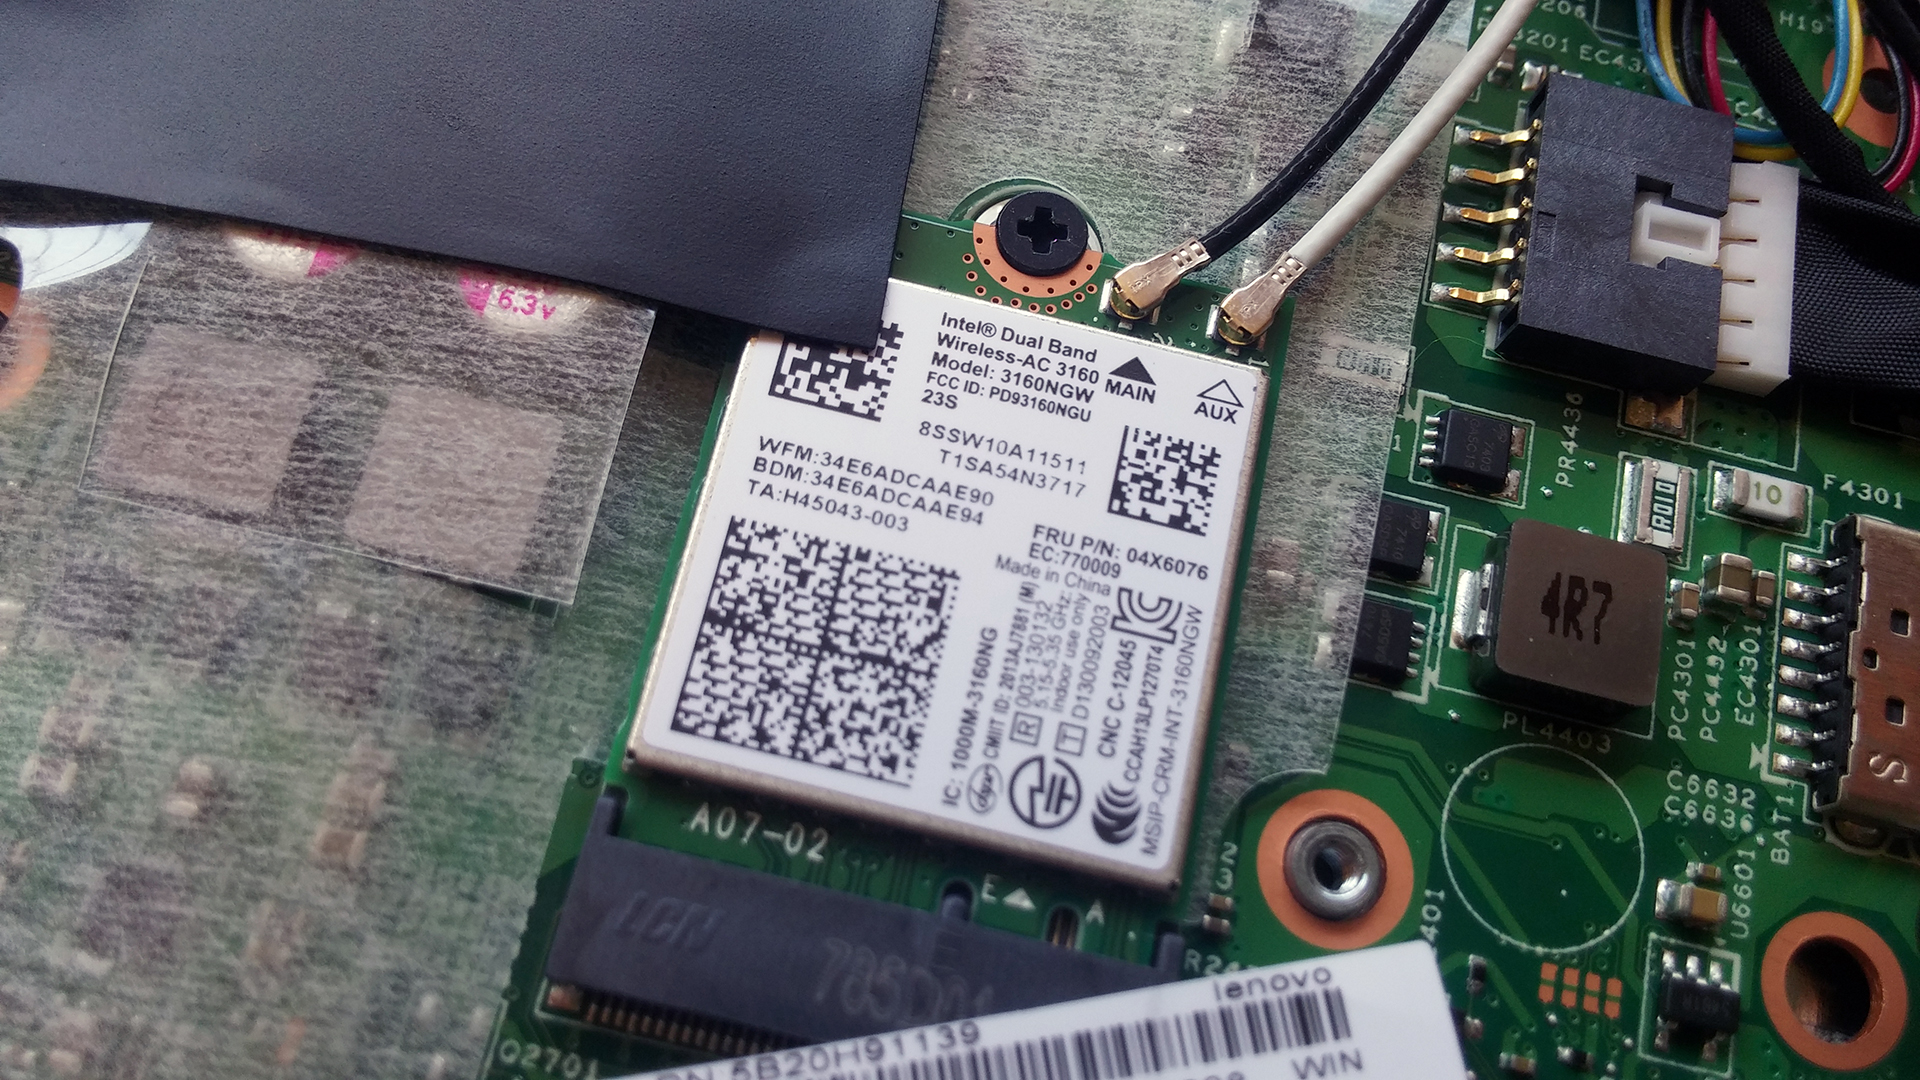
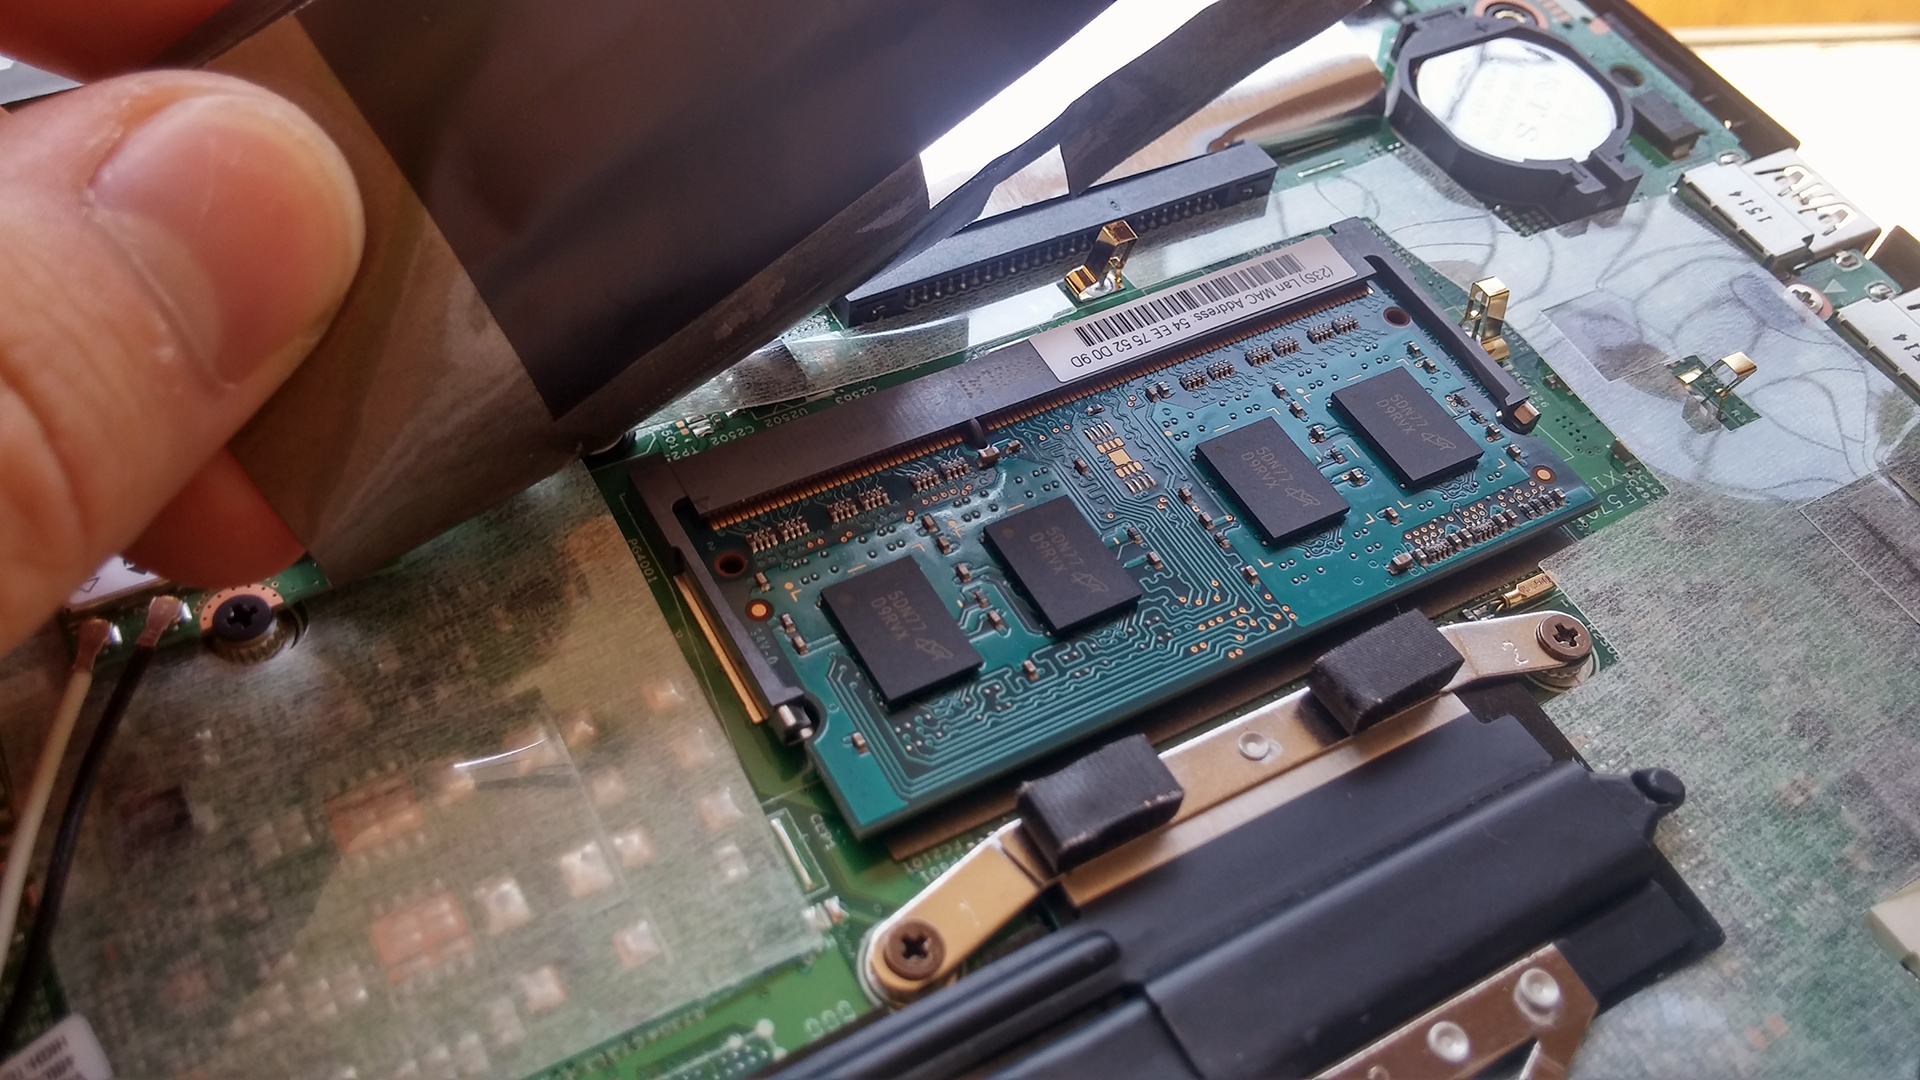
2. Upgrade options, Wi-Fi module, battery
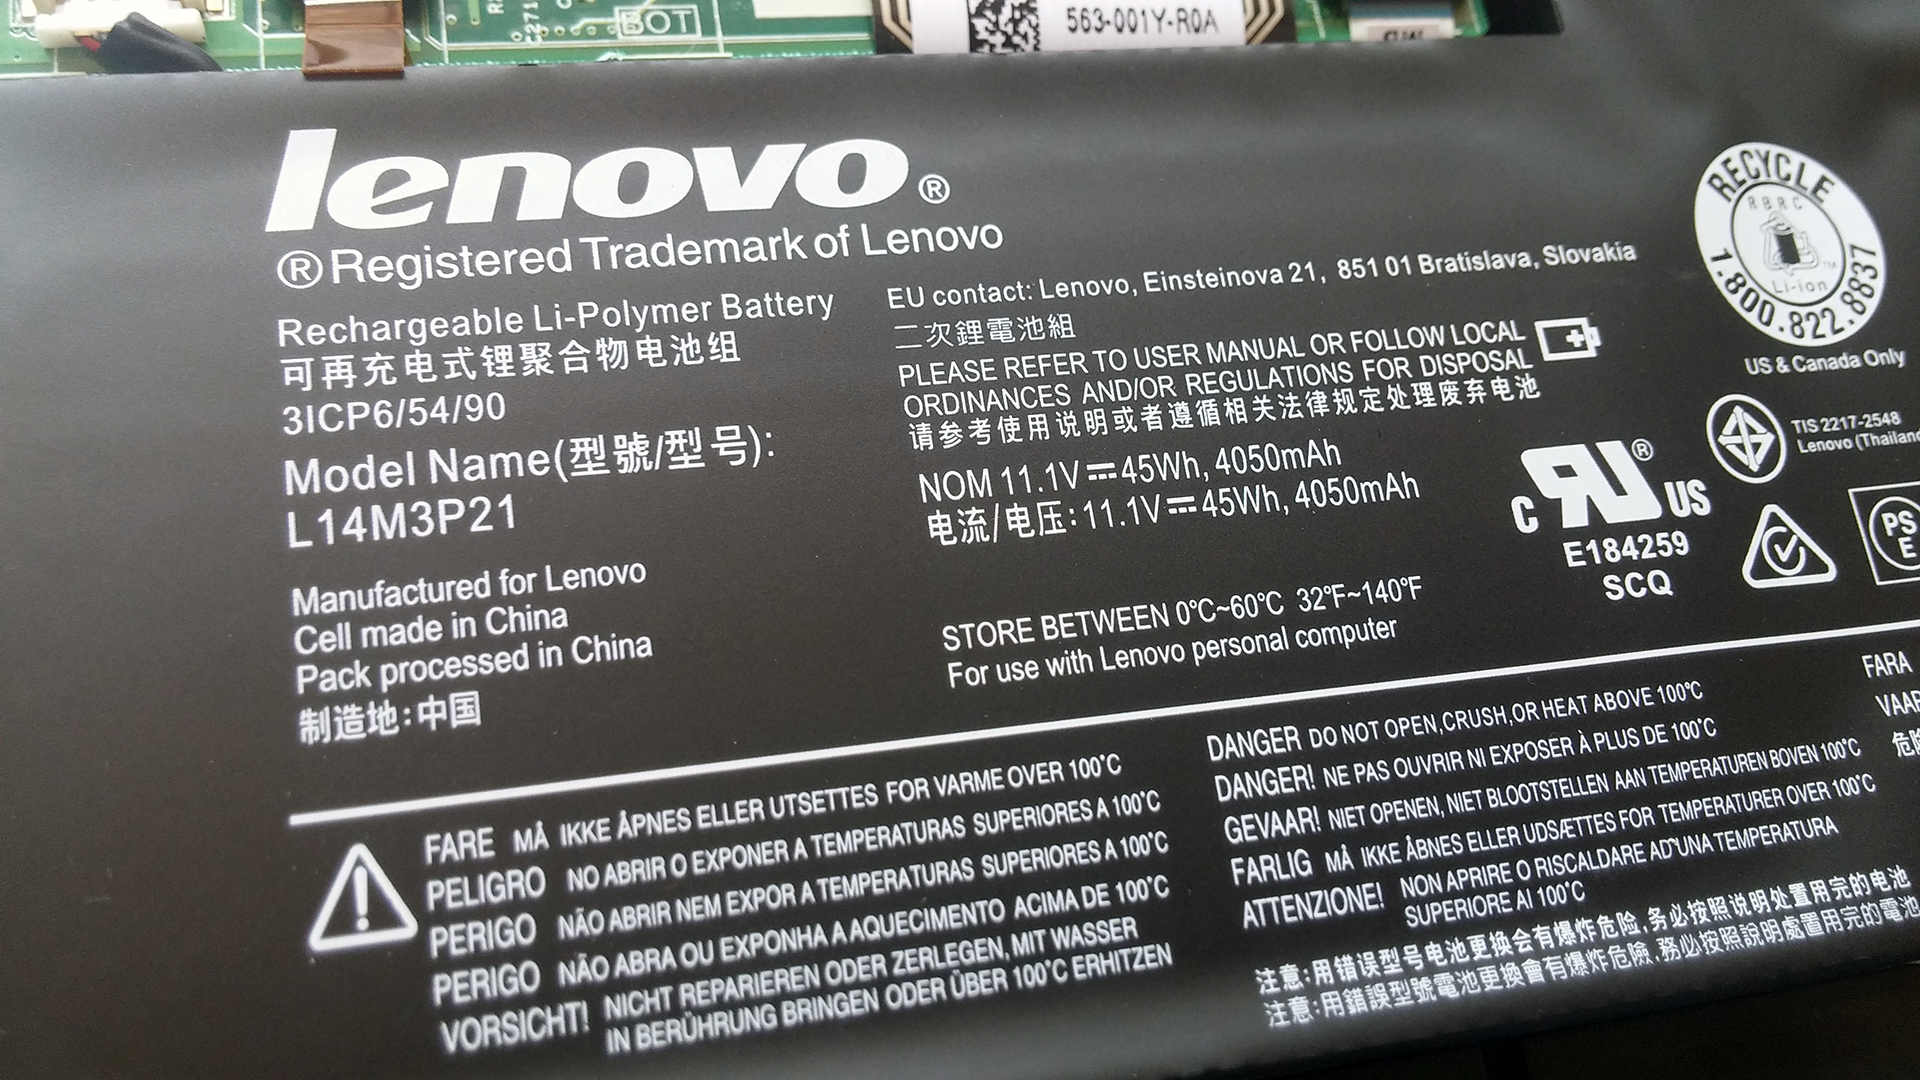
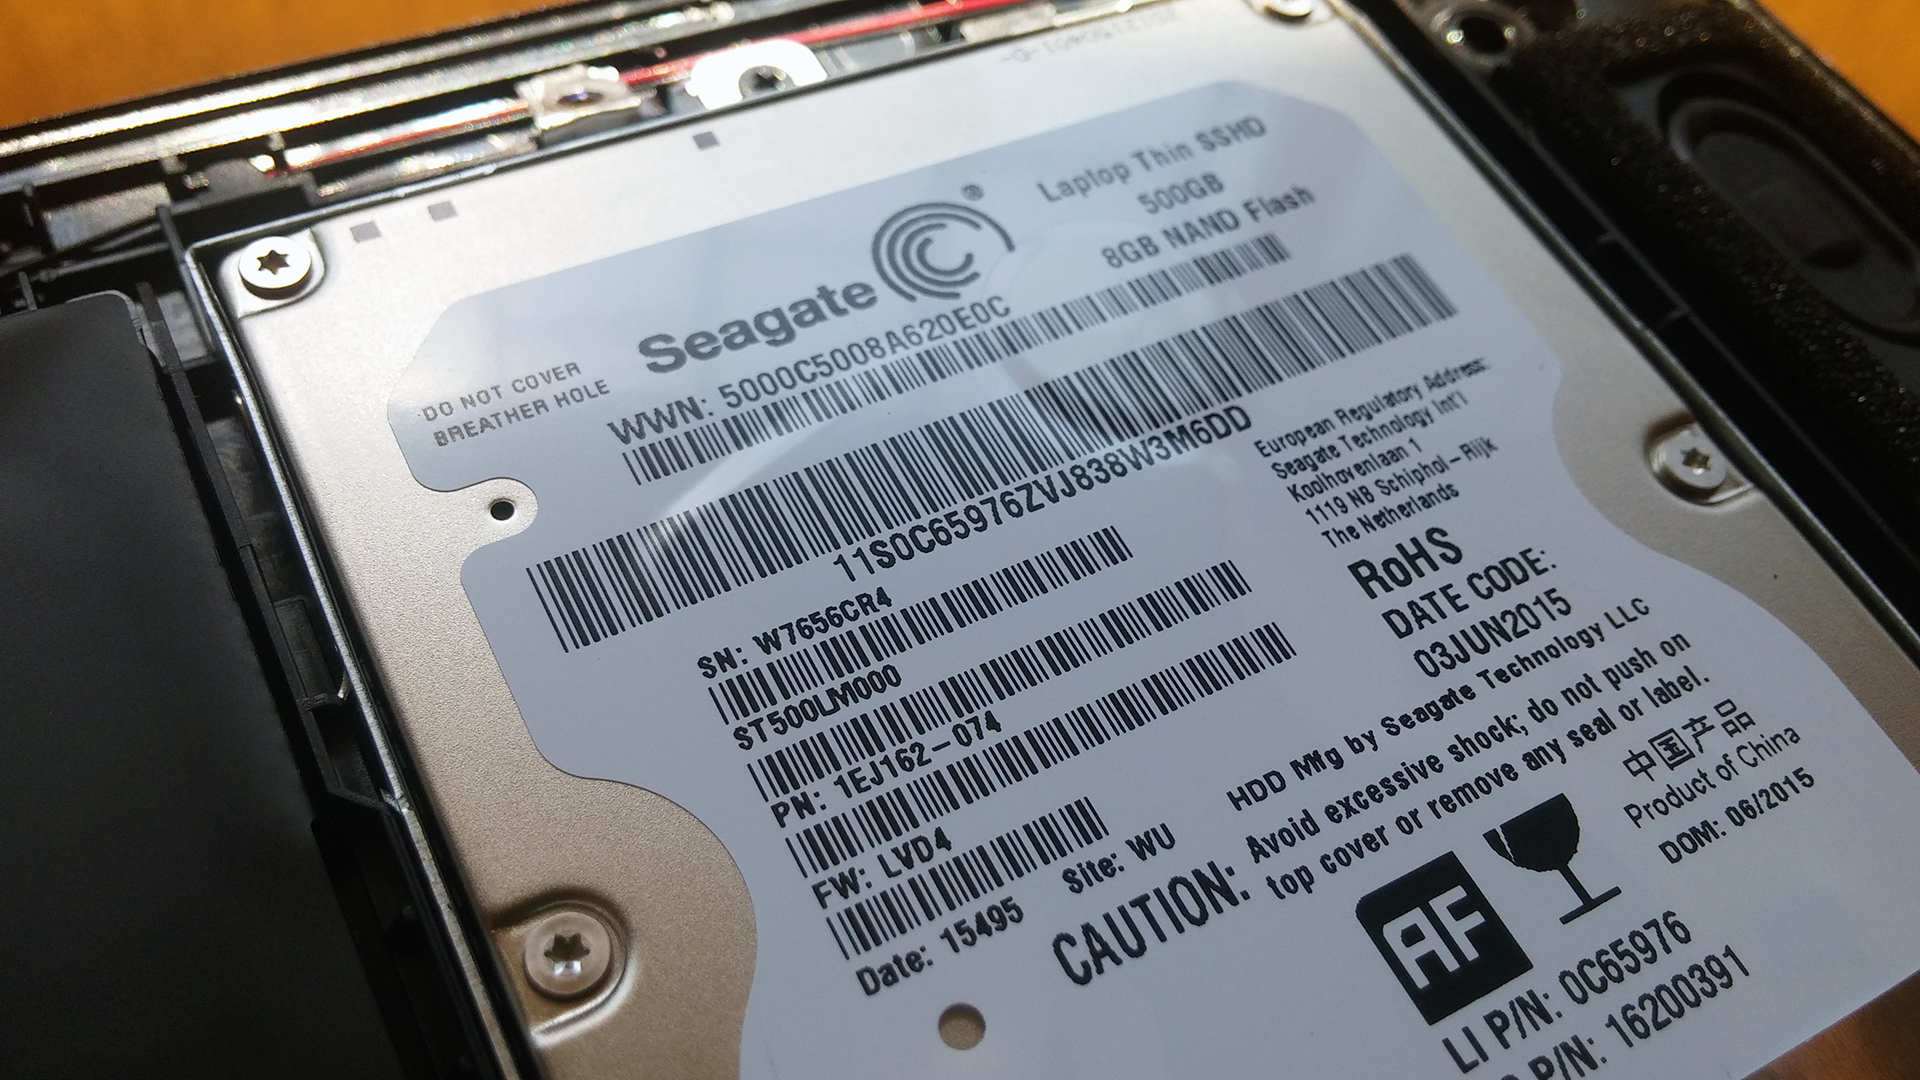
The notebook comes with Seagate 500GB SSHD (8GB SSD + 500GB HDD running at 5400 rpm) or at least the configuration we are currently reviewing. If you need additional storage, you will need to swap the current SSHD with another 2.5-inch storage device like HDD or SSD. No M.2 SATA SSD slot, unfortunately, but quite acceptable at this price range. Right next to the drive you can see the 45Wh battery with model name L14M3P21 manufactured for/by Lenovo.
Going up the motherboard can be seen the Intel Dual Band Wireless-AC 3160 Wi-Fi module and one RAM chip covered with a black sticker, which in our case is 4GB. You will have to swap the 4GB chip with another 8GB chip if you want to perform an upgrade, since there is only one RAM slot provided.
You can check the current price of the notebook here: http://amzn.to/1LPciCA


Hello, how can I remove the keyboard?
i can upgrade to 16 giga with 1 Dimm ram
hi, did the 16GB ram work well. does your system show it actually has 16GB available?
Is it possible to change cpu? I know the 500 have several cpu options but want to know if its possible to change or if the cpus are permanent?
Hello, Conny Linängen!
To the best of our knowledge, such an upgrade is impossible. It is always best to plan in advance – you know how fast technology changes and, for this reason, it’s always good to be on the safe side and pick a model with decent CPU specs.
Regards,
Dimitar Karamitev
Can I upgrade the RAM to 16 GB with a single 16 GB SODIMM RAM stick? E.g http://www.amazon.com/Crucial-Single-PC3L-12800-SODIMM-CT204864BF160B/dp/B0123BRIDK
No it can only withstand 8GB RAM max
Can I change the battery, my model hay a 30 Wh and is to small
ive got a yoga with 256 GB of SSD can i add an HDD?
Why would you ? It’s stupid to degrade the best
Does it have 1 slot or 2 slots for ram? Is it upgradable to 8 GB through 4GB*2 ram!?
Is it version with backlight keayboard? If yes could you tell me which tape is from backlight connection?
Hi! In your article you wrote that this one has limited storage upgrade possibilities. What does the two options you mentioned really mean. Or said in another way, I need as much storage as possible (256 GB or more) and with less affect on the work speed. What do you suggest?
Quote: ” If you need additional storage, you will need to swap the current SSHD with another 2.5-inch storage device like HDD or SSD. No M.2 SATA SSD slot, unfortunately, but quite acceptable at this price range.”
Regards Novice
I have the exact model as in this illustration… My question… Is this 4GB ram shouldered to board? Secondly how to purchase a suitable and reliable 8GB ram in India..
It’s not soldered to board.u can buy compatible 8gb at any retailer just match the voltage and don’t buy entry level product buy better quality stuff
how do i fix mt lenovo flex 10 that is not charging and not coming on
Did anyone try upgrading the RAM of a Lenovo Yoga 500 to 16GB?
Serrurier-parispascher.fr
Bonjour j aimerai changer la mémoire vive dans mon ordinateur portable lenova yoga
Lenovo Yoga 500-14IHW
Il es possible de faire une configuration en 16 giga ram merci à toutes personnes