Inside Lenovo ThinkPad L13 Yoga – disassembly and upgrade options
Being a ThinkPad and a Yoga, this laptop needs to mary two fundamentally different platforms.
Check out all Lenovo ThinkPad L13 Yoga prices and configurations in our Specs System or read more in our In-Depth review.
1. Remove the bottom plate
What is separating you from this laptop’s internals, are 9 Phillips-head captive screws, which are not detaching from the bottom plate, after being undone. After that, you need to remove the stylus, and then pry the panel away with a plastic tool, starting from the back.
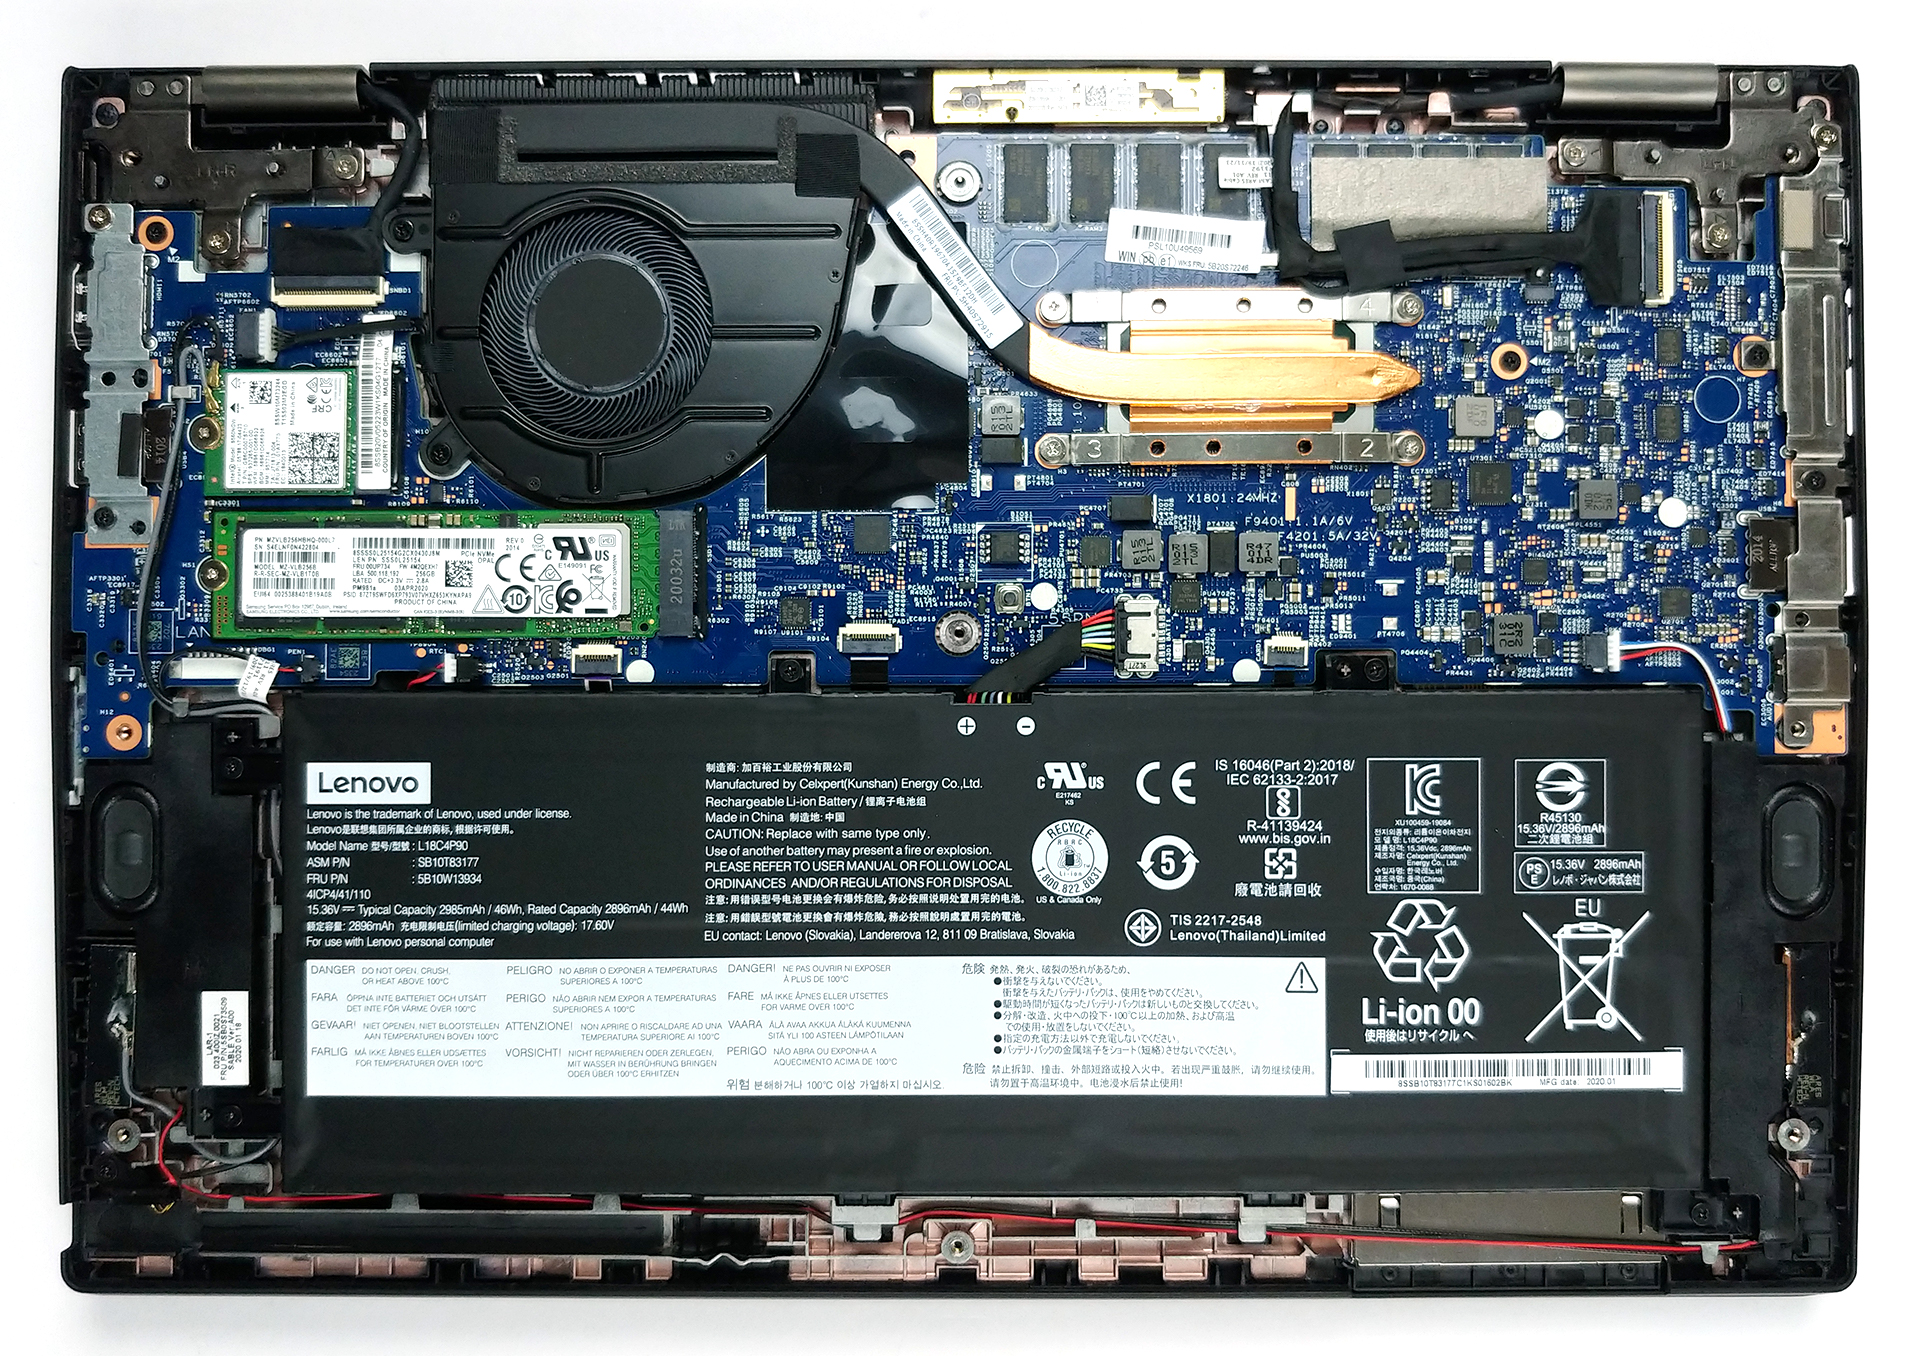
2. Battery
When it comes to the battery, you get a 46Wh unit.

3. Memory and storage
Sadly, you can see the memory modules just above the processor. This means that you won’t be able to upgrade it after you purchase the device, which leaves you with the 4, 8, or 16GB you paired the laptop initially. On the bright side, you can put a faster and larger SSD via the M.2 PCIe x4 slot.

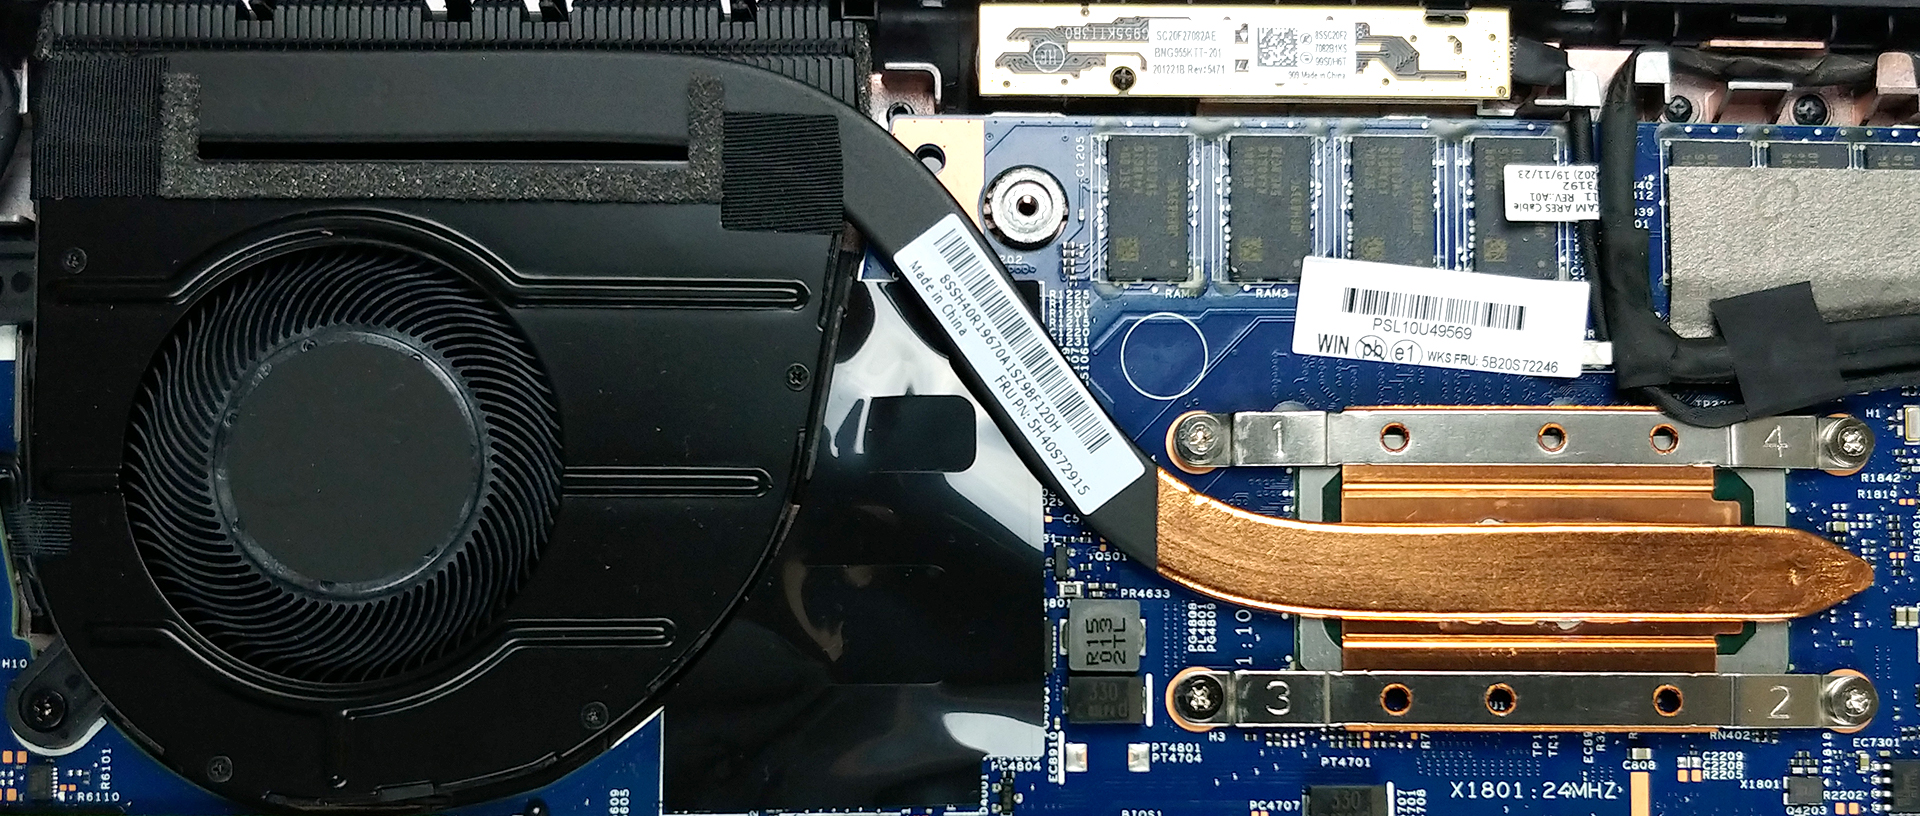
4. Cooling system
Cooling-wise, we see the standard heat pipe and a single fan that blows the heat away from the notebook.
Check out all Lenovo ThinkPad L13 Yoga prices and configurations in our Specs System or read more in our In-Depth review.