Inside Lenovo Legion 5 (15) – disassembly and upgrade options
One of Lenovo’s bestsellers – the Legion 5 (15) delivers decent computing performance and gaming capabilities at a relatively easy-digestible price.
Check out all Lenovo Legion 5 (15) prices and configurations in our Specs System or read more in our In-Depth review.
1. Remove the bottom plate
You have 11 Phillips-head screws separating you from the internals of this notebook. After you undo them, pry the bottom panel with a plastic tool, starting from the front. Be patient, as the embulked part on the back can be a little more difficult to remove.
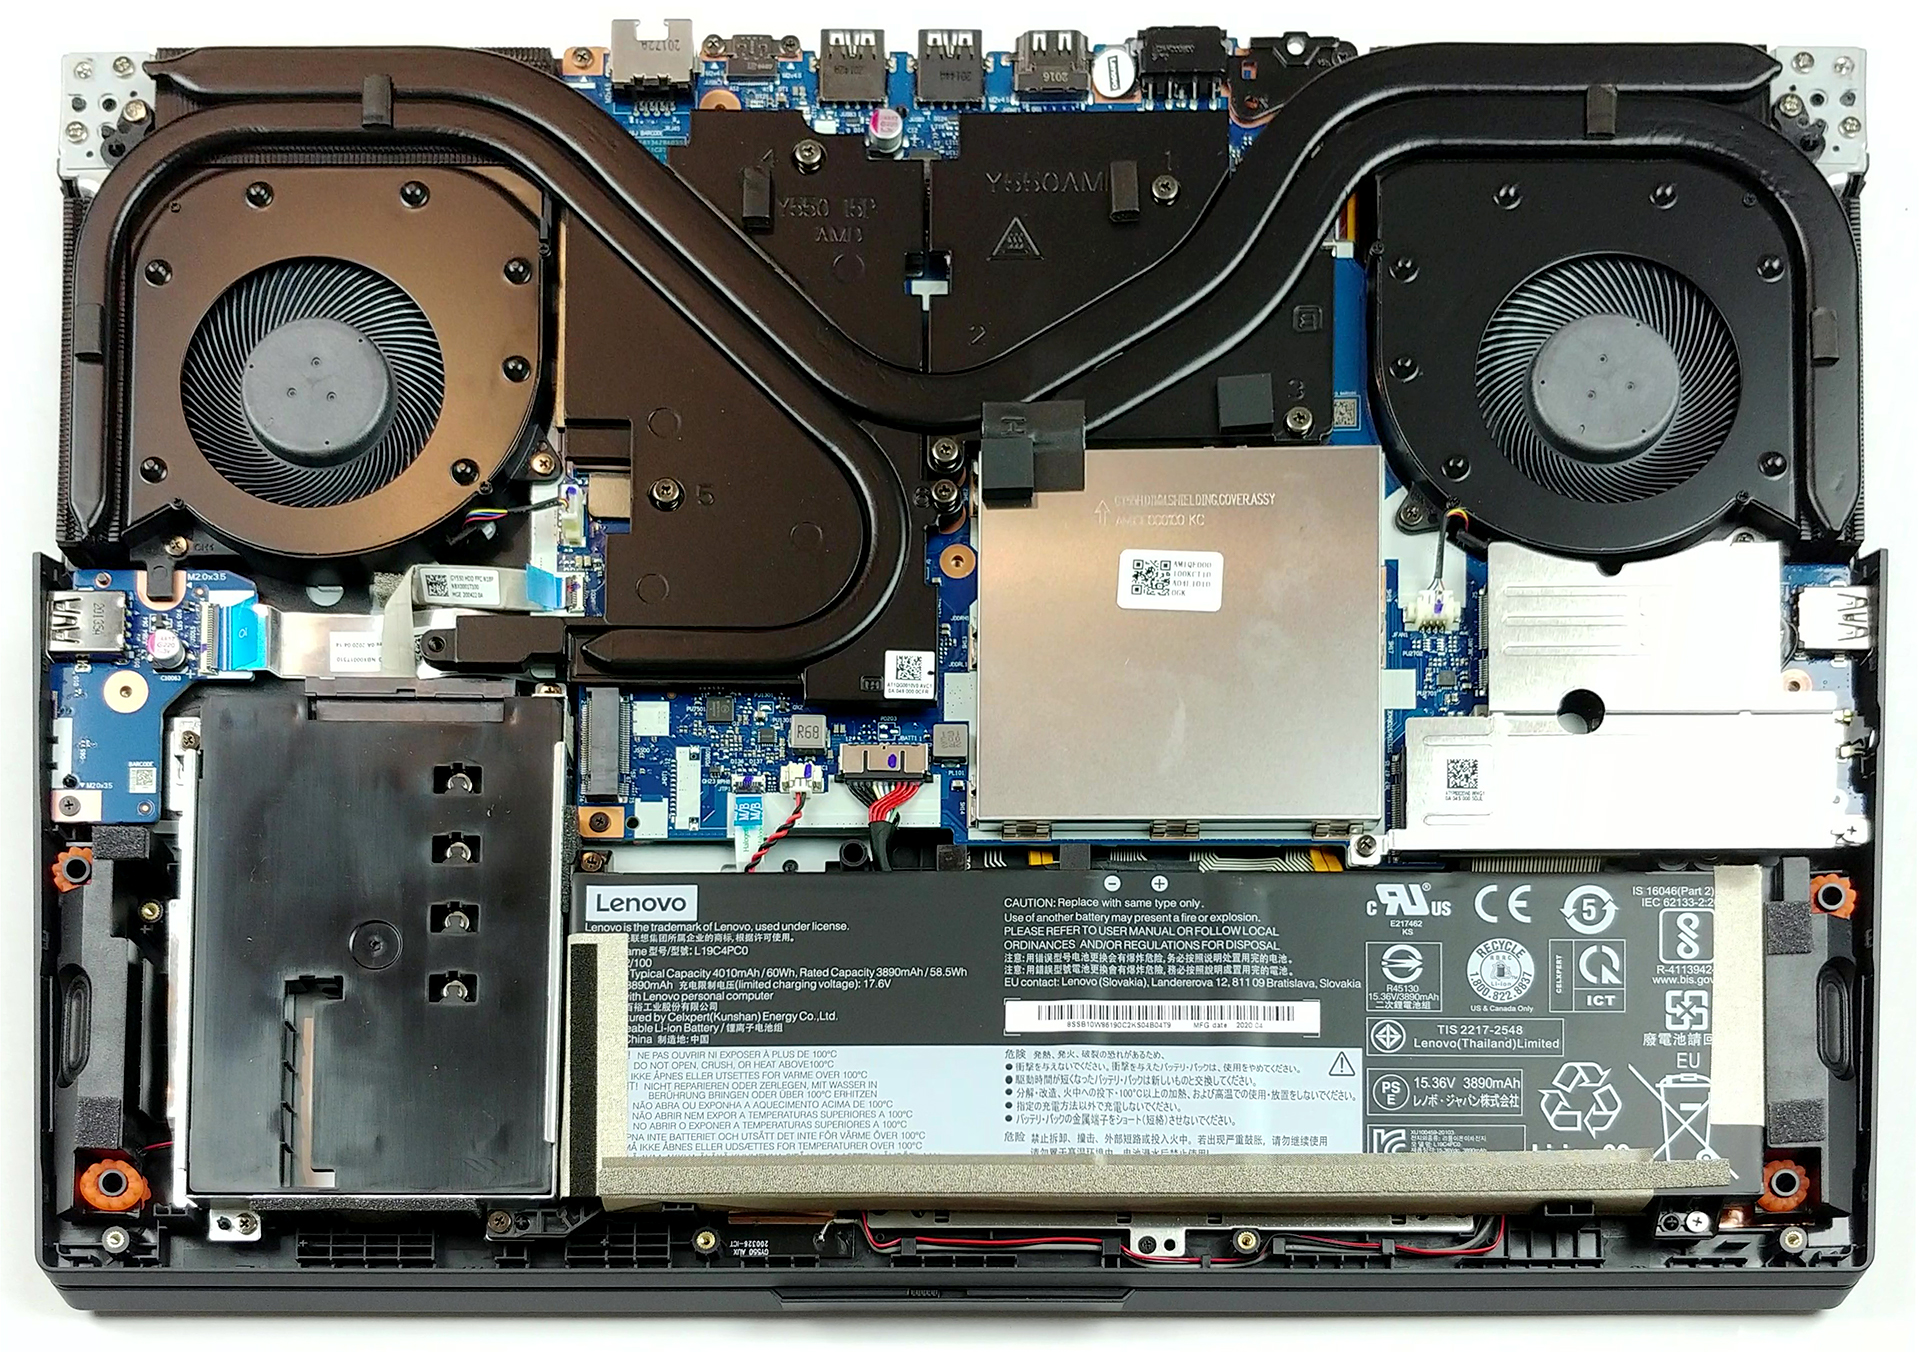
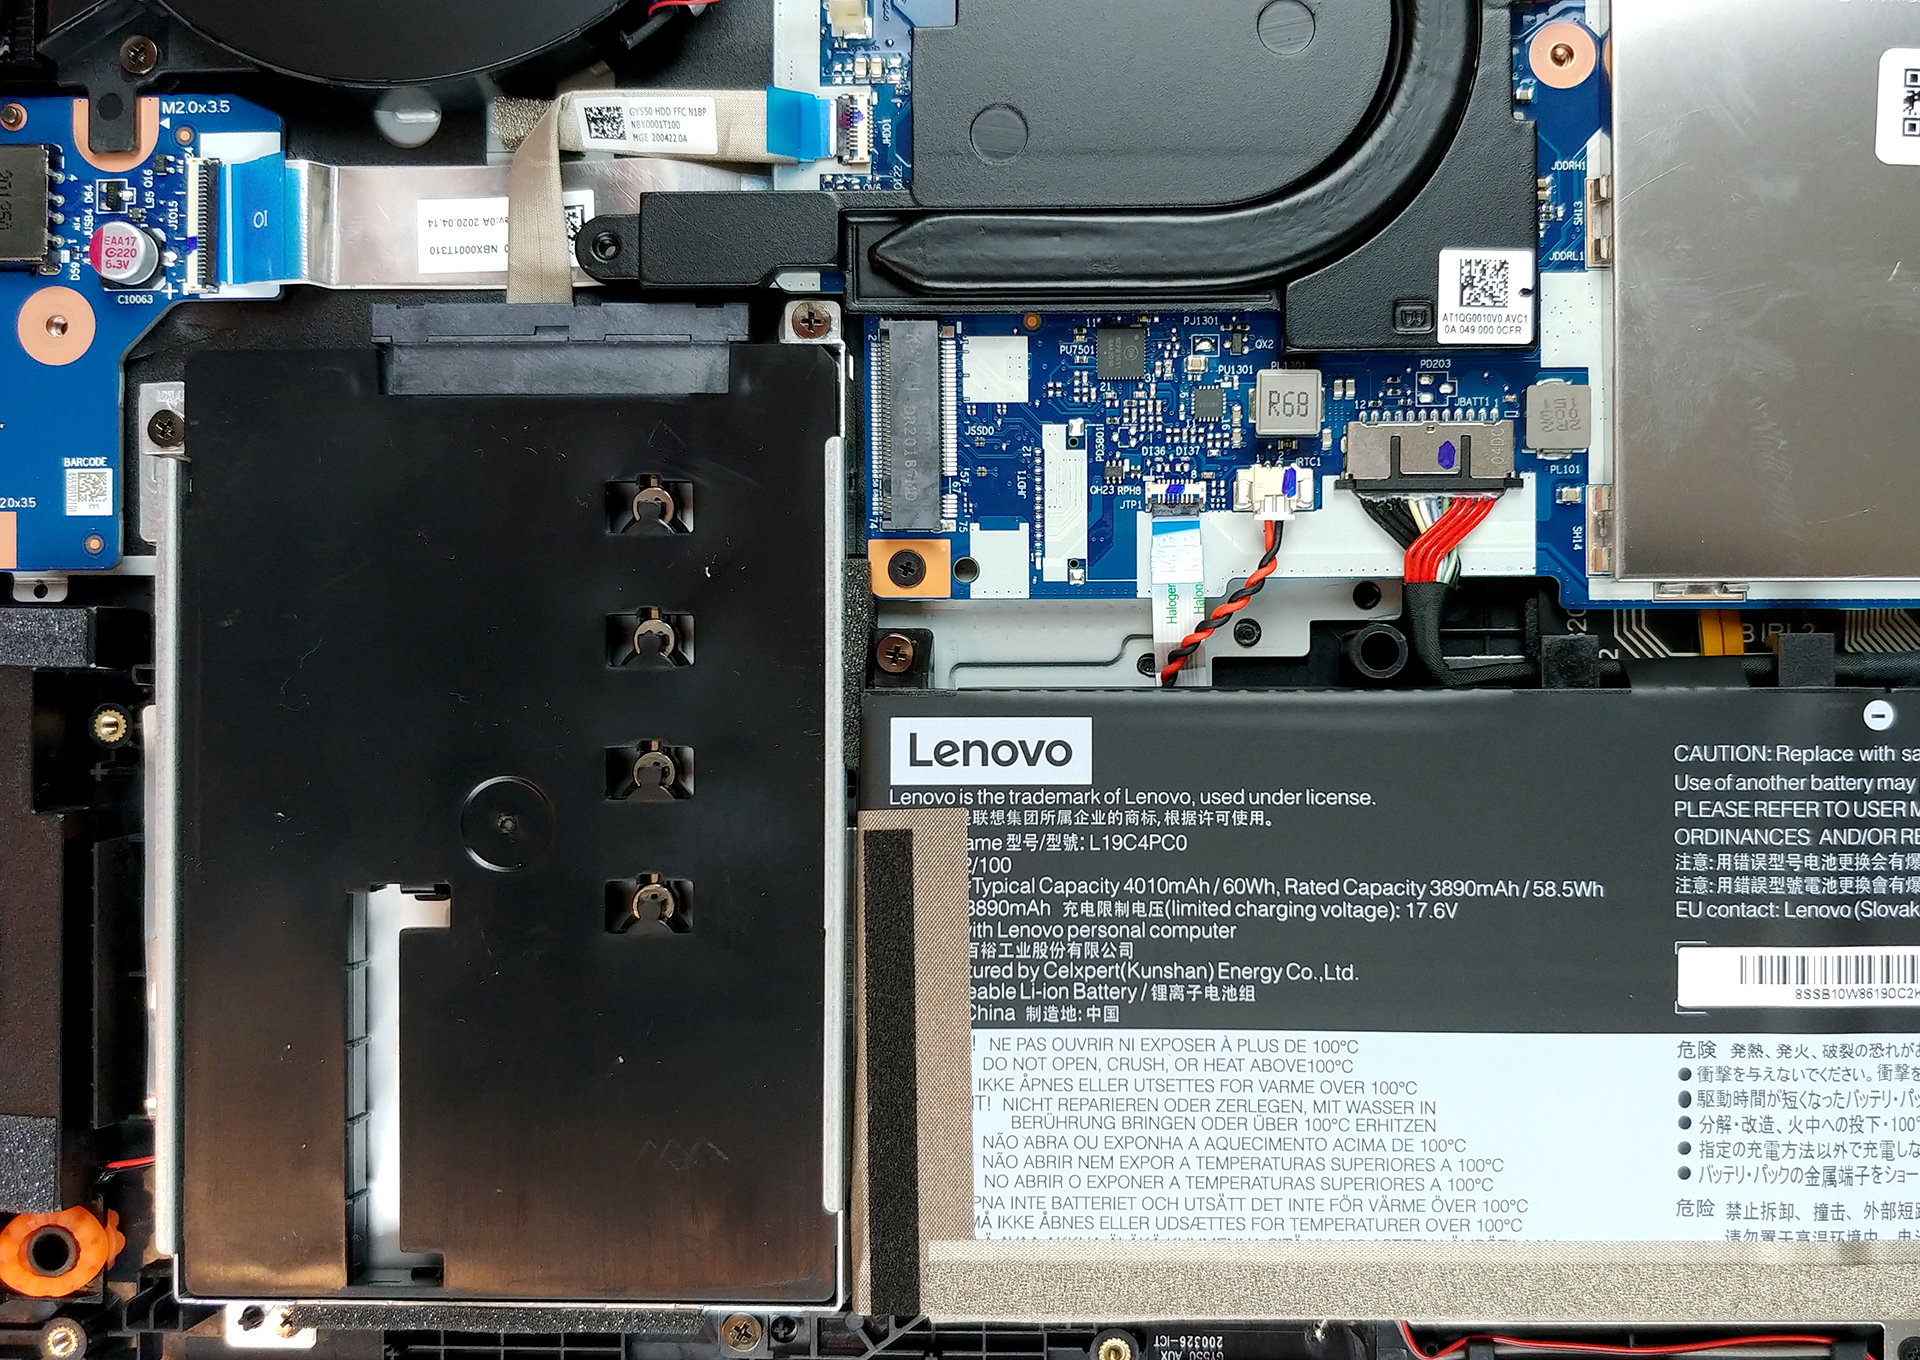
2. Battery
How about the battery? Well, Lenovo sells the Legion 5 with two options – a 60Wh and an 80Wh one, as our particular unit features the smaller of the two.

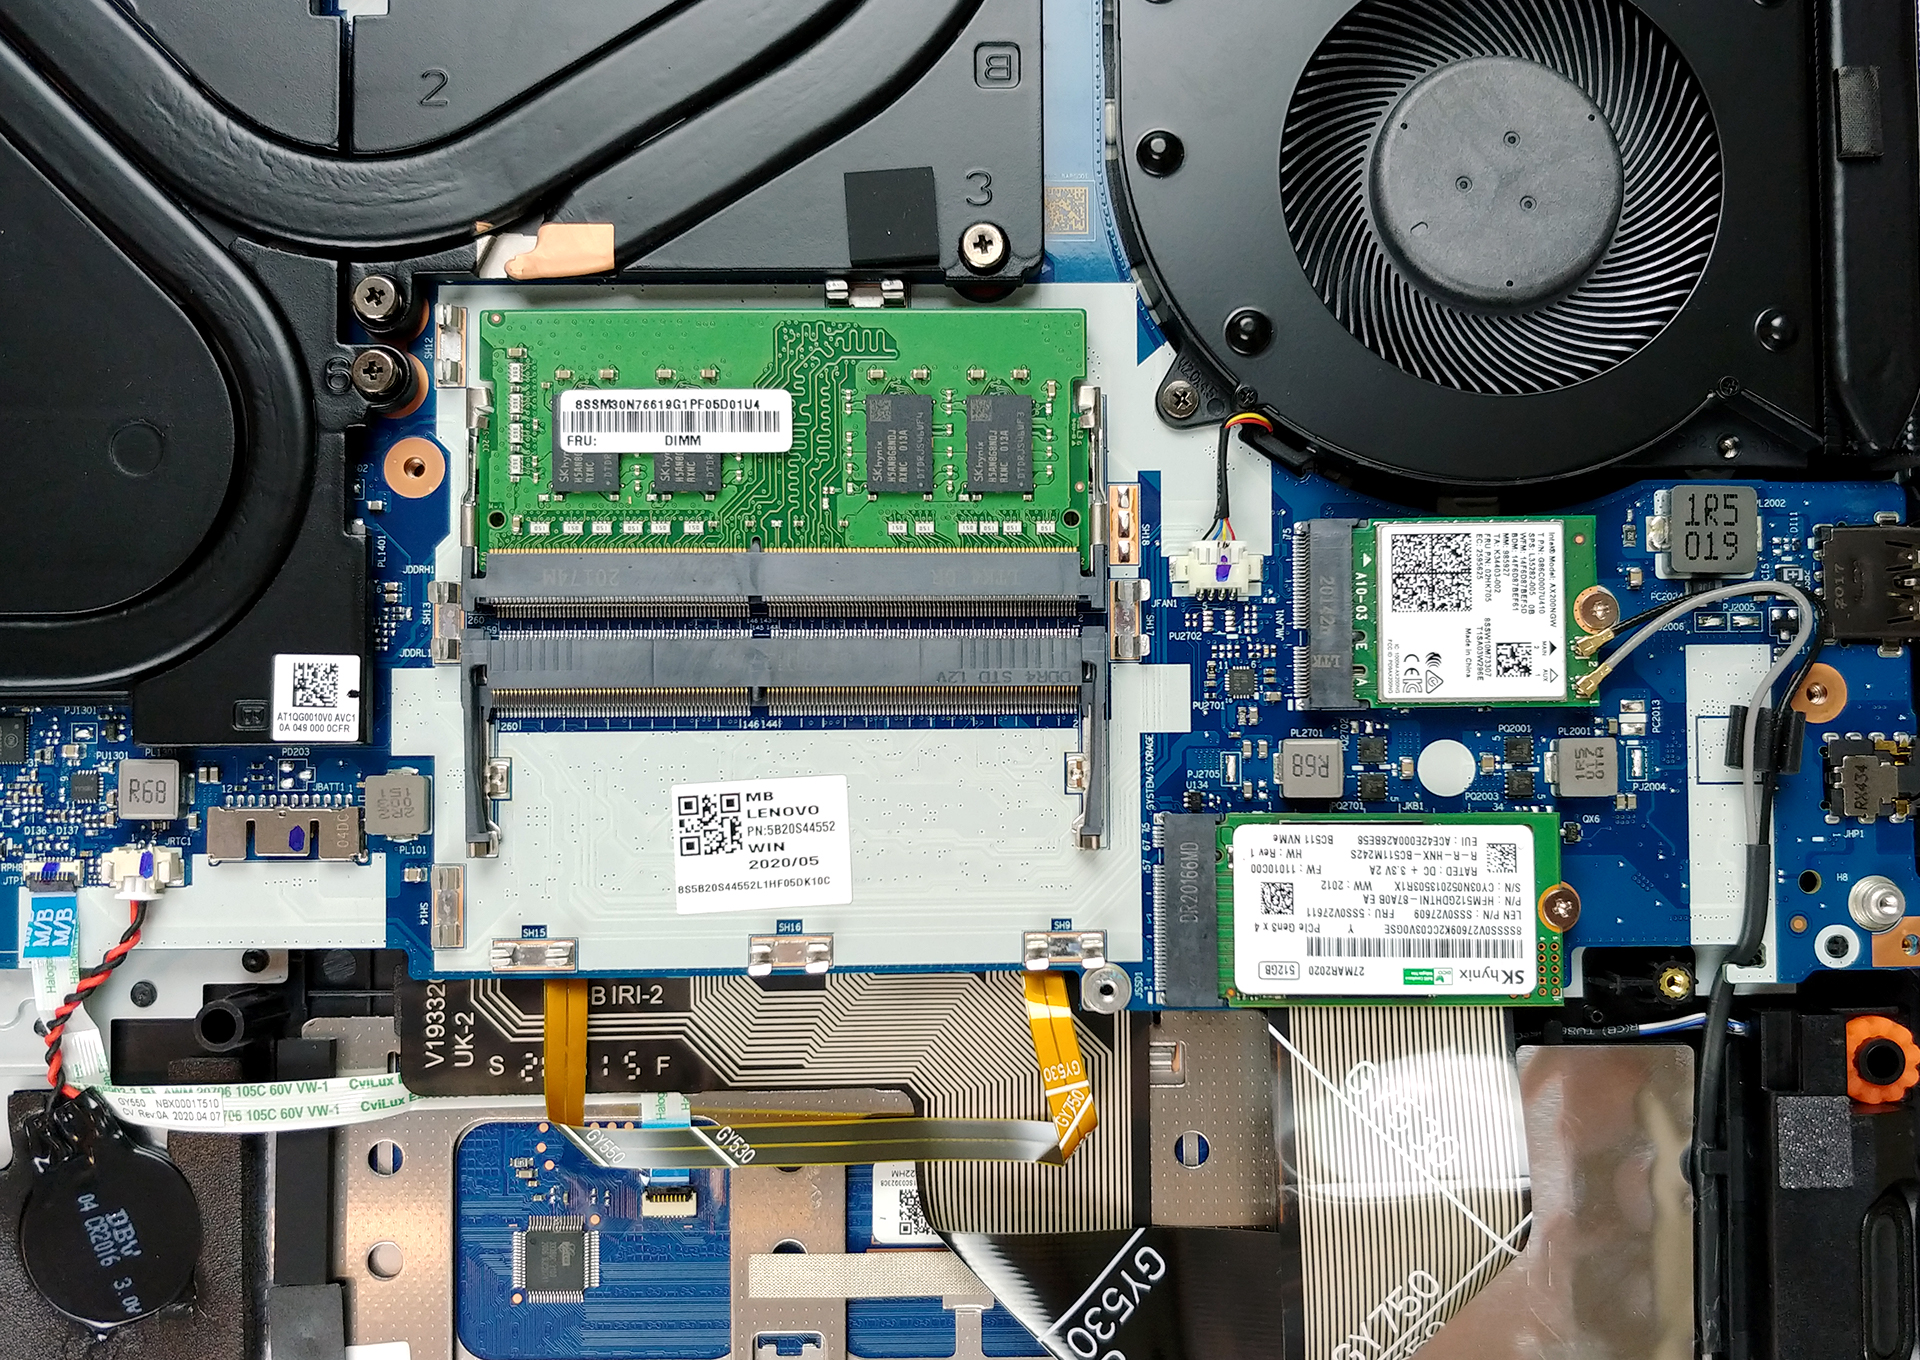
3. Memory and storage
As far as the upgradability goes, there are two RAM SODIMM slots. According to Lenovo, they sell the notebook with a maximum of 16GB of DDR4, working at 3200 MHz in dual-channel mode. However, we are pretty positive that it can hold up to at least 32GB in total. In terms of storage, there are two M.2 PCIe x4 drive slots (one of which is blocked by the 2.5-inch SATA drive and we are not really sure it works.
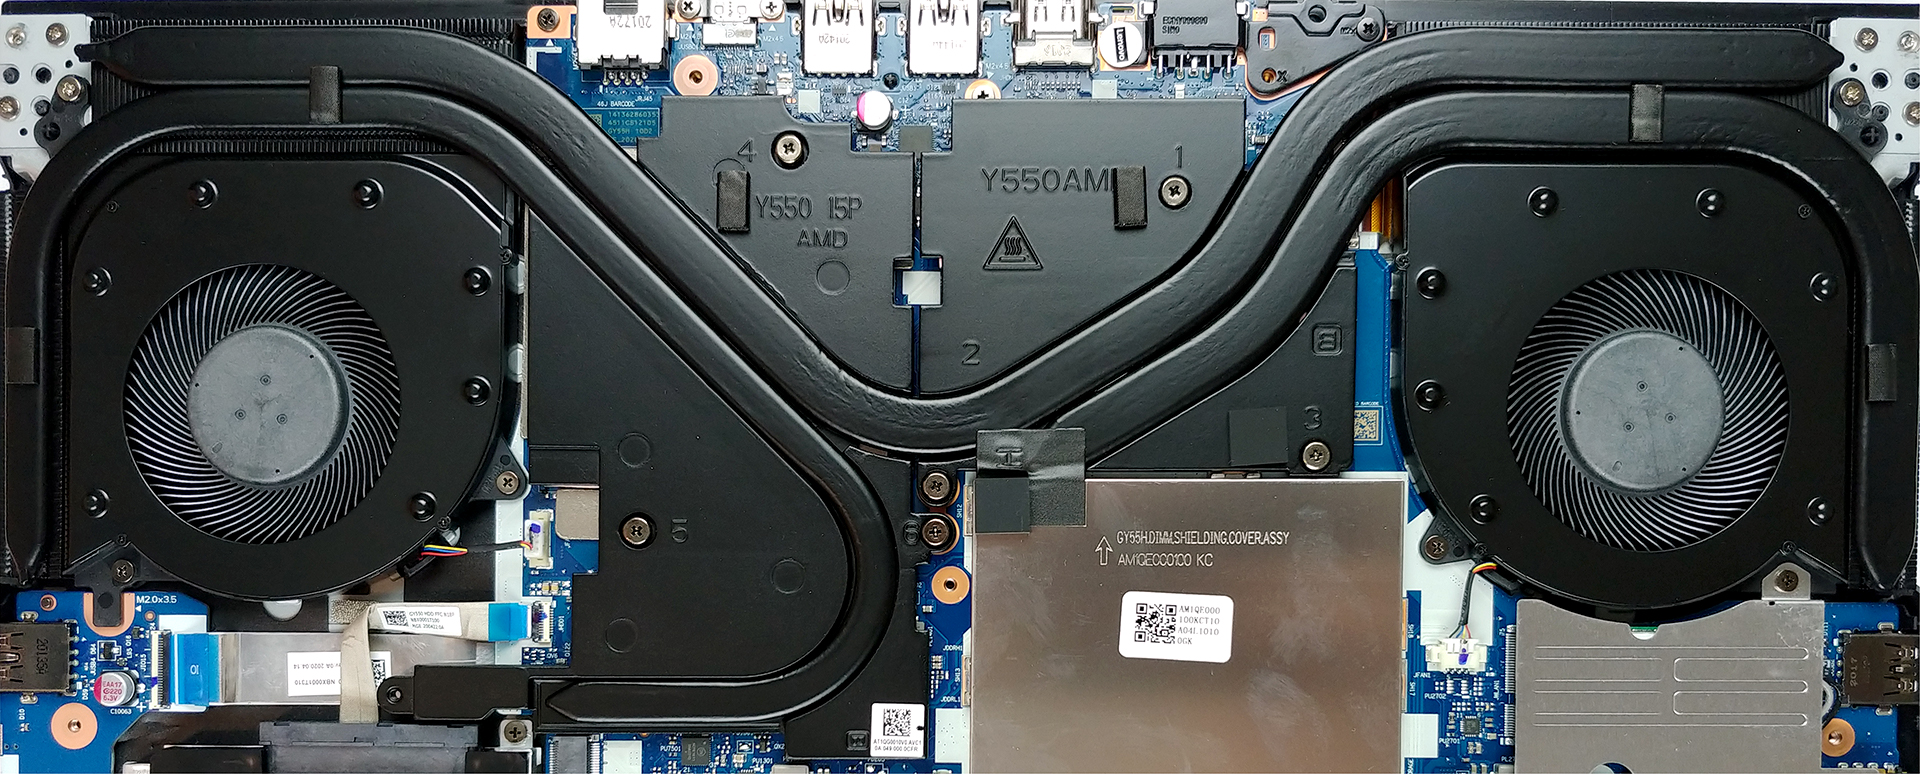
4. Cooling system
Cooling-wise we see two big metal plates, covering the VRMs and the memory modules of the graphics cards. Additionally, there are three heat pipes – one shared between the CPU and the GPU and one more for each of them. Thankfully, there are four heat spreaders, which increases the thermal capacity of the entire solution.
Check out all Lenovo Legion 5 (15) prices and configurations in our Specs System or read more in our In-Depth review.


Can you confirm that it can hold 32gb Ram? This is holding me back from getting one… Please
Yes, it does support 32GB (2*16) 3200Mhz 1.2v So-dimm in dual channel mode.
Are you sure? This document is saying it only supports 16GB.
https://psref.lenovo.com/syspool/Sys/PDF/Legion/Lenovo_Legion_5_17ARH05H/Lenovo_Legion_5_17ARH05H_Spec.PDF
It supports even more than that. I installed a 32g DIMM and have 40. Pretty sure it could support 64 if I had another 32g DIMM
Will 2x16gb 2666mhz DIMM work?
It will.
I have the i7 version with 1660ti and upgraded the Ram with 2 Hyper X DDR4 2933 Sticks and it DOES show up as full 32 GB of ram.
I want to upgrade RAM, does it need to be same manufacturer as other ram, or just need to add other 8gb ddr4 3200mhz?
Any company is okay. Maybe crucial?
Can I add 16 GB DDR4 2666 MHz along with existing 8 GB DDR4 3200 MHz (which is clocked to 2933 MHz)?
Is it possible to upgrade the gpu? 1650 to 1660ti?
Nope.
Is the cpu soldered on?
Are you able to upgrade the cpu?
have you tried in anyway to use the m.2 second slot?
Are the two different batteries the same in physical size?
are there any graphics card upgrades? in the amd version.
Is it important for the ram to be CL19 or CL 22? Which one should I get, or it is the same?
lower cl is batter. if you have two different cl ram installed, motherboard will make them both work in the higher cl
I tried to add a new hdd 2.5 inch to my legion 5, but i cant fully close the laptop after that, like hdd height is too much, its height is 9.5mm, so i don’t know what’s the problem, hdd is pushing the chassis from fully closing!
Needs to be a 7mm high, 2.5″ HD or SSD, which limits you to roughly 2TB or less for a mechanical HD. 9.5mm drives are too tall for thinner laptops.
In terms of the second m. 2 slot, it works, but you have to choose between using a it or the HD. Same for the battery. If you go with the larger battery, you loose access to the HD bay, so no mechanical HD or full size ssd. But can do dual m.2s with the larger battery.
can i have two sata discs inside the computer with each 1terrabyte ?
I can confirm, the second NVMe m.2 slot works.