Inside Dell XPS 15 7590 – disassembly and upgrade options
As of now, this is Dell’s flagship workhorse computer. In the past several years, the company has done little to change its design, but how are things on the inside? Let’s find out!
Check out all Dell XPS 15 7590 prices and configurations in our Specs System or read more in our In-Depth review.
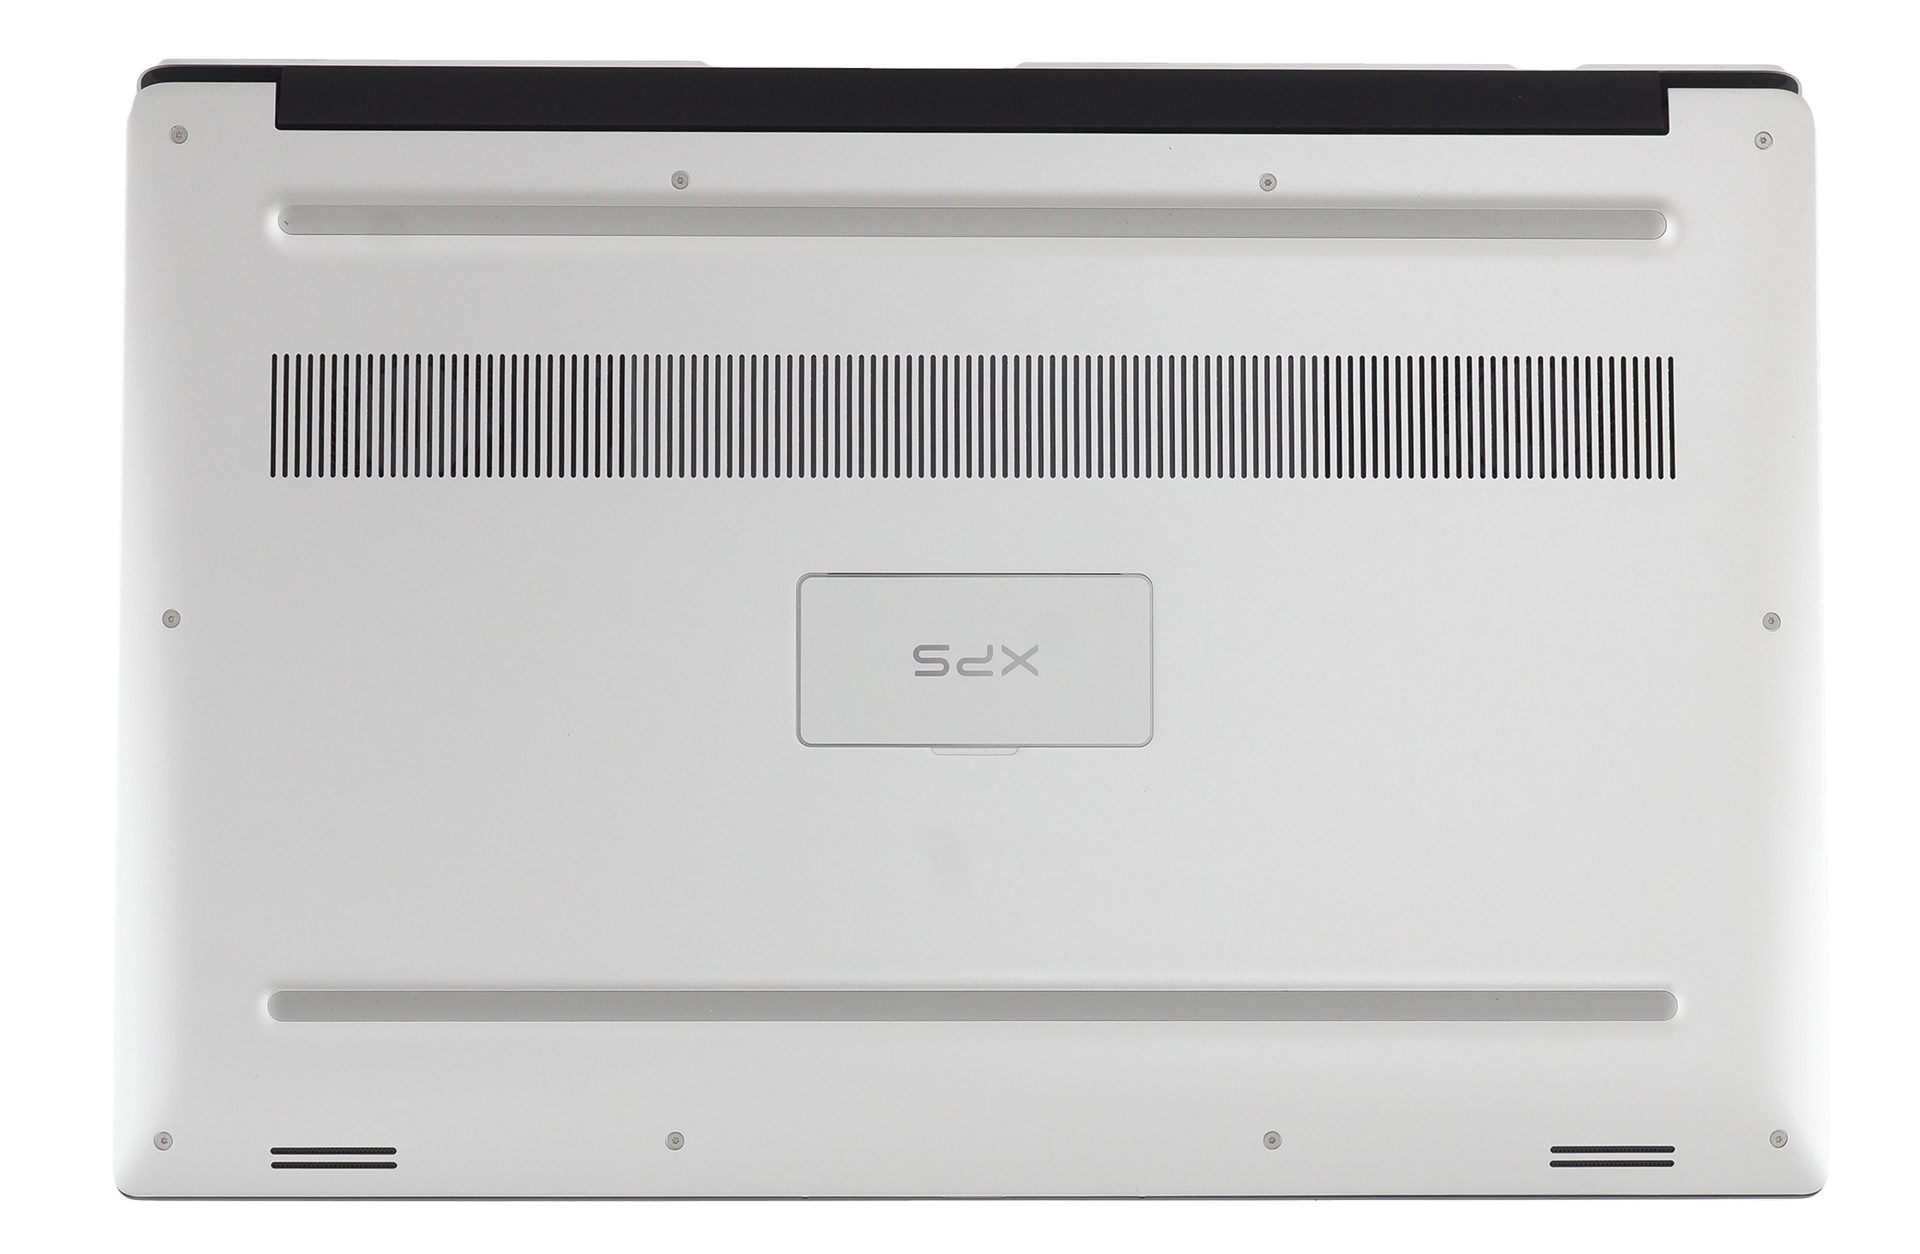
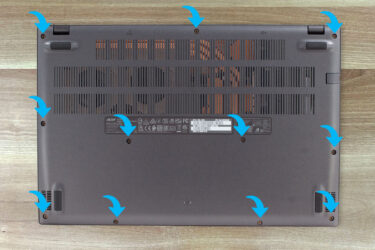
1. Remove the bottom plate
In order to access the internals of this notebook, you need to remove its bottom plate, This can be done by unscrewing all 10 Torx-head screws that you see, and then further two, that are hidden by the “XPS” labeled plate in the middle of the panel. After that, you would want to start the prying process from the backside – around the hinges. This will give you enough force, yet will be the most protective method for the materials.
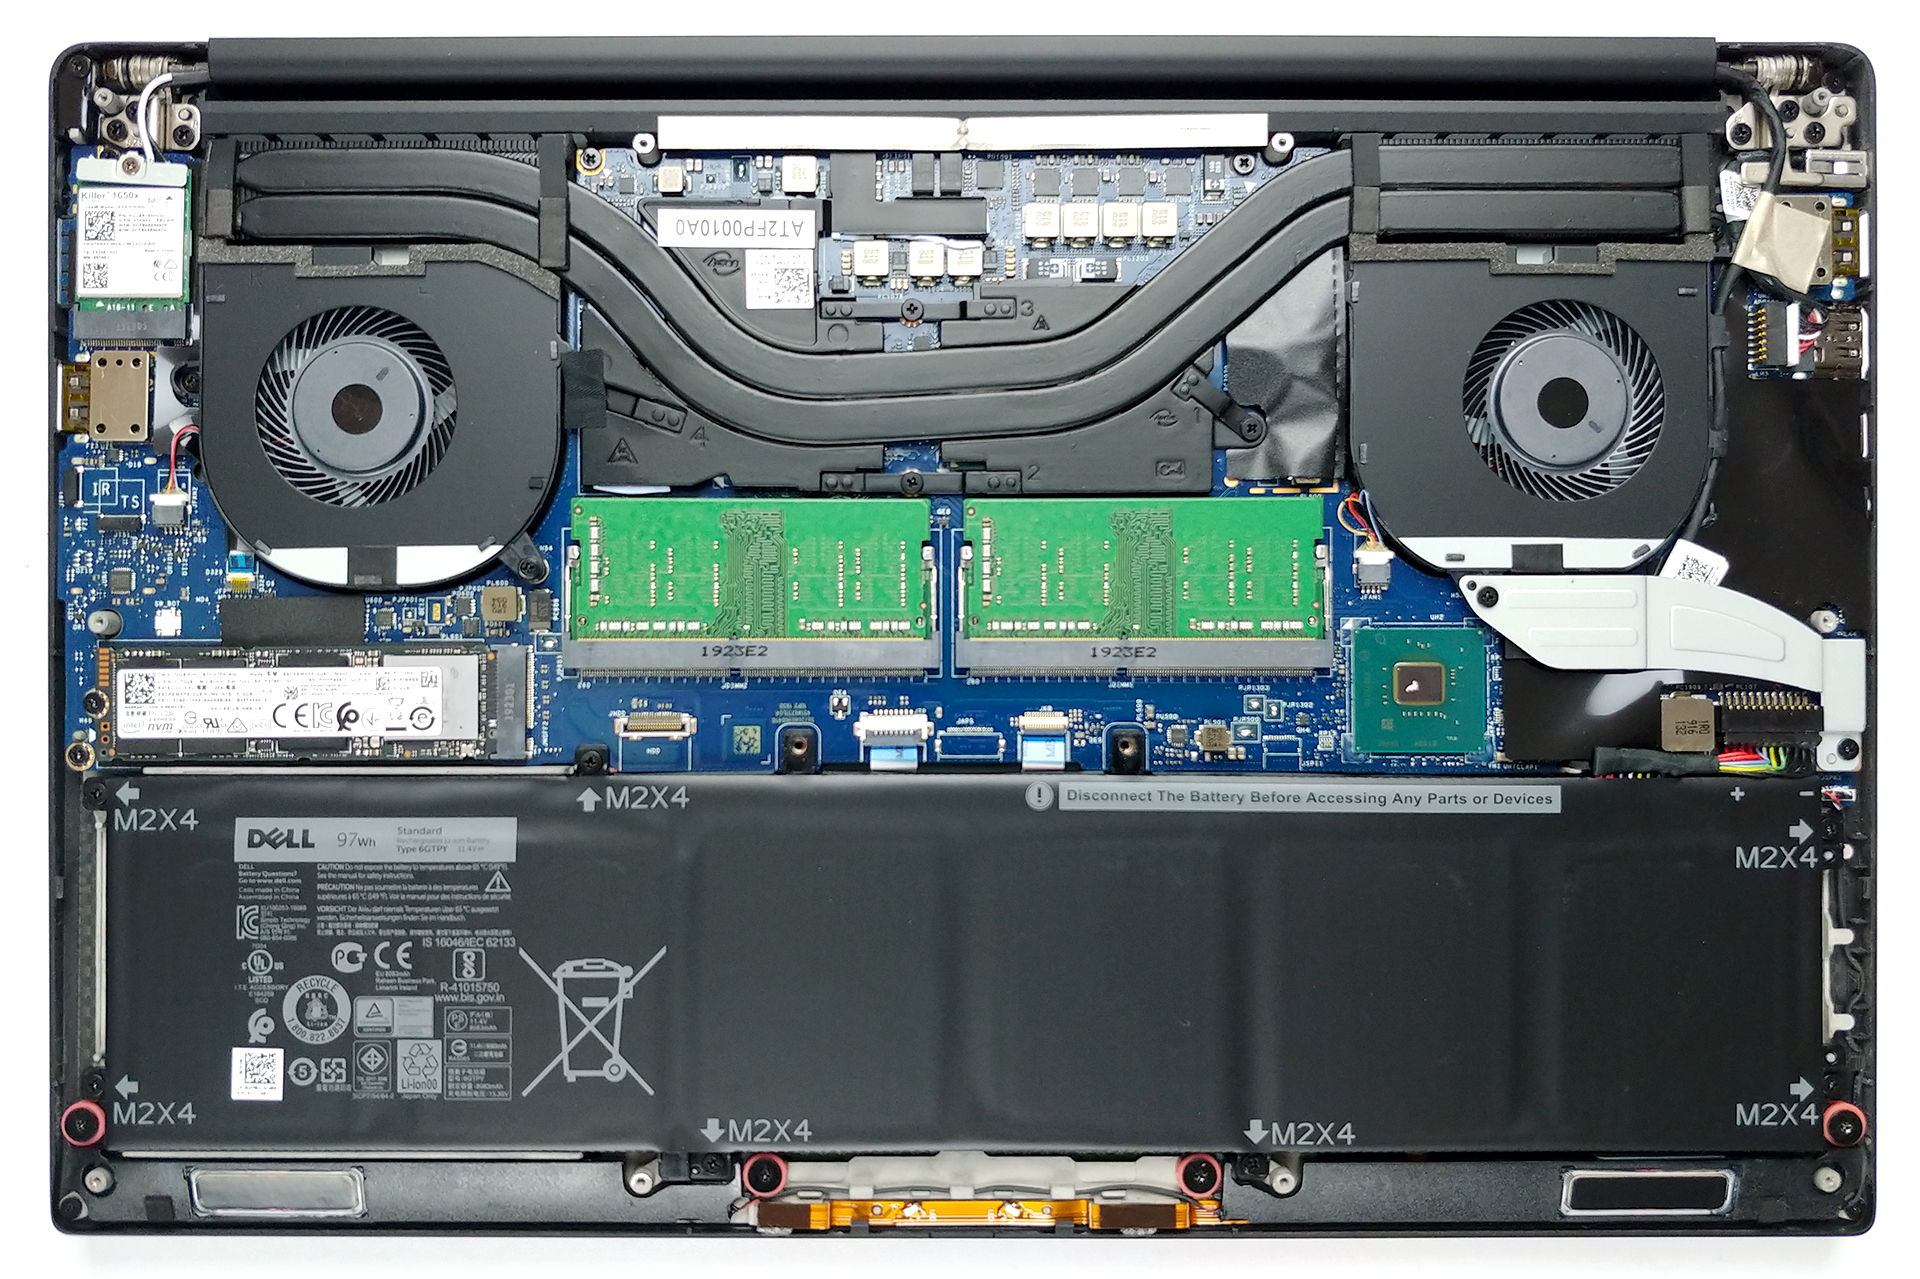
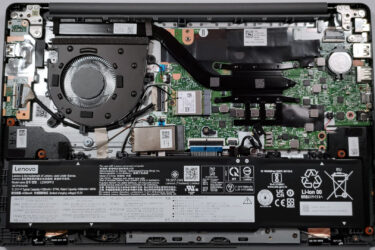
2. Battery
There are two options for the battery – a 56Wh and a 97Wh unit. The device we tested was equipped with the latter so we loose the 2.5″ SATA drive slot.

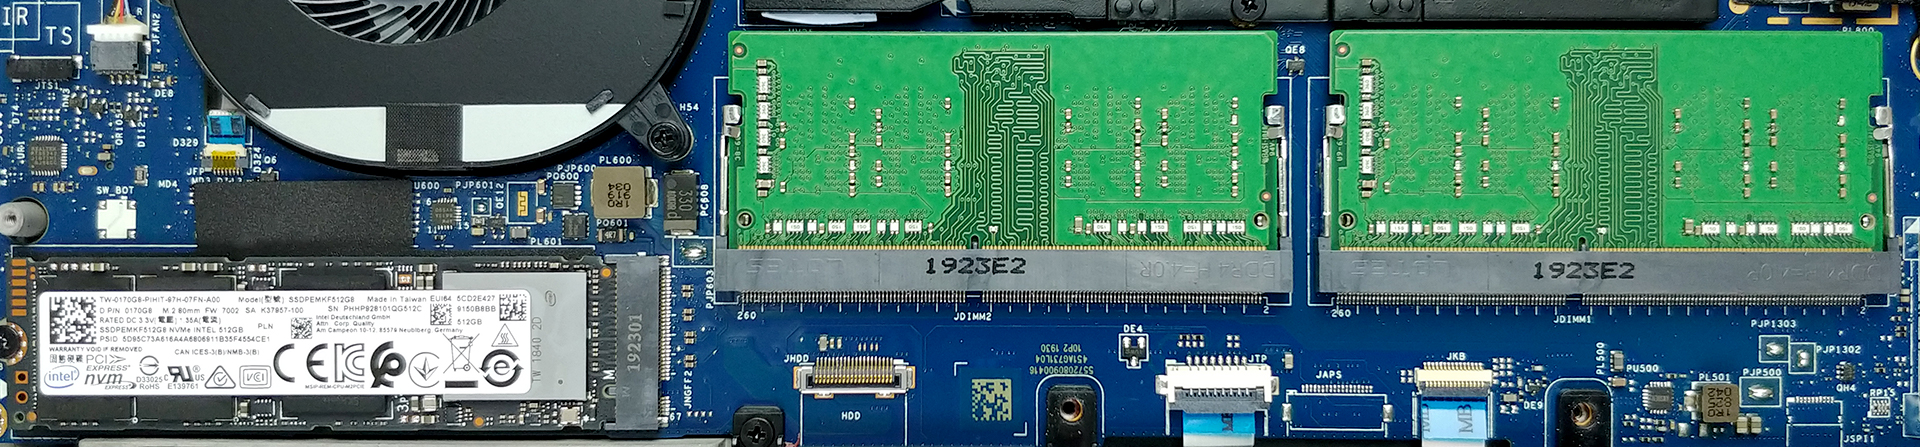
3. Memory and storage
In terms of memory here are two RAM DIMMs, which support up to 64GB of DDR4 2666 MHz memory – that’s 32GB per slot! While on the storage side, there is only one M.2 PCIe x4 slot, that supports up to 2TB drives.
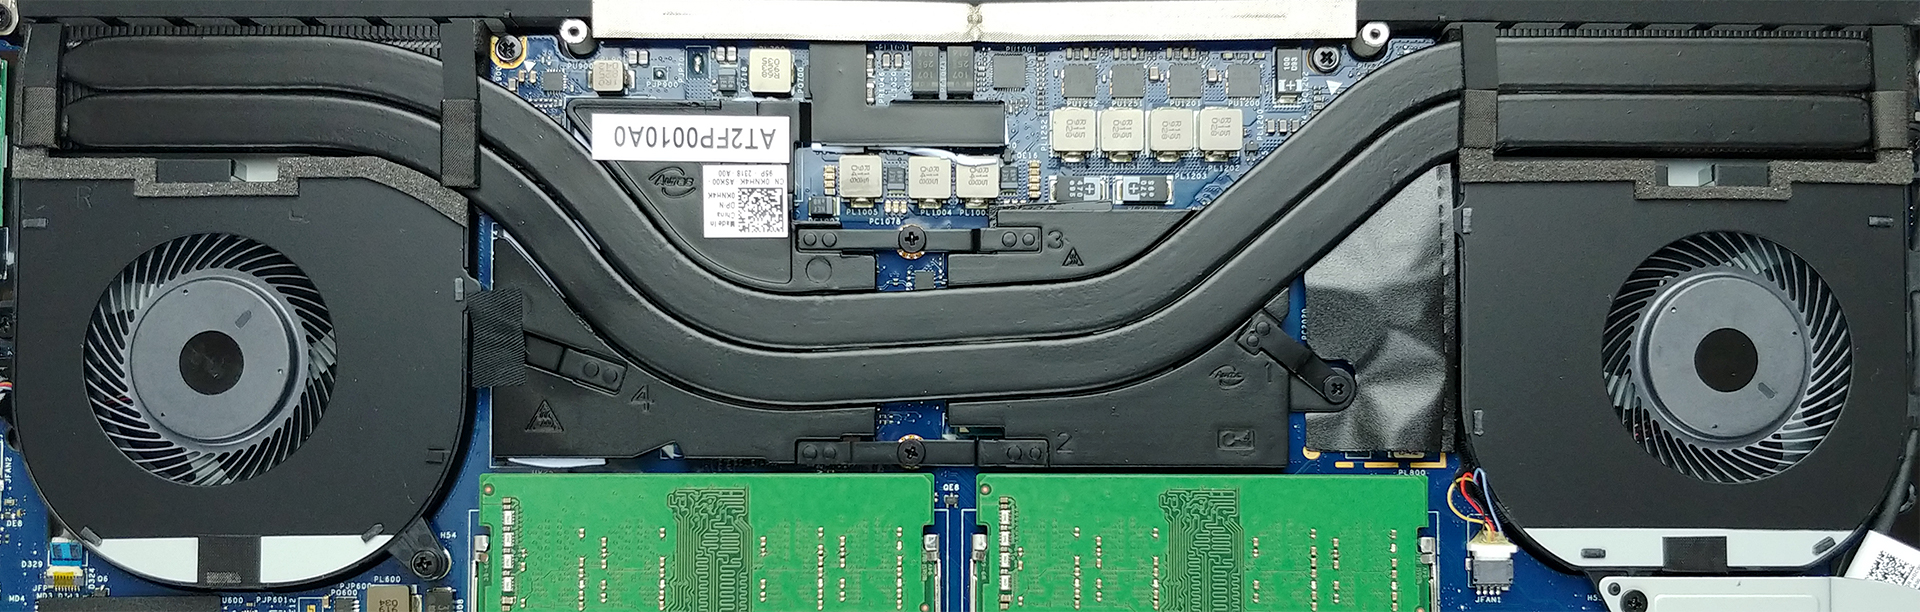
4. Cooling system
The cooling solution on the XPS 15 7590 comprises two heat pipes, that cool both the CPU and the GPU. We must say that there are two metal plates put on top of each chip, while the chipset had its own thermal conductive pad that sticks to the bottom panel.
Check out all Dell XPS 15 7590 prices and configurations in our Specs System or read more in our In-Depth review.


The 2TB SSD limit is it tested or just copied from DELL?
Because I read from about people testing 4TB NVMEs https://www.reddit.com/r/Dell/comments/e8l0jx/xps_15_7590_compatible_with_4tb_nvme_ssd/
and
https://www.crucial.com/compatible-upgrade-for/dell/xps-15-(7590)