Inside ASUS X509 – disassembly and upgrade options
ASUS X509 has a surprisingly good looking externals. However, on the inside, we saw some indications of cost-cutting.
Check out all ASUS X509 prices and configurations in our Specs System or read more in our In-Depth review.
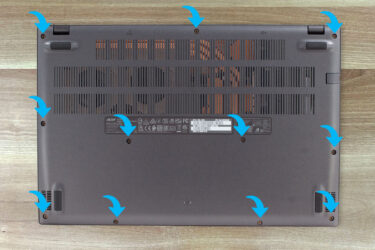
1. Remove the bottom plate
There are a total of 10 Phillips-head screws holding the bottom panel. In addition to that, there are some clips, that have to be popped with a plastic tool. Keep in mind that the material here is not of the best quality, which ultimately means you can damage the laptop quite easily.
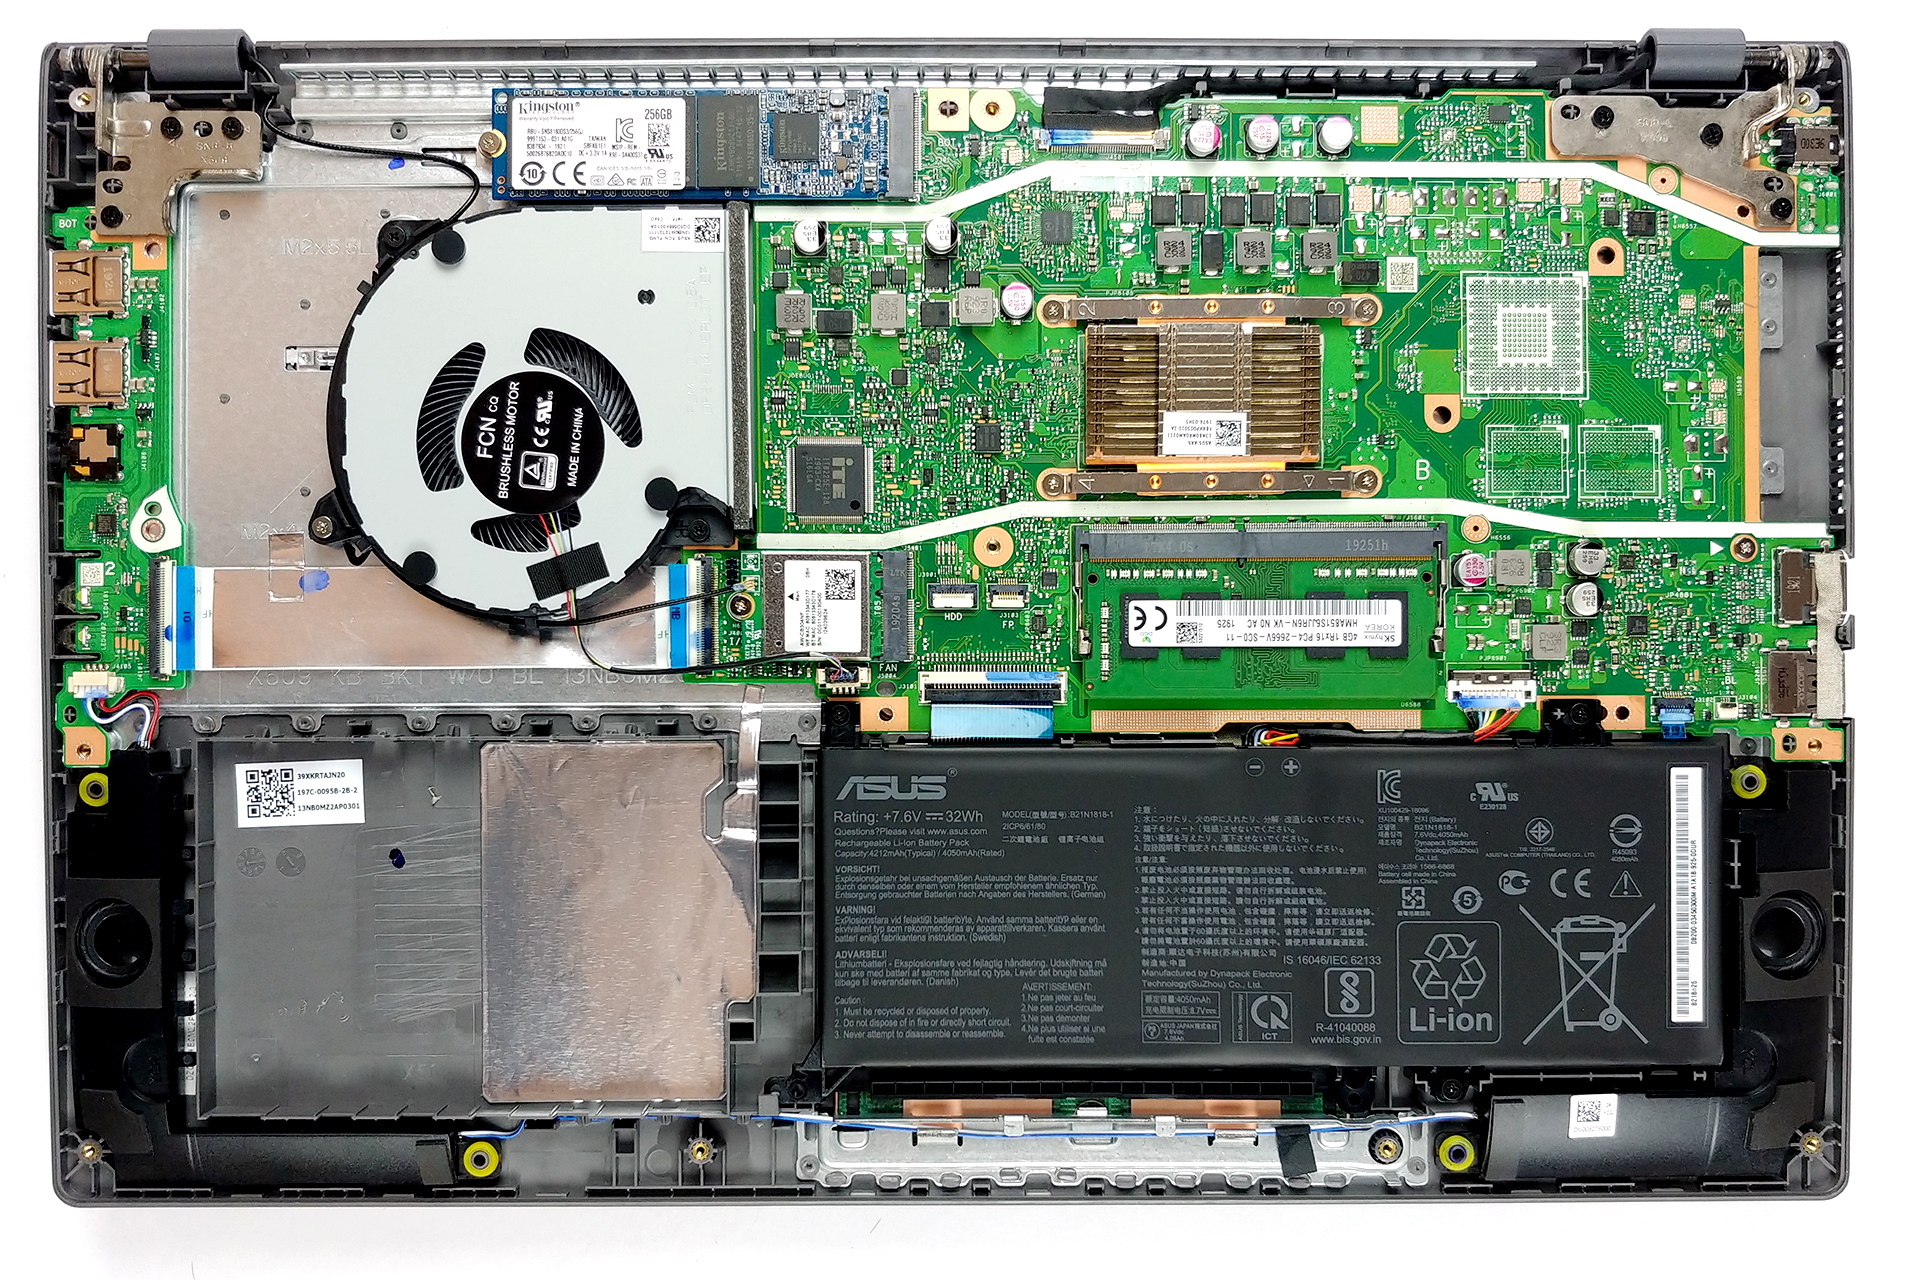
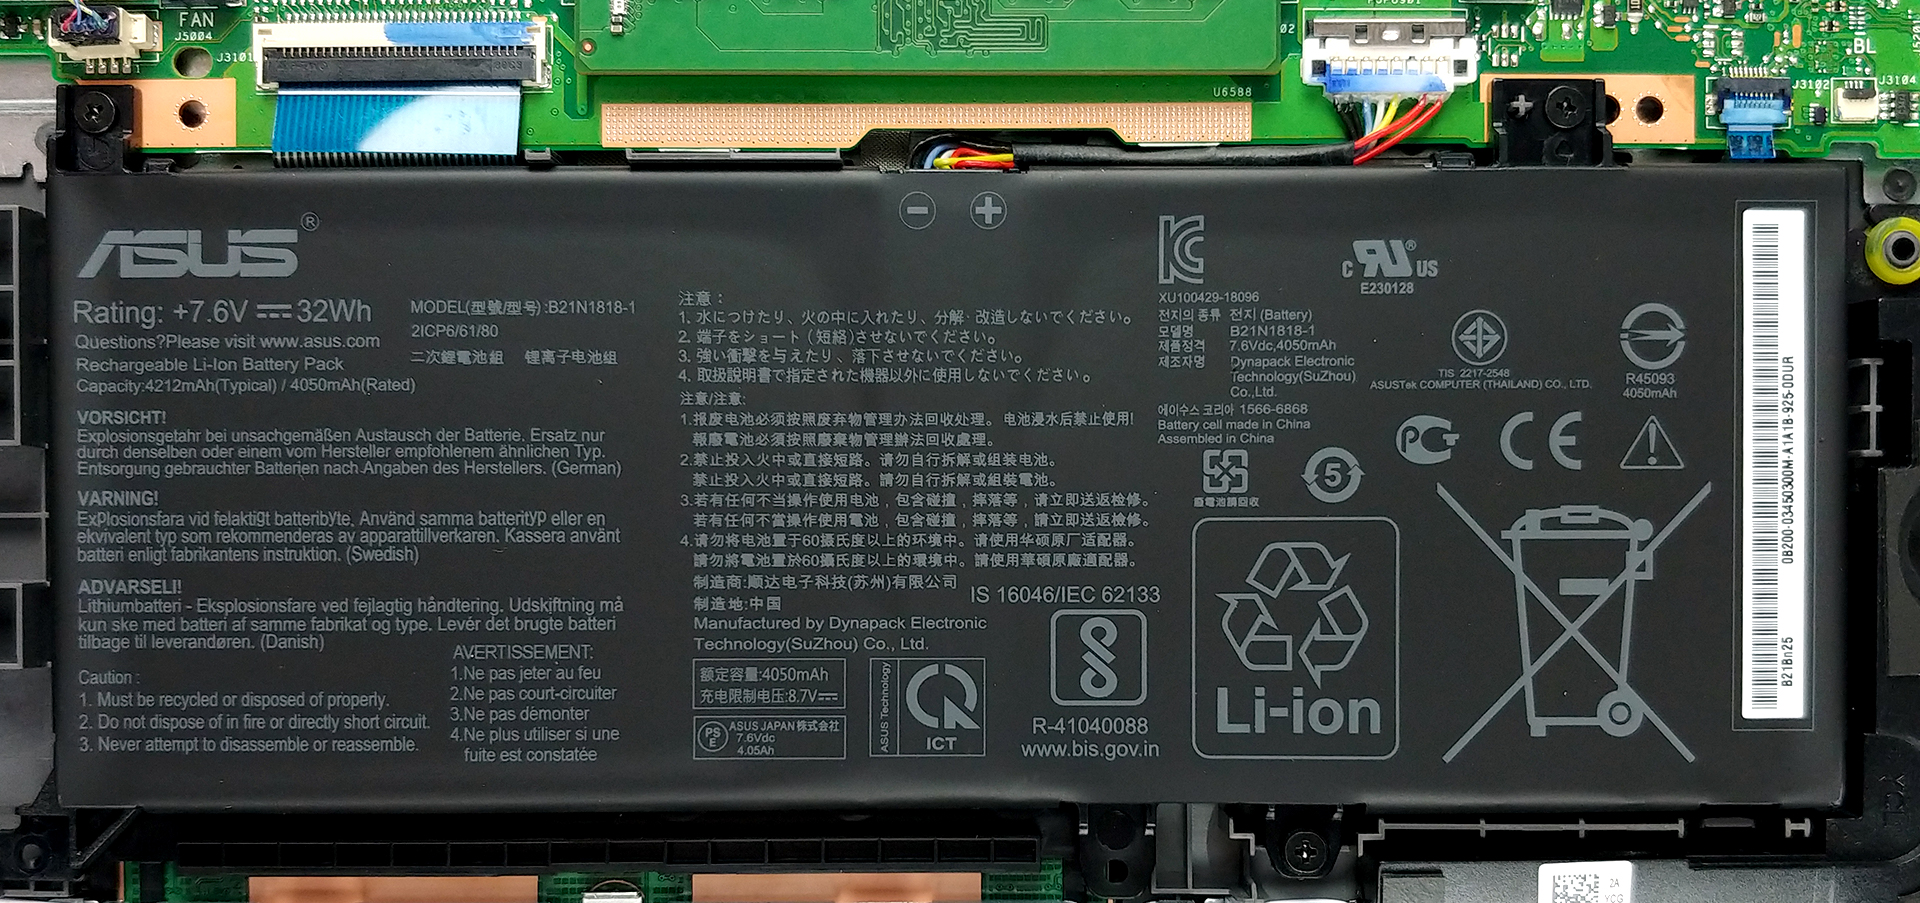
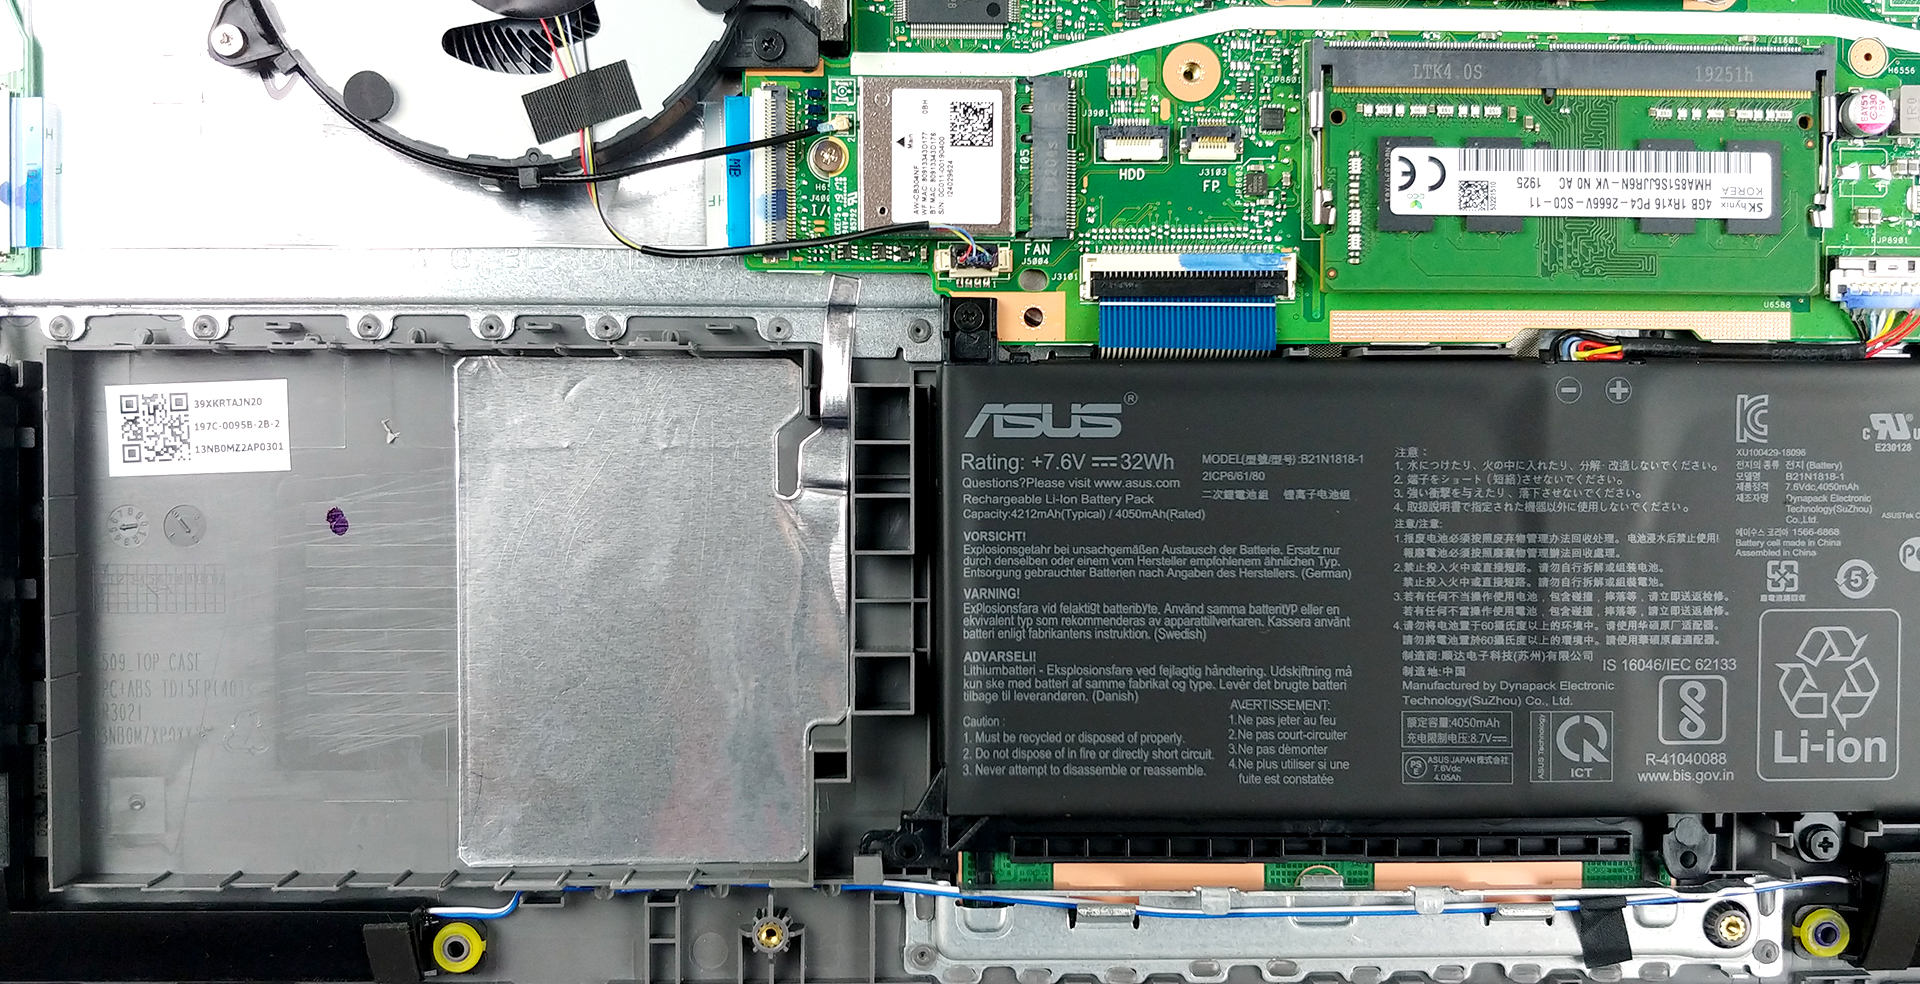
2. Battery
On the other side, the battery is extremely easy to be removed. There are three Phillips-head screws that lock it in place. As of the unit, itself, it has a 32Wh capacity, which is disappointing for a 15-inch notebook.
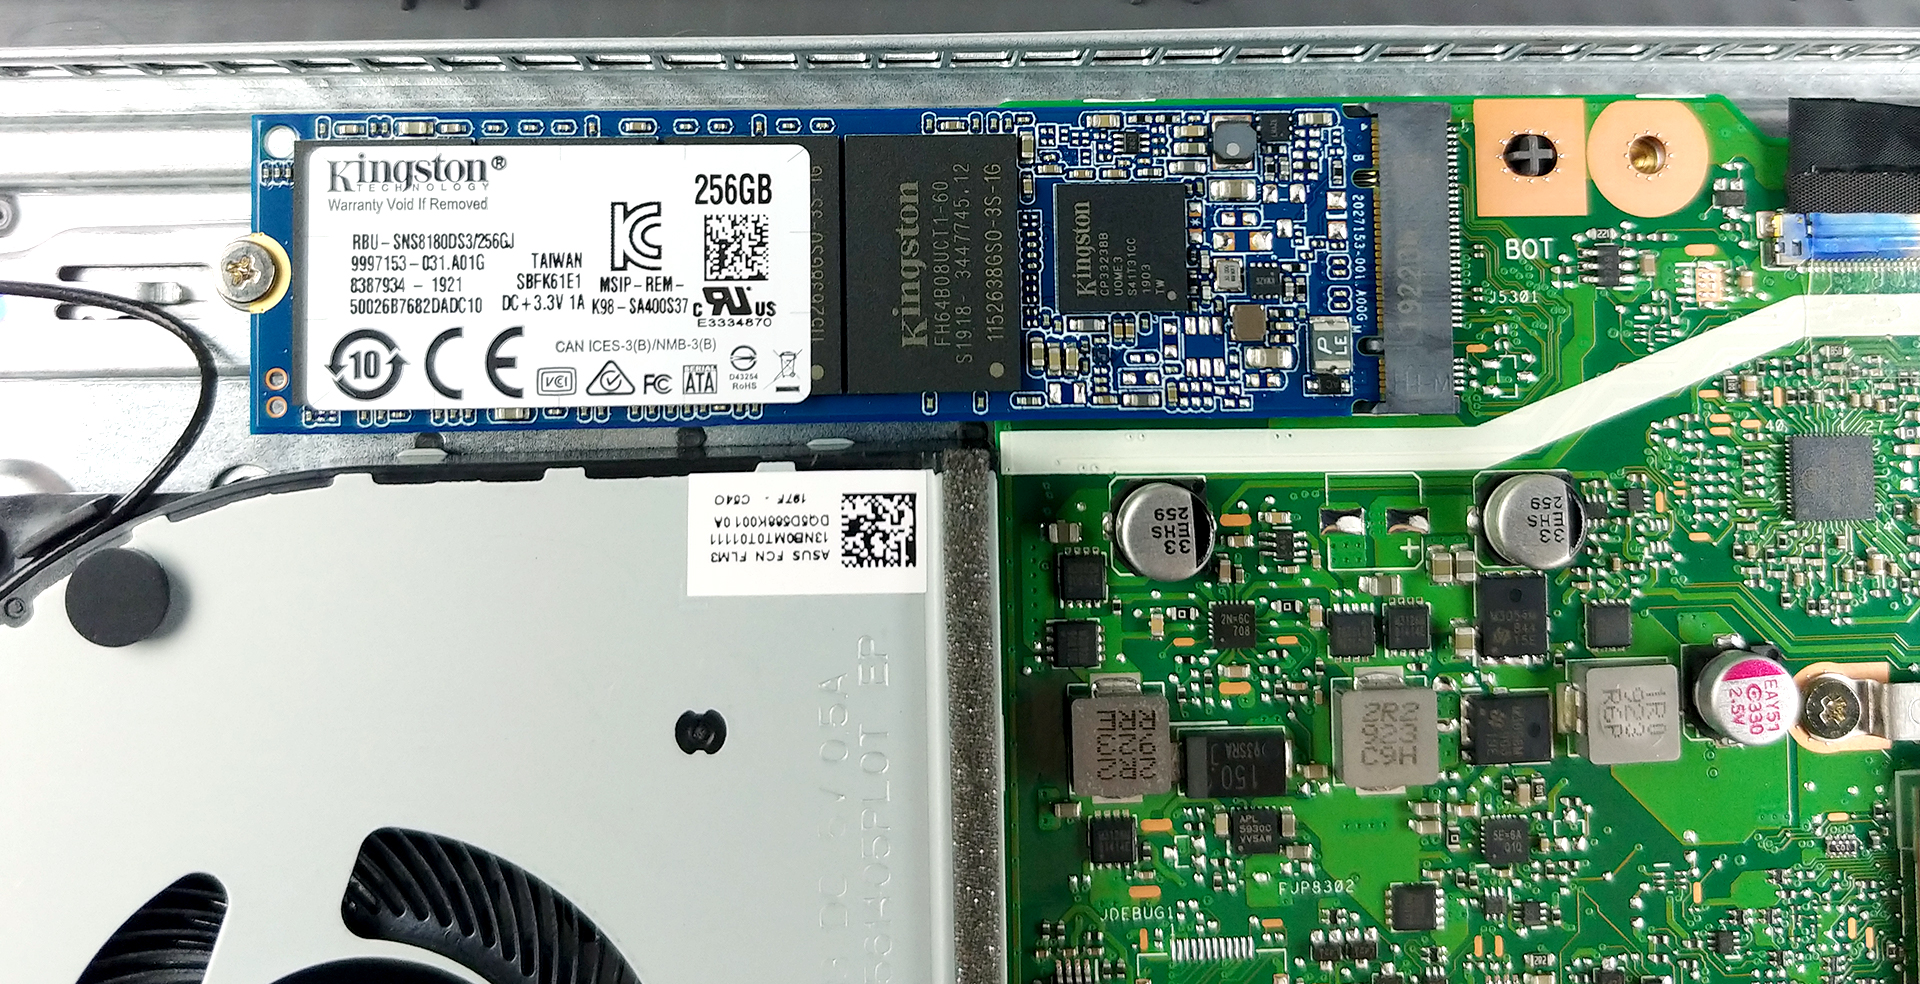
3. Memory and storage
As far as upgradability is concerned, this laptop is pretty strong. While there are 4GB of RAM already soldered to the motherboard, there is also one RAM DIMM that can add up to a maximum of 16GB of memory. Additionally, on the top side of the machine, you can find an M.2 PCIe x2 slot, while the 2.5″ SATA slot is located on the bottom right.
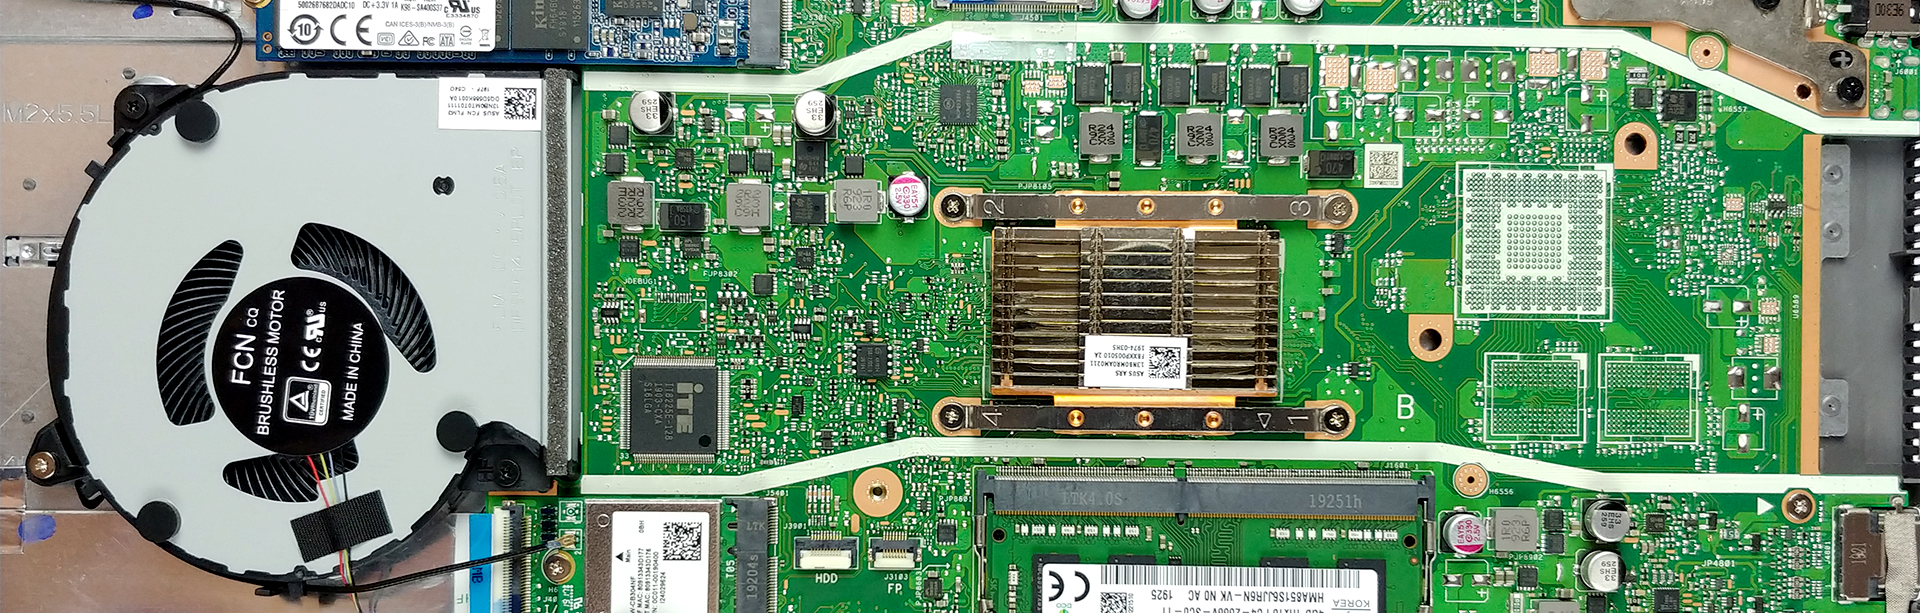
4. Cooling system
In terms of cooling, the X509 features a bizarre execution. There are no heat pipes, but just a little heat spreader placed right on top of the processor. Then, air is blown towards it, while plastic rails on the bottom plate guide the airflow from the fan, through the heat spreader, all the way to the side of the machine.
Check out all ASUS X509 prices and configurations in our Specs System or read more in our In-Depth review.


Hello, any ideea where is the cmos battery or how to reset cmos?
cmos battery inbuild in the battery. how to do laptopcleaningservice under the supervision of expert.
Hi, What is the fp 3103 port next to the ssd port?
Do you mean the HD port? That port is where you plug in an HD cable and plug the other end into a TV or monitor. I have this model and don’t see ANY ports other than the HD port, 3 USB ports, a 1/8″ headphone/aux audio output port and the AC port where the charger plugs in. FWIW, The ASUS X509J is a total piece of garbage! Mine came with too much forced in, unremoveable, bundled garbage, NO CD-Rom, NO means of reformatting and when a FORCED IN Windows update broke the operating system I have NO way to… Read more »
You… You can check your windows key with a command in cmd
Hello, can i put in this laptop new cpu?
how to clean the laptop.
its always done under the supervision of an expert (laptopcleaningservice)