Inside ASUS VivoBook K570 – disassembly and upgrade options
While the VivoBook K570 is not one of the most user-friendly laptops in terms of upgradability, it doesn’t mean that it is impossible to upgrade it yourself. Just make sure you keep track of all the screws and their locations.
Check out all ASUS VivoBook K570 prices and configurations in our Specs System or read more in our In-Depth review.
1. Getting inside
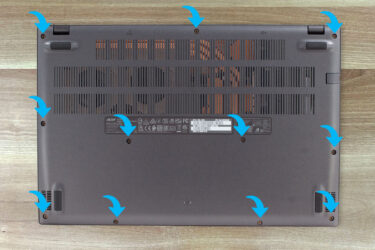
In terms of upgradability, this laptop surely doesn’t feature the most user-accessible design. Naturally, the first thing to do is to remove the bottom panel, right? Well, partially yes. You have to unscrew 11 Phillips-head chaps, and after that, you need to switch the laptop round, open the lid, and pry the entire keyboard deck. After you lift it, carefully detach the keyboard ribbon cable from the motherboard, and you can lift it away.
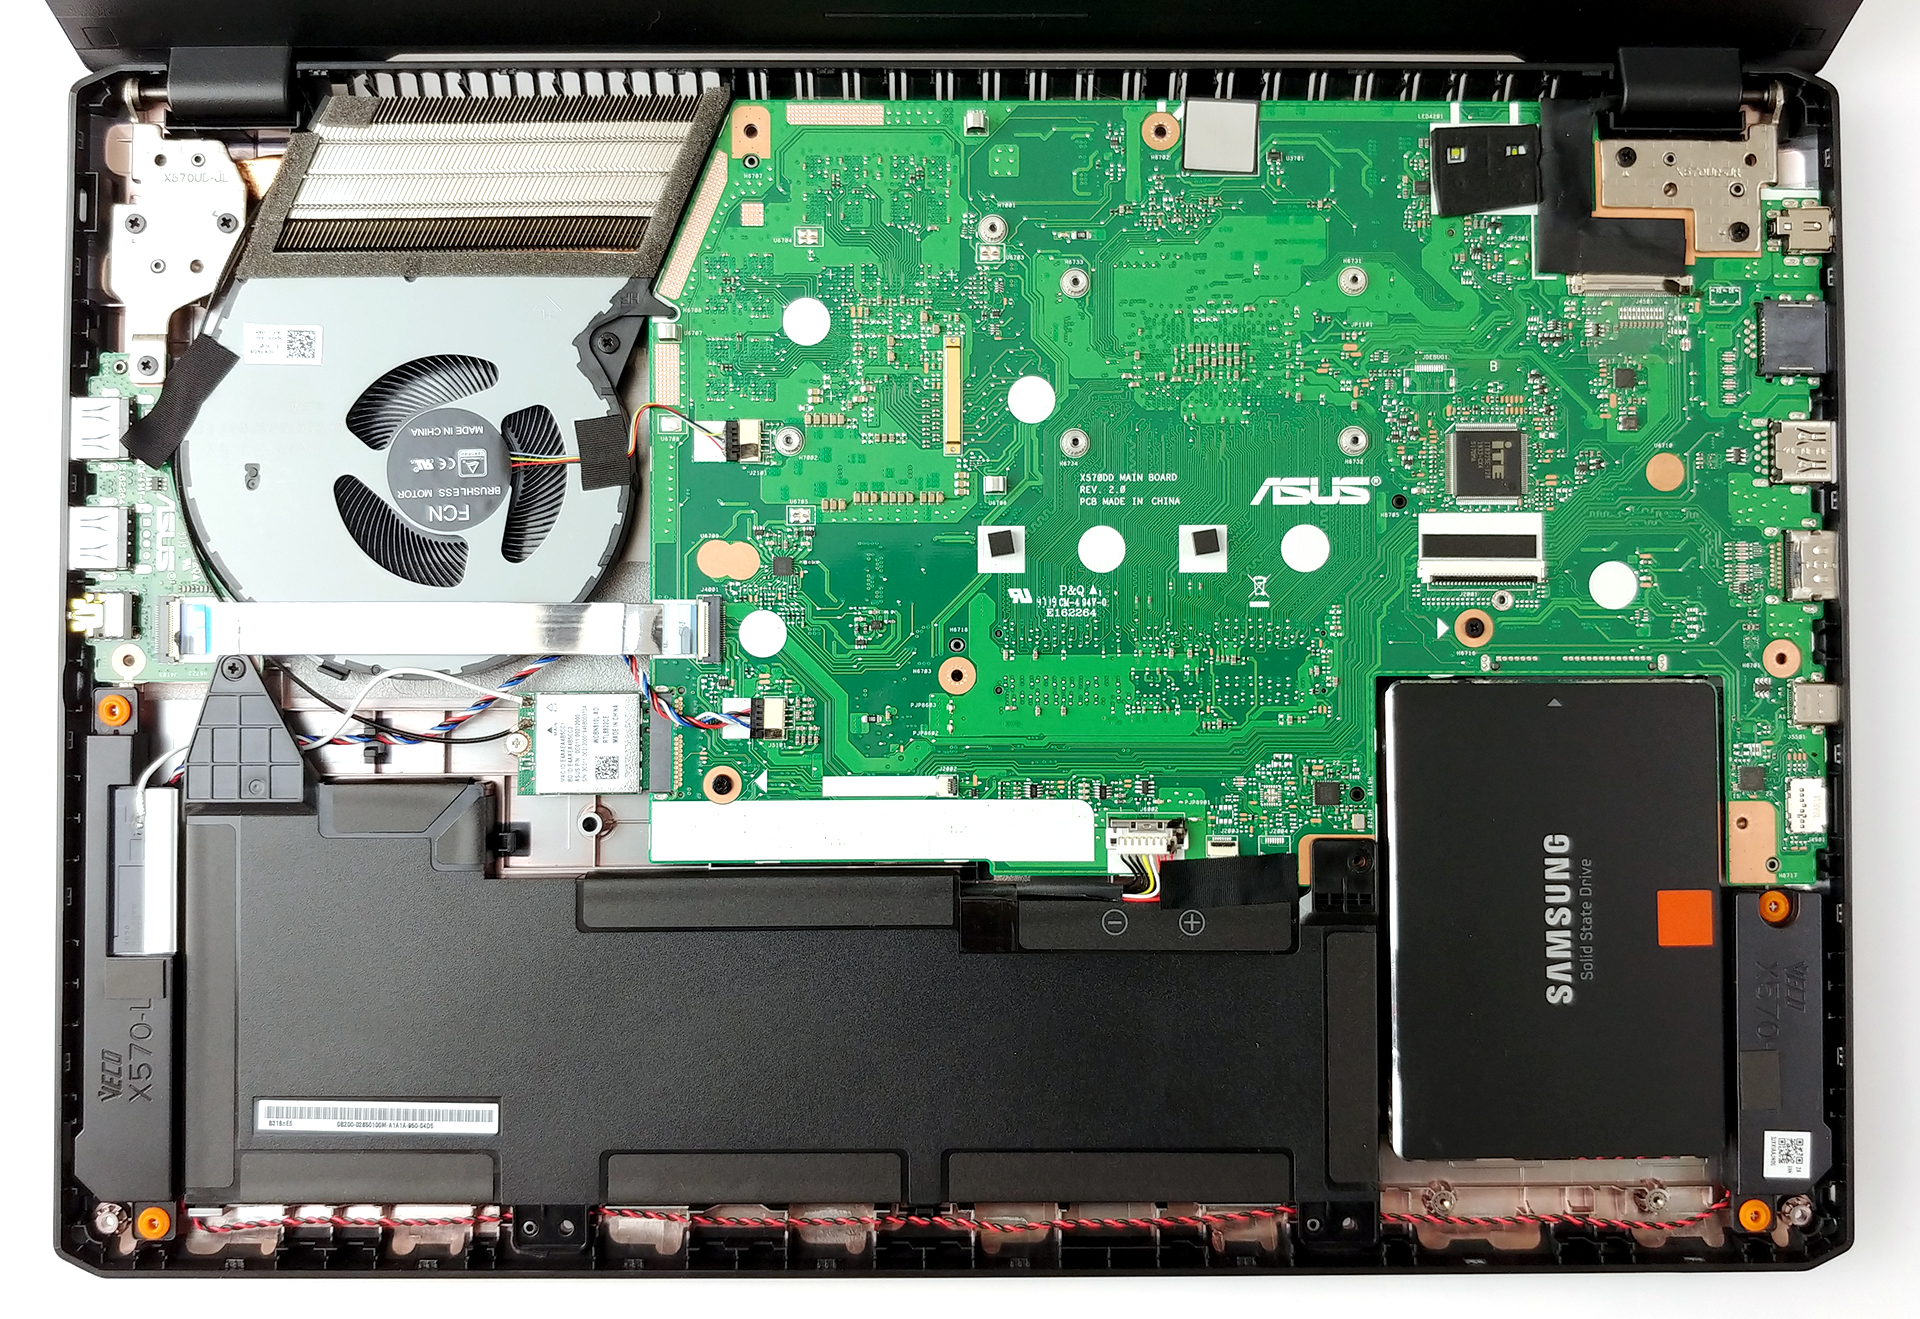
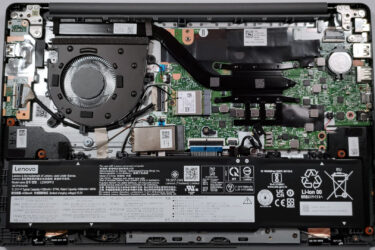
Next, you need to remove the display, the fan, the battery, the Wi-Fi card and only then – you can take the motherboard out. For further instructions please refer to our video above.
2. Battery
This machine is equipped with a 48Wh battery.

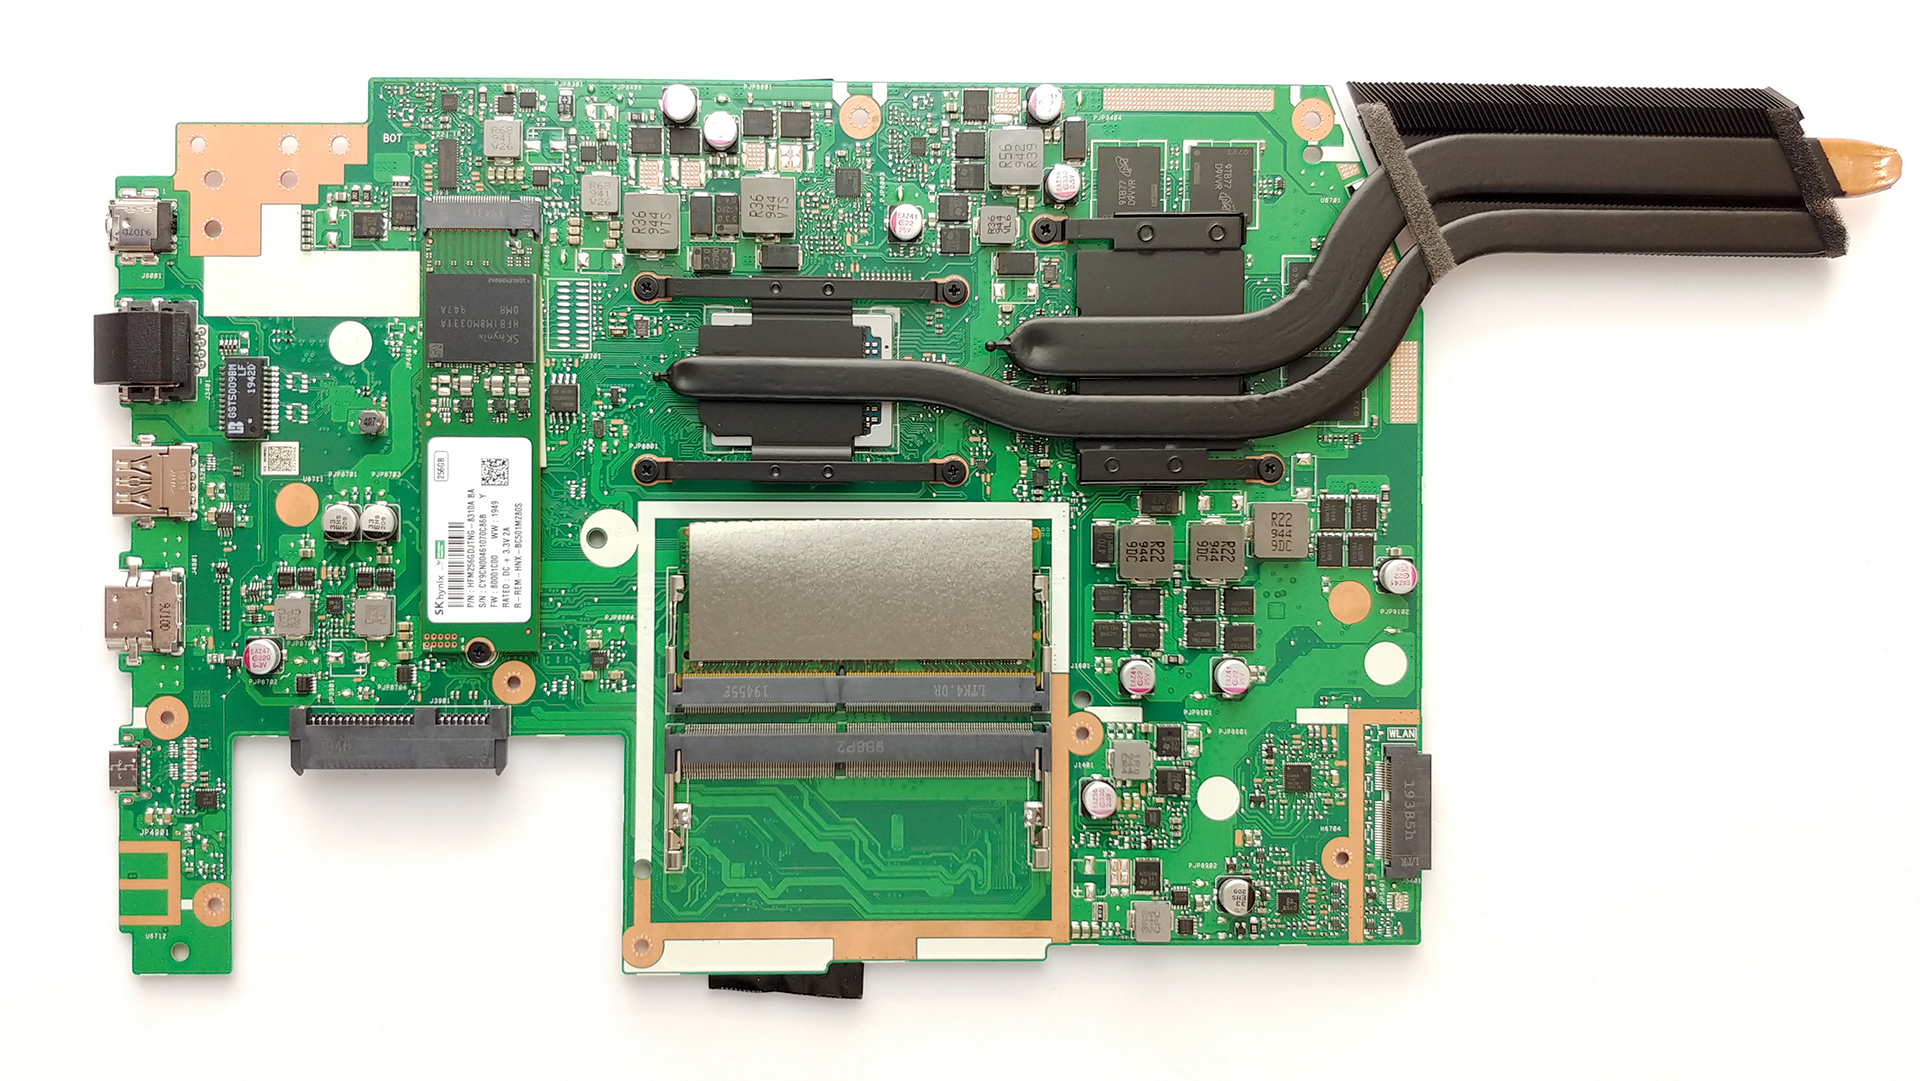
3. Memory and storage
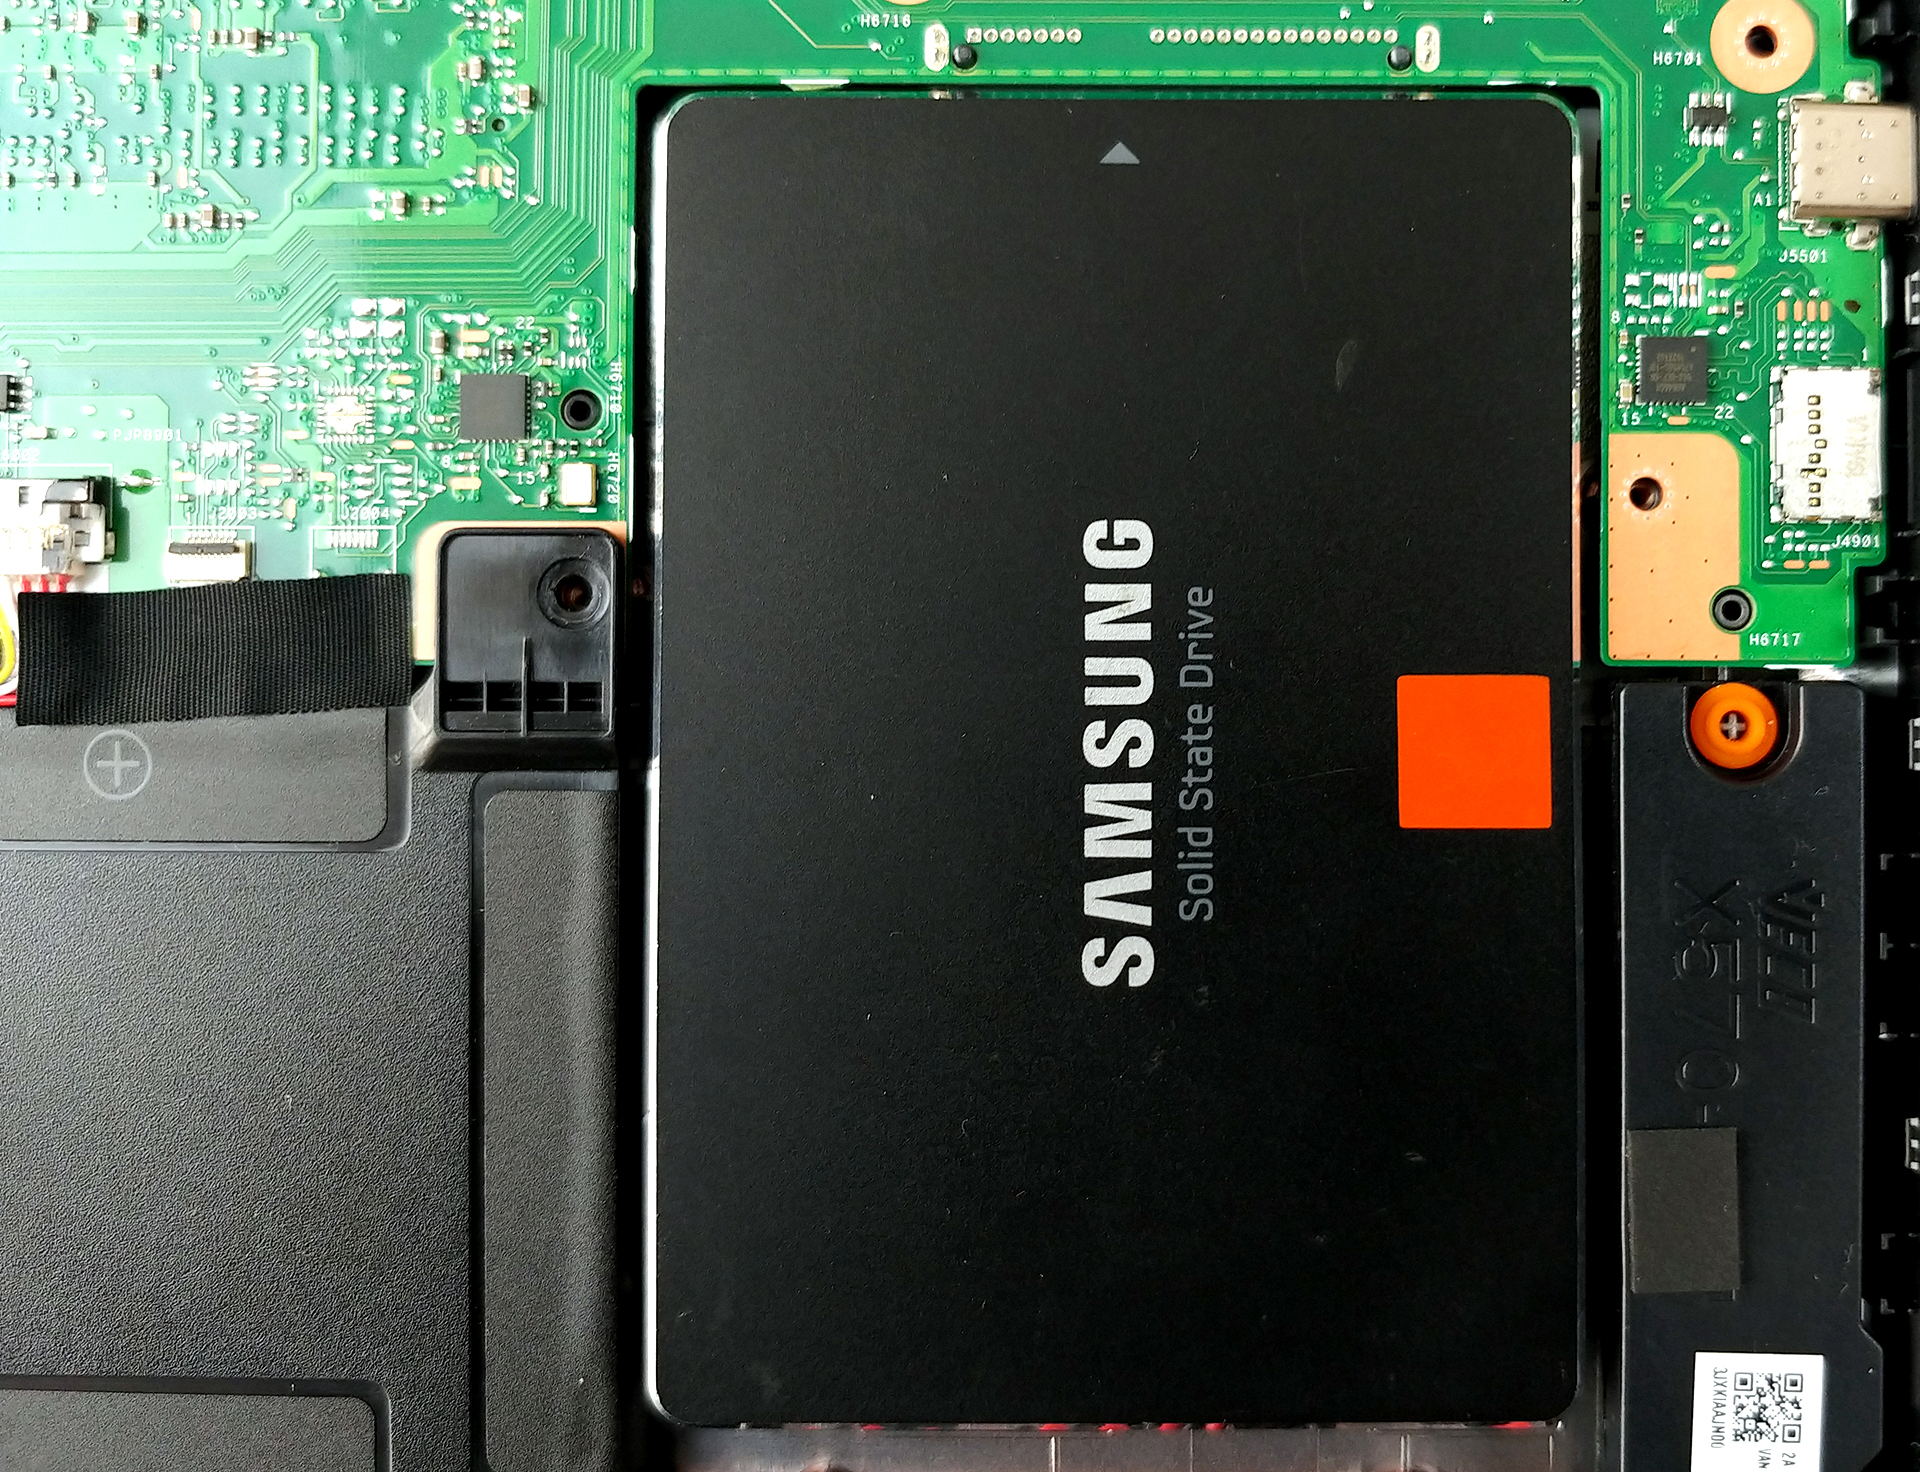
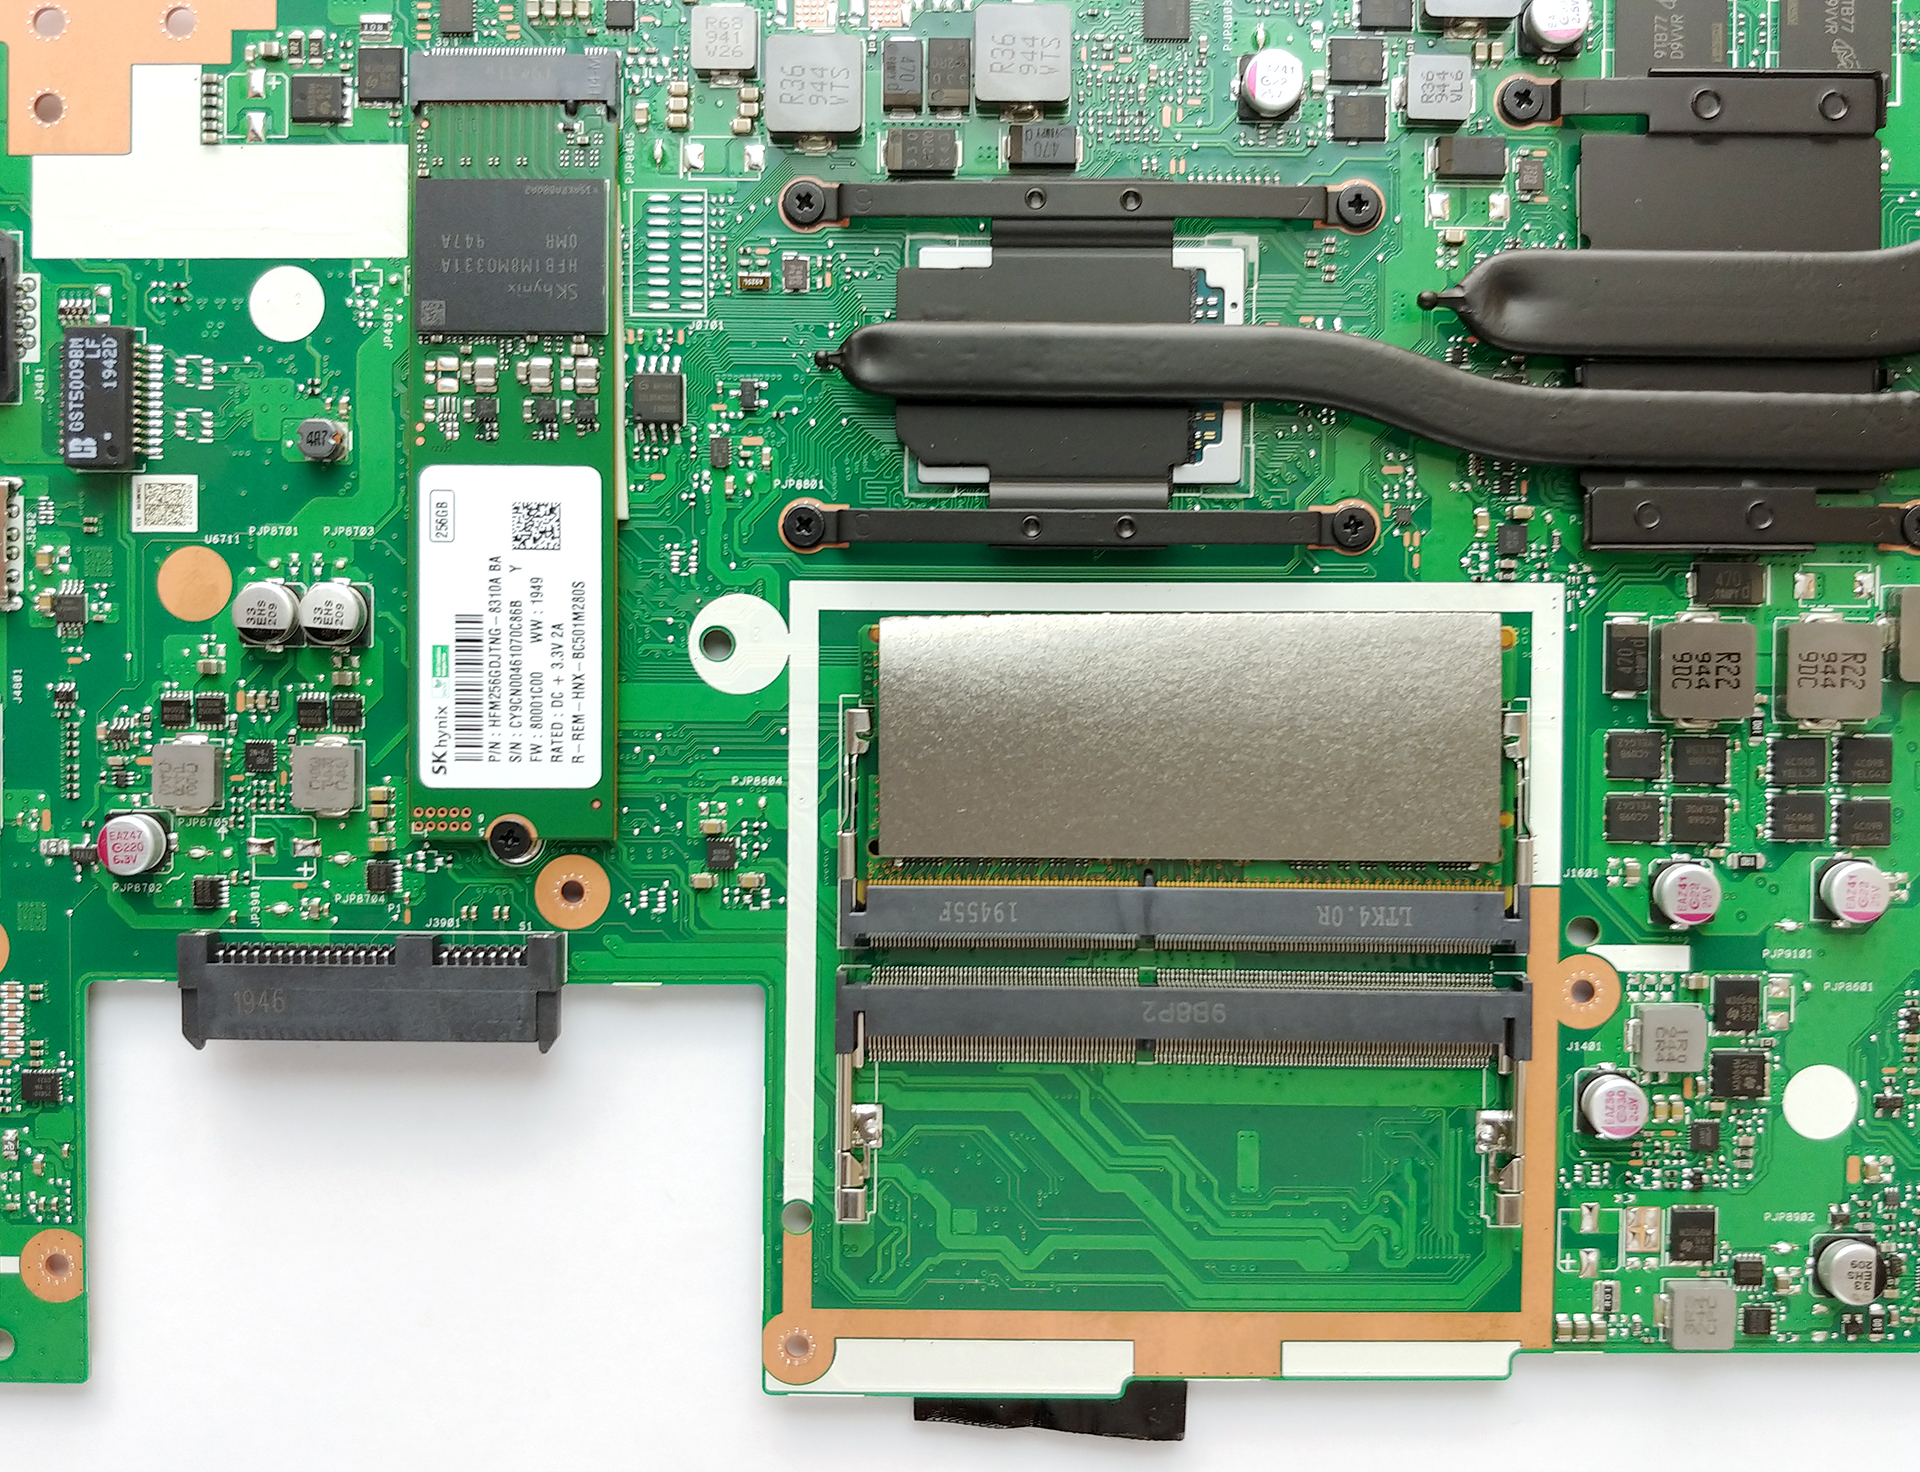
There are two RAM SODIMM slots, supporting up to 32GB of DDR4 memory in total. As of the storage, there is a 2.5″ SATA drive slot, which is accessible without fully disassembling the machine, and one M.2 NVMe PCIe x2 slot that requires a full teardown.
4. Cooling system
As far as the cooling goes, the single fan we removed earlier, cools down two heat pipes – one relatively thin, and one pretty thick. The thin one, cools mainly the CPU, although it goes on top of the GPU as well. Simultaneously, the thick heat pipe is meant for the dedicated graphics card.

Check out all ASUS VivoBook K570 prices and configurations in our Specs System or read more in our In-Depth review.